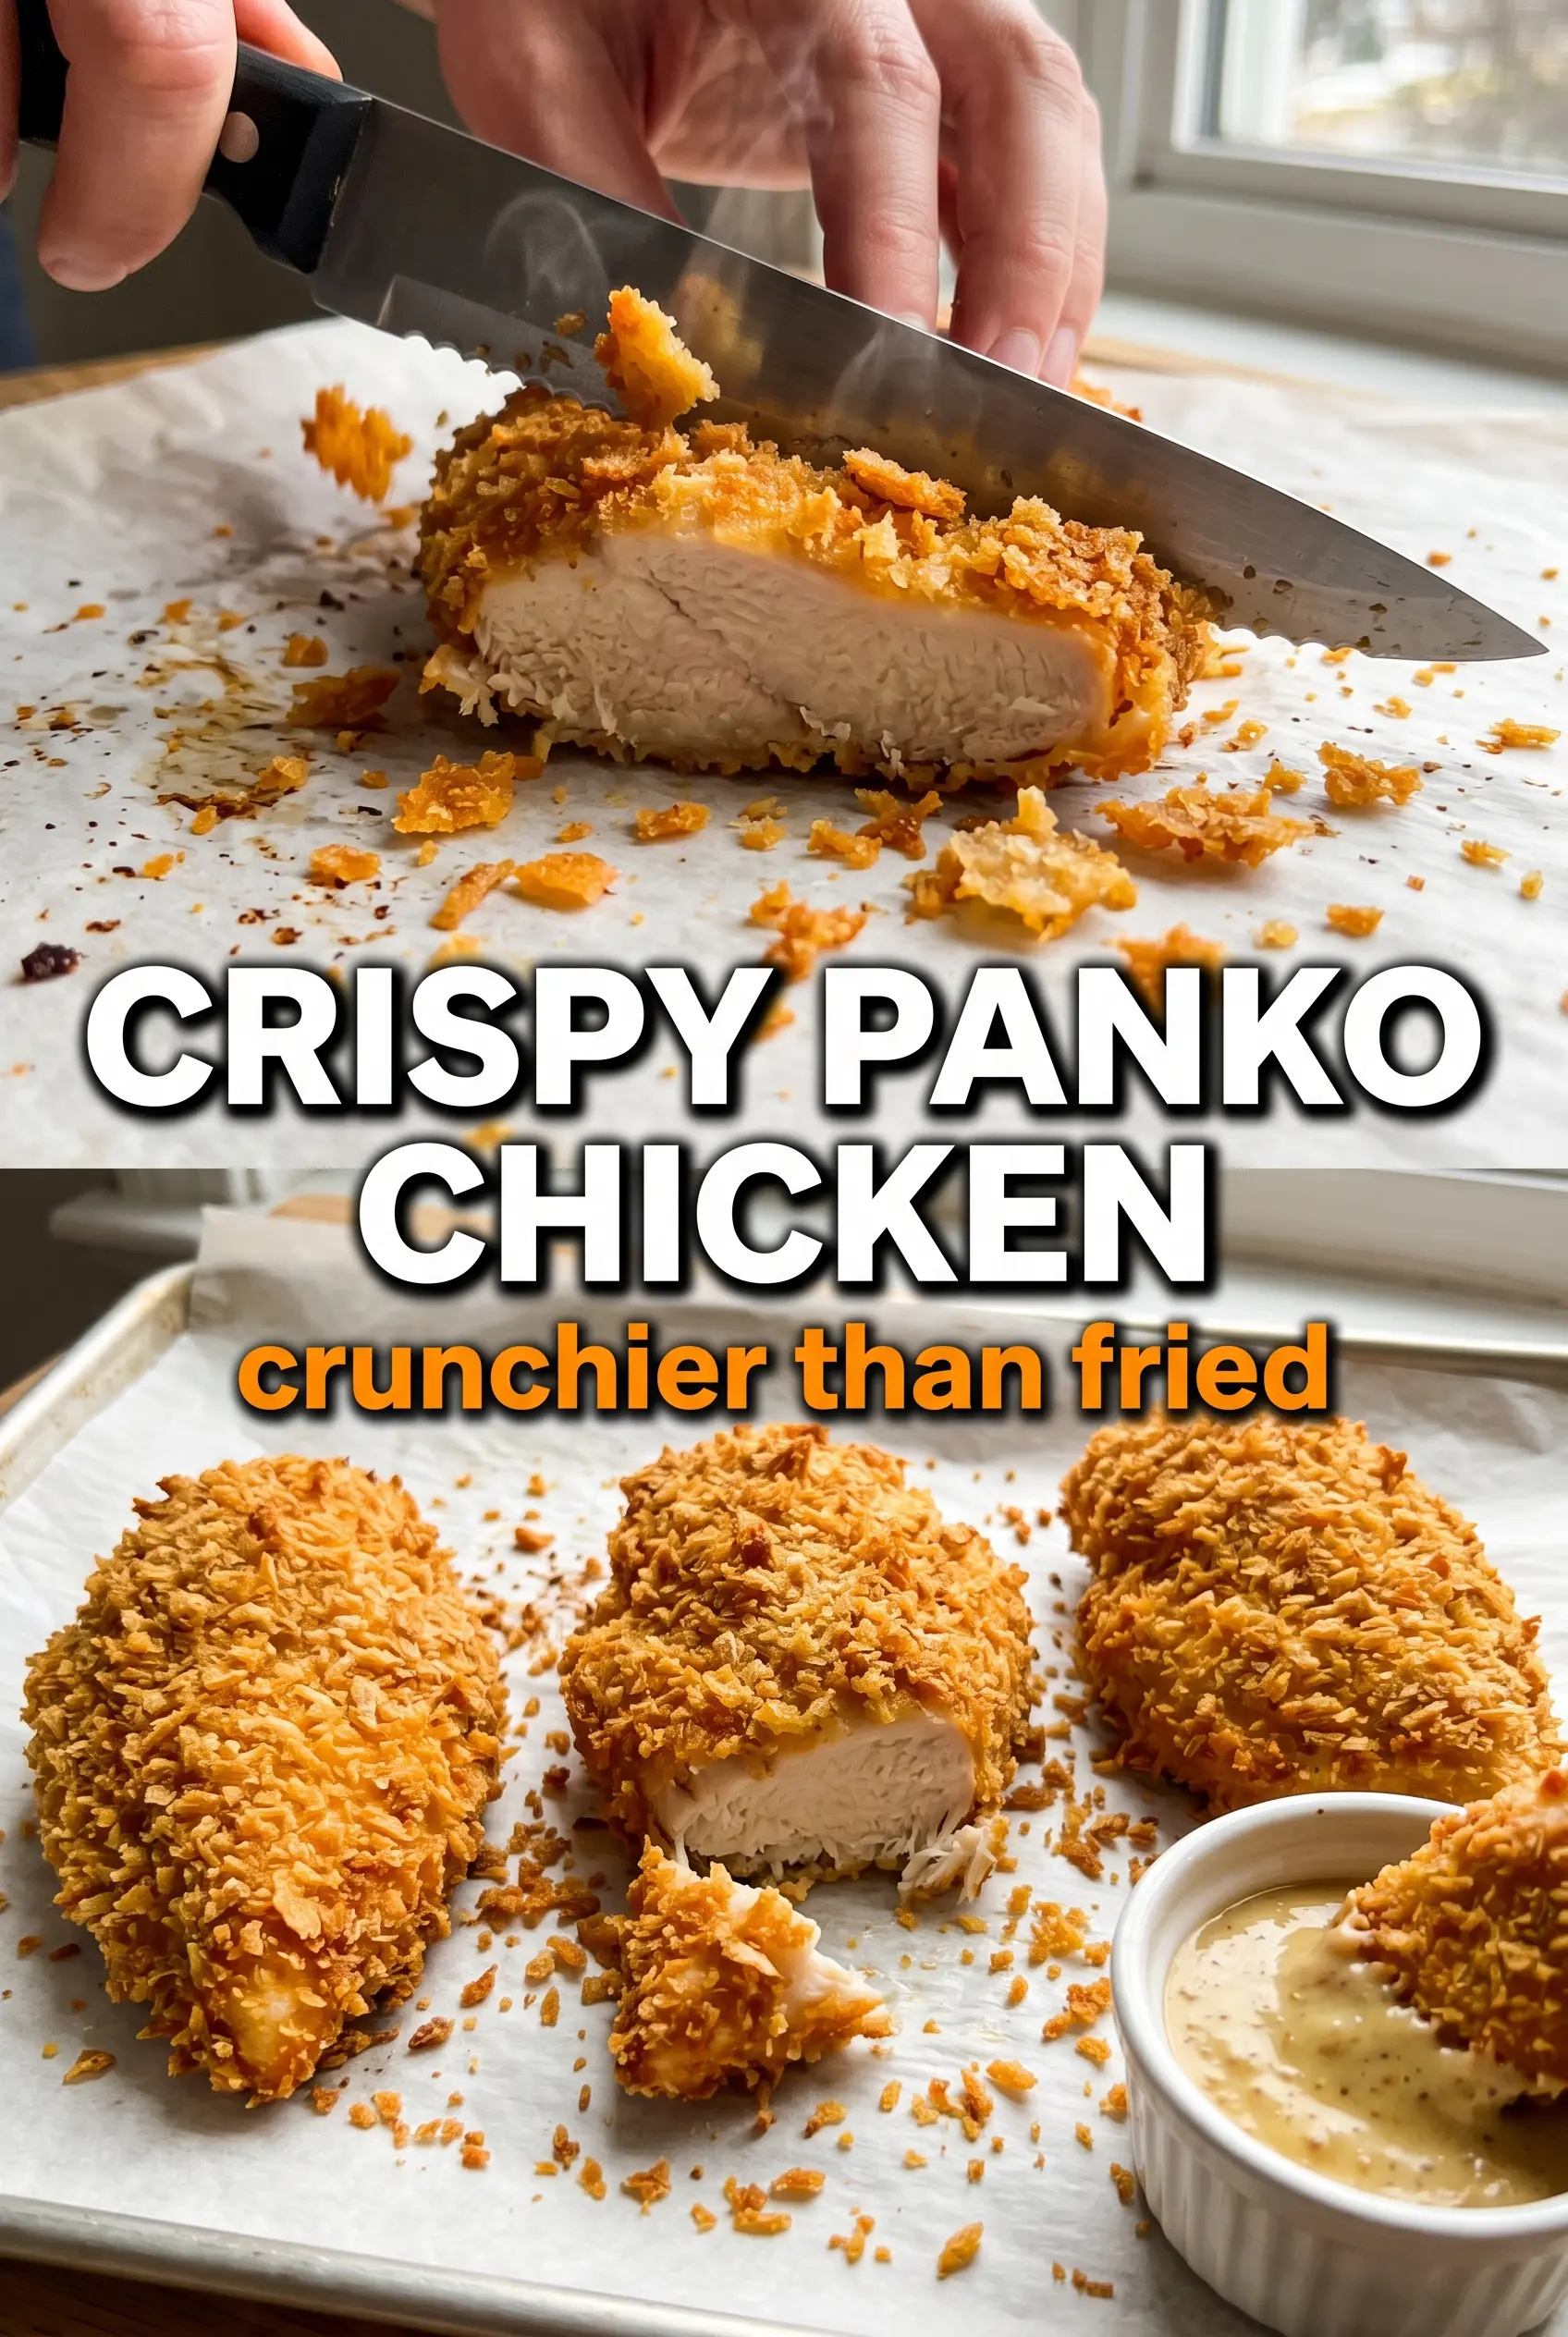
Crispy panko crusted chicken breasts earn their spot in the weeknight rotation because the coating bakes up audibly crunchy while the chicken stays juicy underneath. The crust turns deep golden and bronzed, with the kind of texture that actually crackles when you cut into it instead of going soft the second it leaves the oven.
The trick is in the layering. A light flour coat gives the egg something to cling to, the egg gives the panko a tacky surface, and the panko itself stays airy enough to bake into a shatteringly crisp shell. Parmesan adds a little salt and a deeper browned edge, while a quick misting of oil is what keeps the crumb from looking pale or dry.
Below, I’ll walk through the part that matters most: how to press the coating on so it stays put, how to keep the breading from falling off, and the few small details that make the difference between crisp and soggy.
The crust stayed crunchy all the way through dinner, even after I squeezed lemon over it, and the chicken was still juicy in the middle. I’ll be using this method for baked chicken from now on.
Love that shatteringly crisp panko crust? Save these crispy panko crusted chicken breasts for the nights when you want baked chicken that eats like fried.
The Mistake That Makes Panko Chicken Go Soft in the Oven
Panko chicken loses its crunch when the coating gets wet before it sets. That usually happens because the chicken sits on a flat pan and steams underneath, or because the oil is skipped and the crumbs dry out instead of toasting. A wire rack fixes the first problem by letting hot air move around the chicken, and a light coating of oil or cooking spray fixes the second by helping the crumbs turn crisp instead of dusty.
Even thickness matters here more than people think. A breast that’s thick on one end and thin on the other cooks unevenly, which means the crust at the edges overbrowns before the center reaches temperature. Pounding the chicken to an even thickness gives you a better crust and a juicier result because the meat finishes at the same time.
What the Parmesan, Panko, and Oil Each Do Here
- Panko breadcrumbs — These are the backbone of the crust. Standard breadcrumbs pack down too tightly and bake up denser; panko stays lighter and gives you that jagged, crisp texture that breaks with a little crunch.
- Parmesan cheese — This adds salt, savoriness, and helps the coating brown faster. Freshly grated Parmesan melts and browns better than the shelf-stable grated kind, though either will work in a pinch.
- Olive oil or cooking spray — The coating needs a little fat on the outside or it can look dry and dusty after baking. Spray is fine for convenience, but olive oil gives a slightly richer, more even bronze finish.
- Chicken breasts pounded even — This isn’t just for looks. Even thickness keeps the chicken juicy and prevents the panko from burning before the center reaches 165°F.
Pressing the Coating On So It Stays Put
Set Up the Breading Line in the Right Order
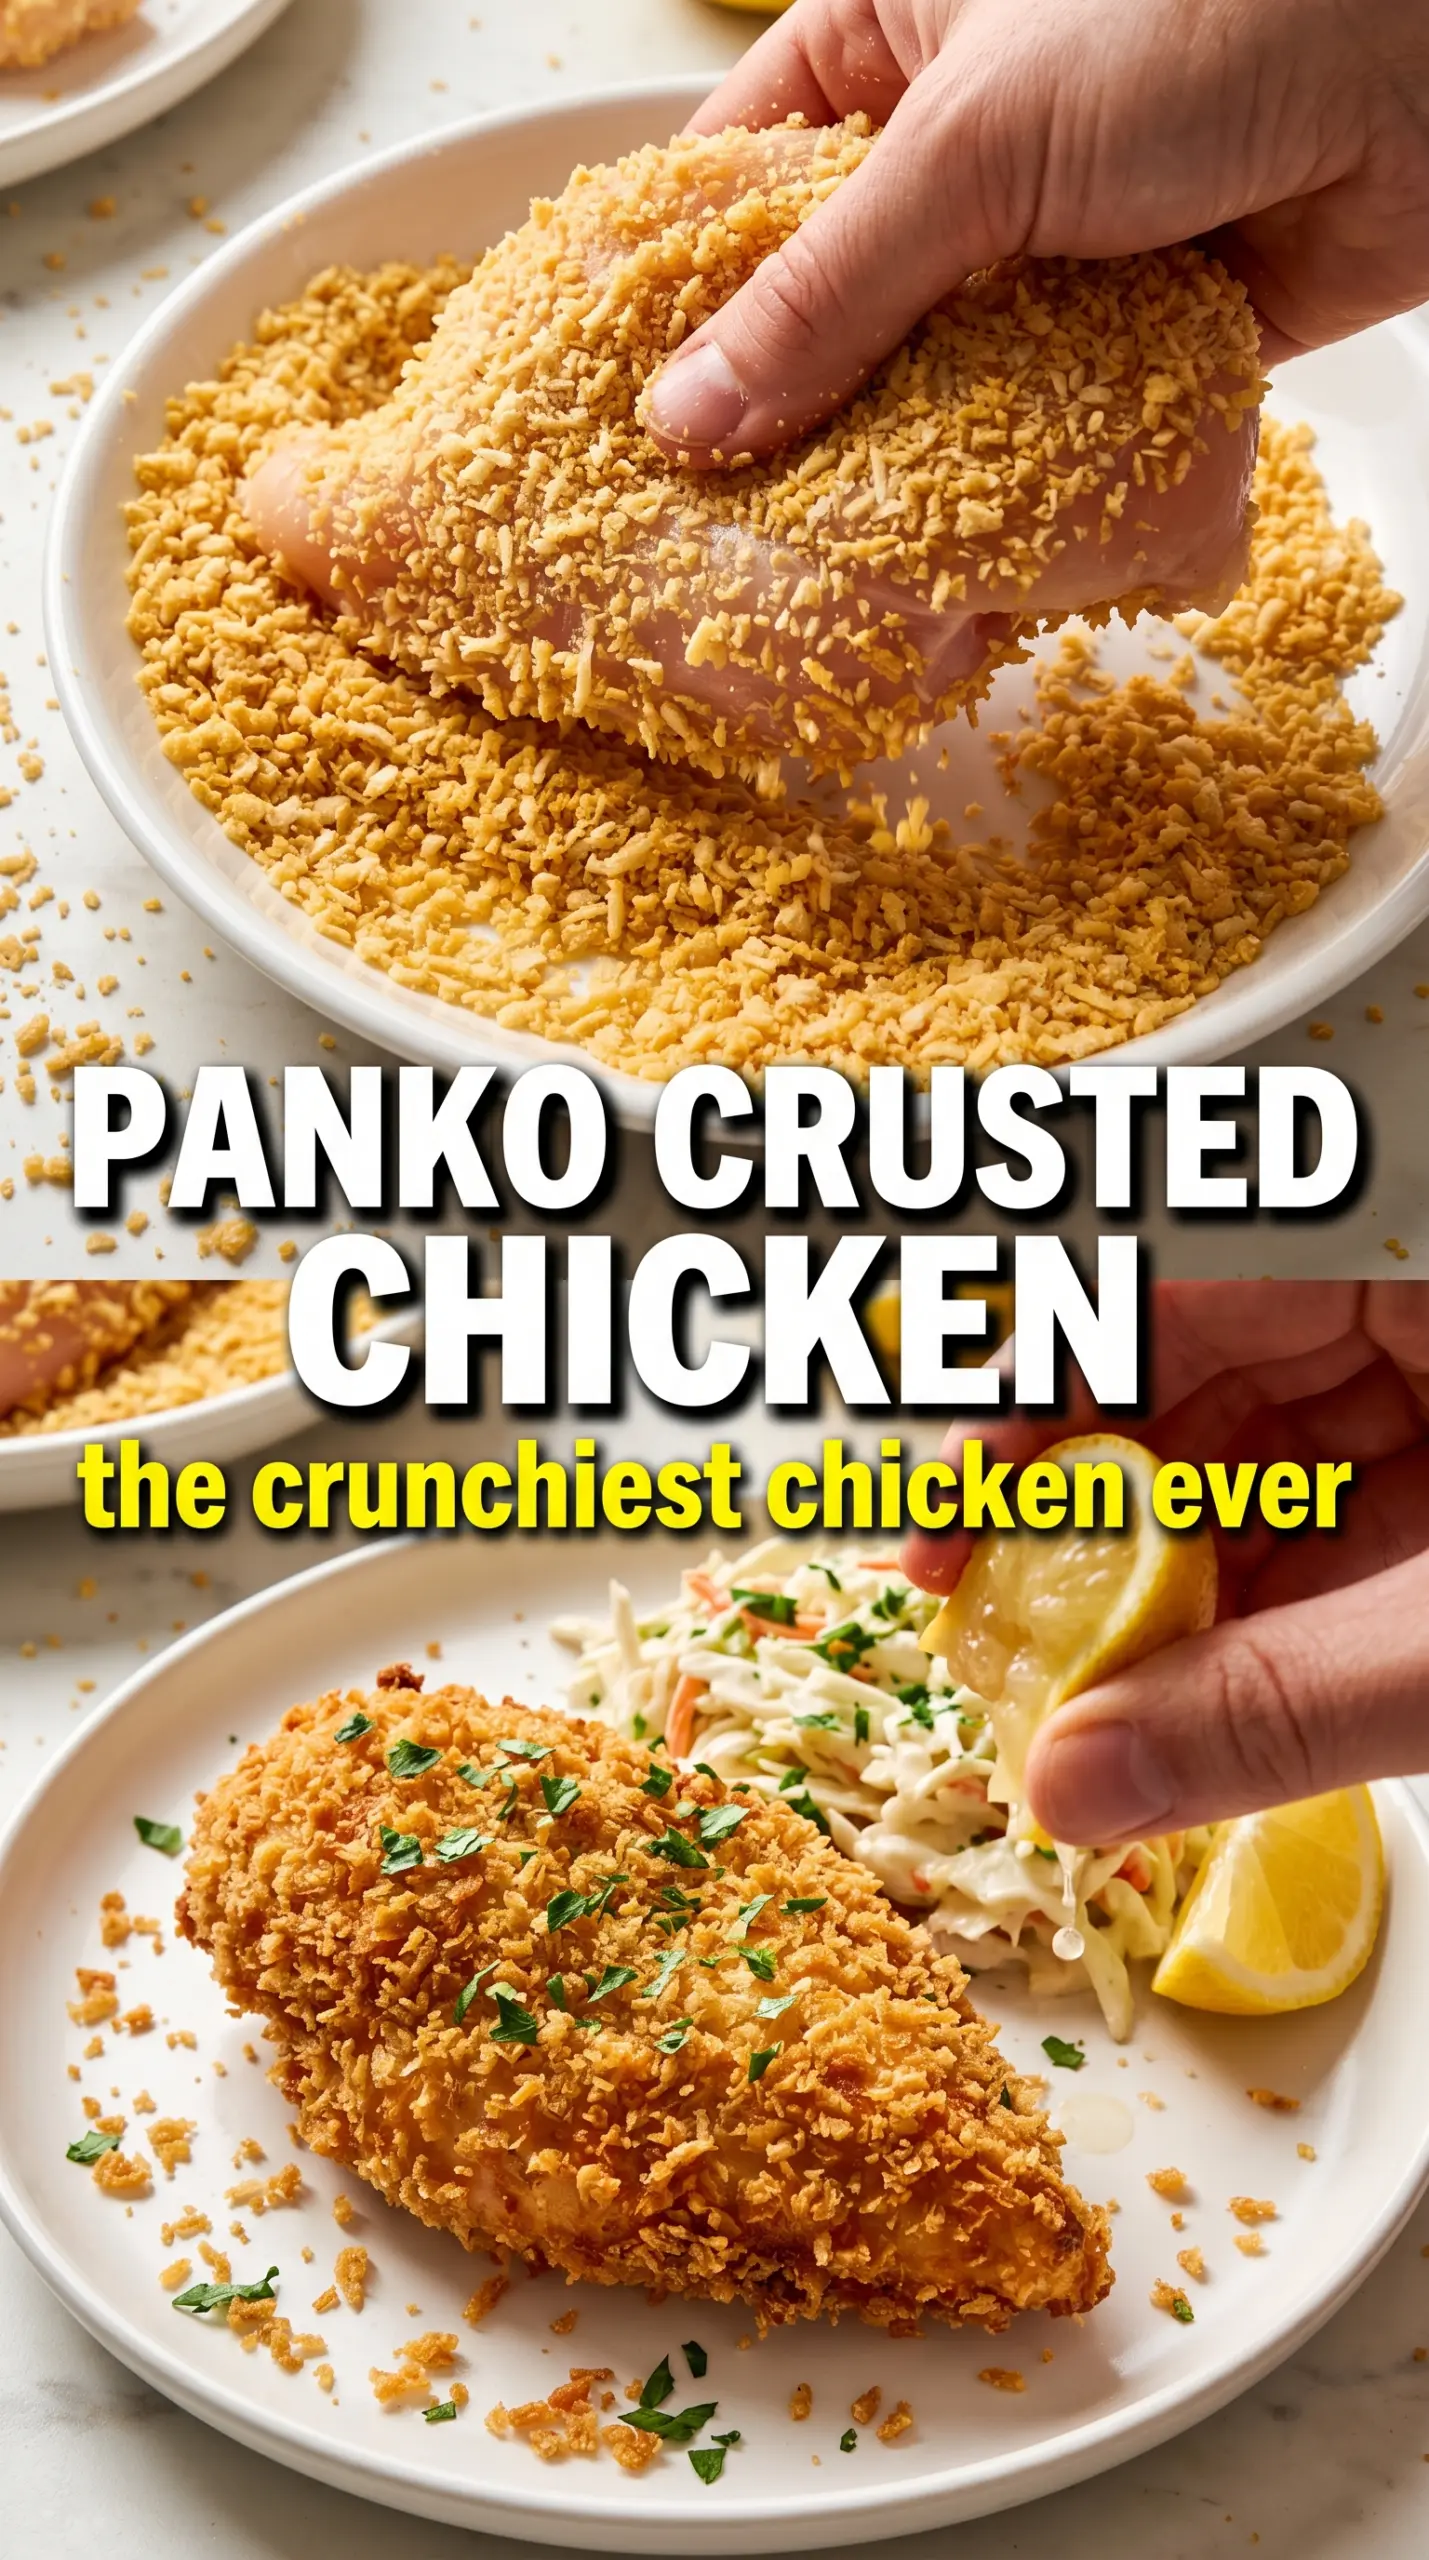
Use one shallow dish for flour, one for egg, and one for the panko-Parmesan mixture. The order matters because the flour dries the surface just enough for the egg to cling, and the egg acts like glue for the crumbs. If you skip the flour or rush the dip, the coating slides off in patches after baking.
Pack the Panko On Firmly
Lay the chicken in the breadcrumb mixture and press hard with your fingertips so the crumbs stick in an even layer. Don’t just dunk and lift; that gives you bald spots and weak edges. The goal is a thick, even coating that looks a little shaggy before it goes into the oven.
Bake Until the Crust Looks Dry and Deeply Colored
At 425°F, the coating should turn a deep golden bronze in 20 to 22 minutes. If it’s still pale, it needs more time; pale panko usually means it was under-oiled or the oven wasn’t fully hot. Pull the chicken when the thickest part hits 165°F, then let it rest for 3 minutes so the juices settle back into the meat instead of running out when you cut it.
Three Ways to Adapt Crispy Panko Crusted Chicken Breasts
Gluten-Free Panko Chicken
Use gluten-free panko and a gluten-free all-purpose flour blend in place of the regular flour. The texture stays crisp, though the crumbs can brown a little faster, so watch the last few minutes closely.
Dairy-Free Version
Skip the Parmesan and add an extra 2 to 3 tablespoons of panko plus a pinch more salt and garlic powder. You’ll lose a little of the nutty, savory depth, but the crust will still bake up crunchy and sturdy.
Lemon-Herb Finish
Add lemon zest to the breadcrumb mixture and serve with extra lemon wedges. The zest gives the crust a brighter top note without changing the texture, which is a nice way to make the chicken taste a little fresher and sharper.
Storage and Reheating
- Refrigerator: Store leftovers in an airtight container for up to 3 days. The crust will soften a bit in the fridge, but it still holds up well.
- Freezer: Freeze after baking and cooling completely. Wrap each piece tightly, then reheat from frozen for the best texture; thawing first can make the coating soggy.
- Reheating: Warm on a rack in a 375°F oven or air fryer until hot and re-crisped. The mistake that ruins leftover panko chicken is microwaving it, which steams the coating and turns it limp.
Questions I Get Asked About This Recipe
Crispy Panko Crusted Chicken Breasts
Ingredients
Equipment
Method
- Preheat oven to 425°F. Line a baking sheet with a wire rack and spray with cooking spray.
- Season chicken breasts with salt, pepper, and garlic powder to taste. Set up breading stations with flour, beaten eggs, and panko mixed with Parmesan, Italian seasoning, garlic powder, and smoked paprika.
- Dredge each chicken breast in flour, then dip in egg. Press firmly into the panko coating on all sides so the crust clings.
- Drizzle or spray the breaded chicken with olive oil. Place on the prepared rack and bake for 20-22 minutes until the crust is deep golden brown and internal temperature reaches 165°F.
- Rest the chicken for 3 minutes. Garnish with fresh parsley and serve with lemon wedges.