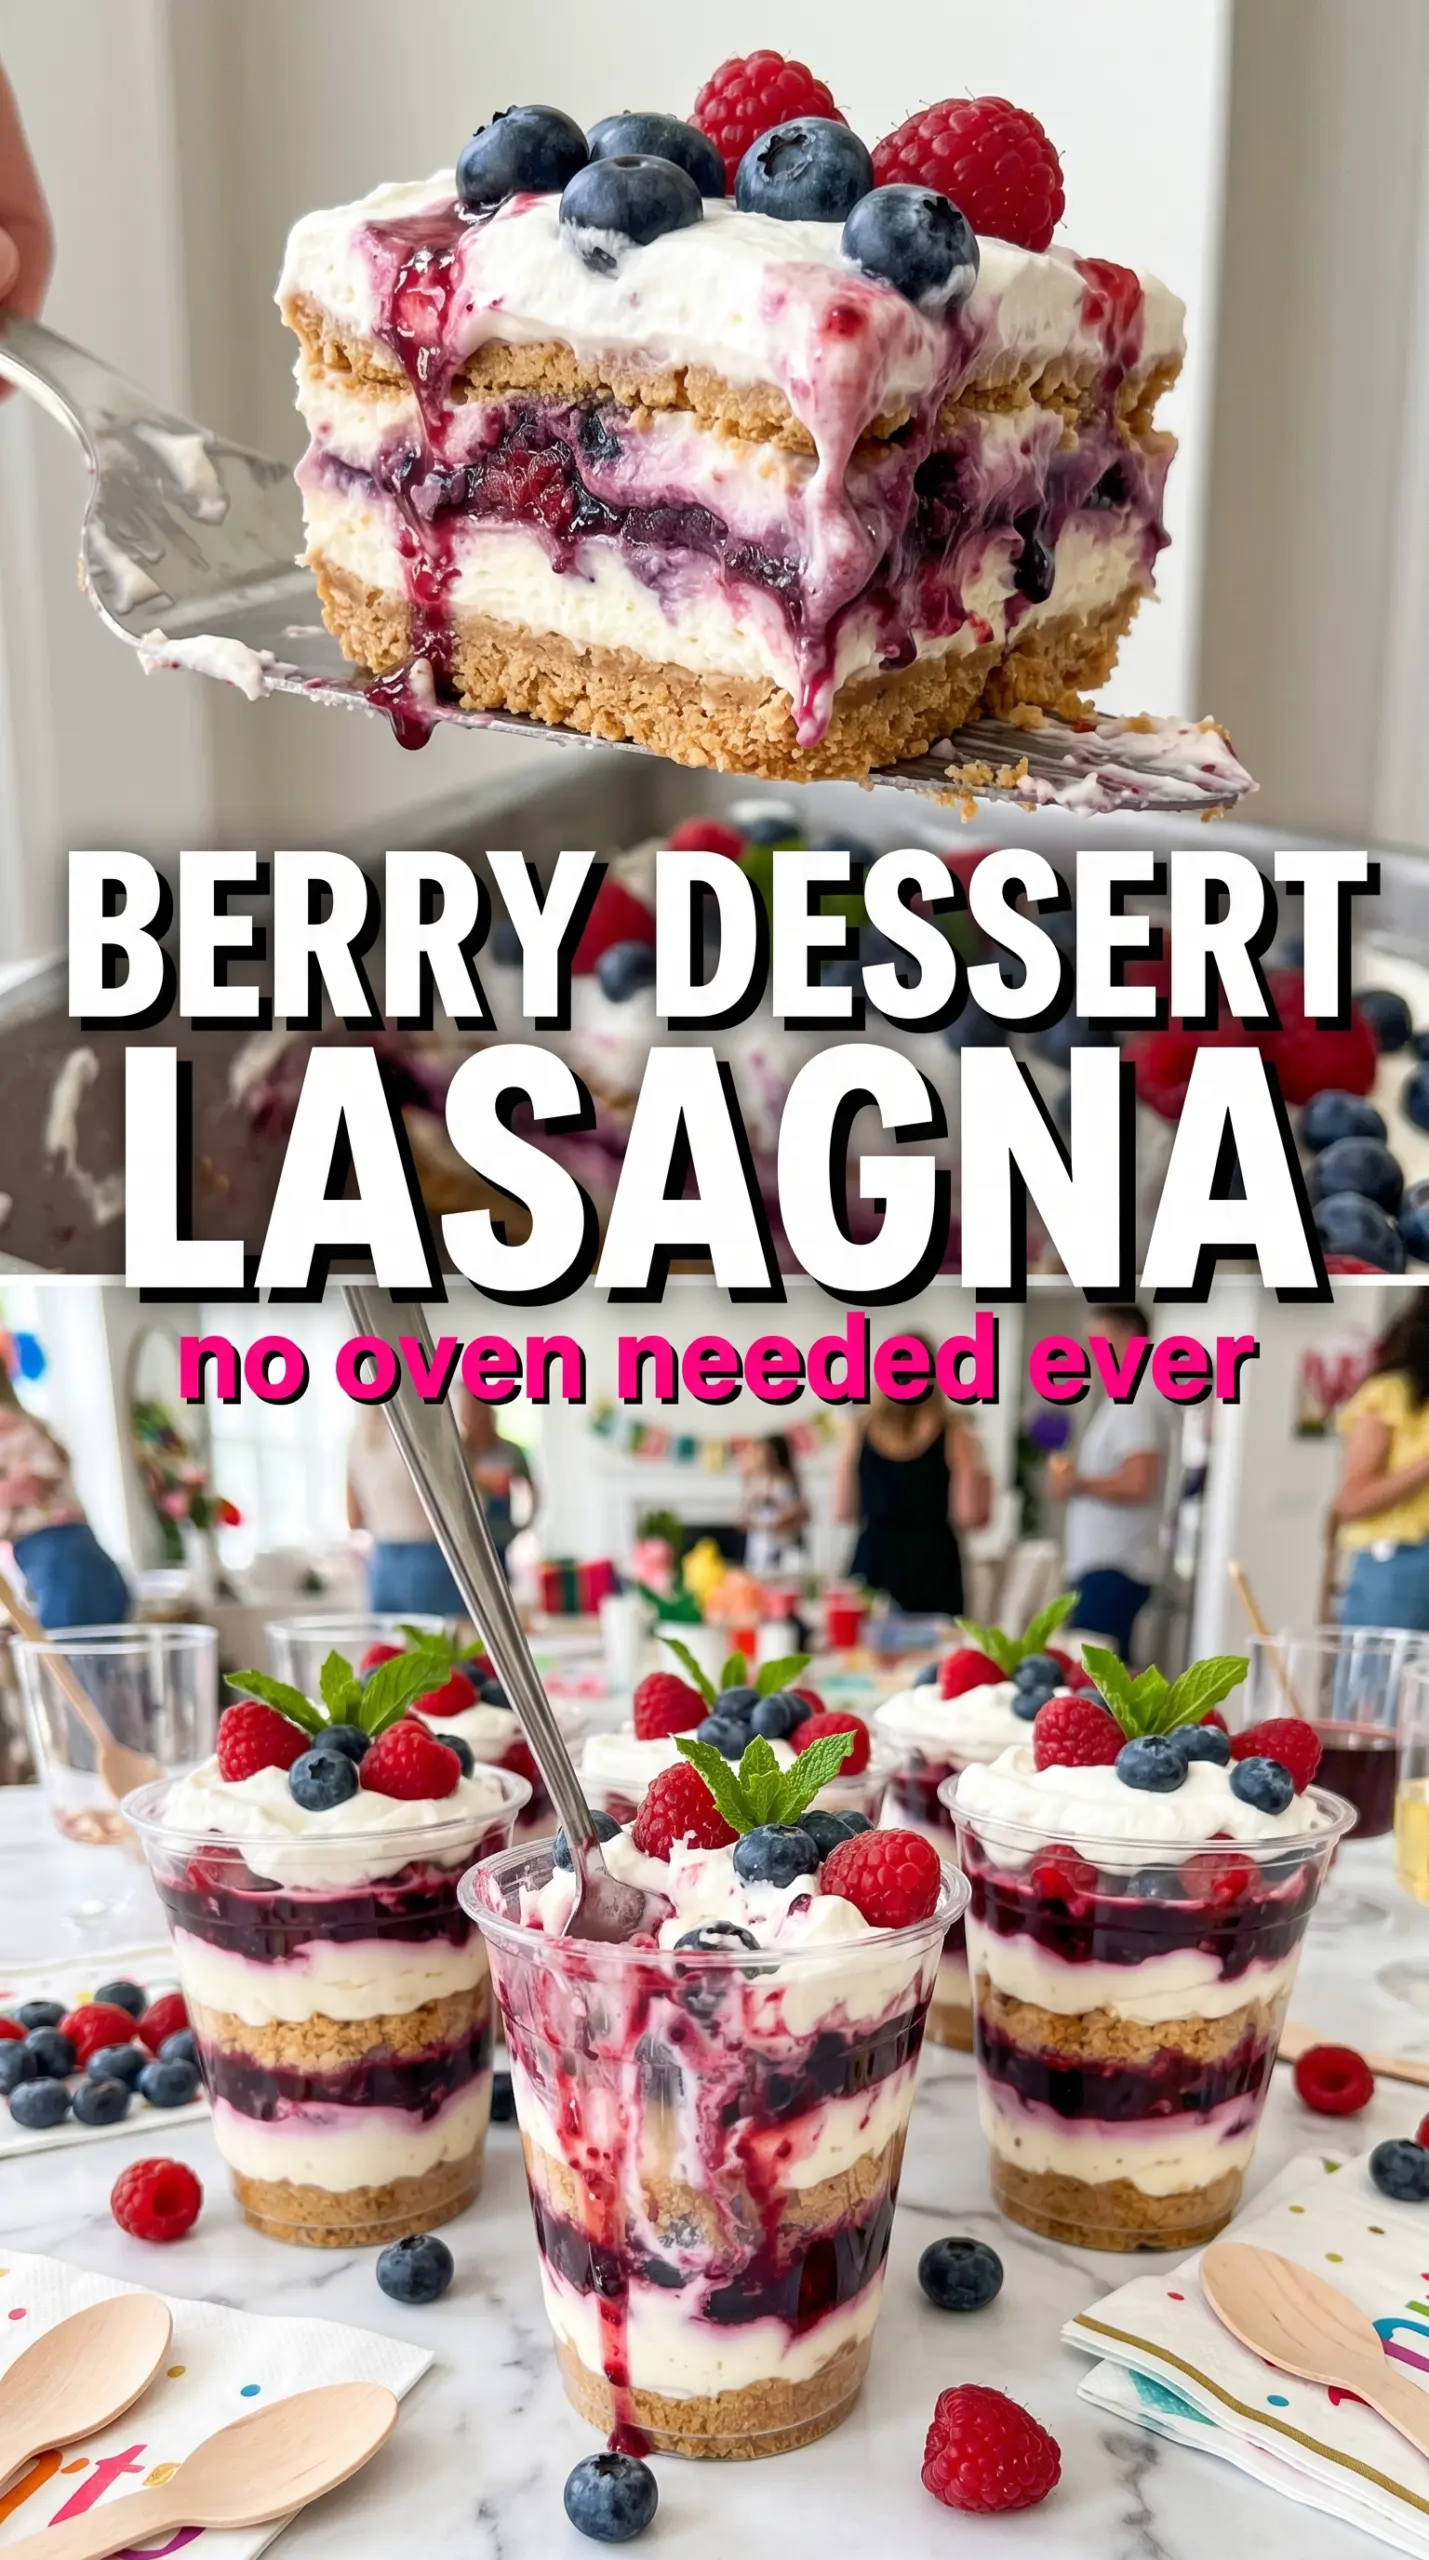
Very Berry Dessert Lasagna lands somewhere between icebox cake and cheesecake, with the kind of clean, layered slice that makes people pause before the first bite. The Golden Oreo crust stays buttery and crisp enough to give contrast, the cream cheese layer sets up plush and tangy, and the lemon pudding keeps the whole dessert from tasting heavy. Then the berries on top cut through every creamy layer with bright, fresh flavor.
What makes this version work is balance. The crust uses Golden Oreos instead of a traditional graham base, which gives you a softer vanilla-cookie flavor that fits the berries better. The pudding layer needs cold milk and a full two-minute whisk so it thickens enough to hold its shape later. And the dessert has to chill long enough for the layers to settle, or the slices will slump instead of standing tall.
Below, you’ll find the little details that keep each layer distinct, plus a few smart swaps for different berries, different pudding flavors, and making it ahead for a party.
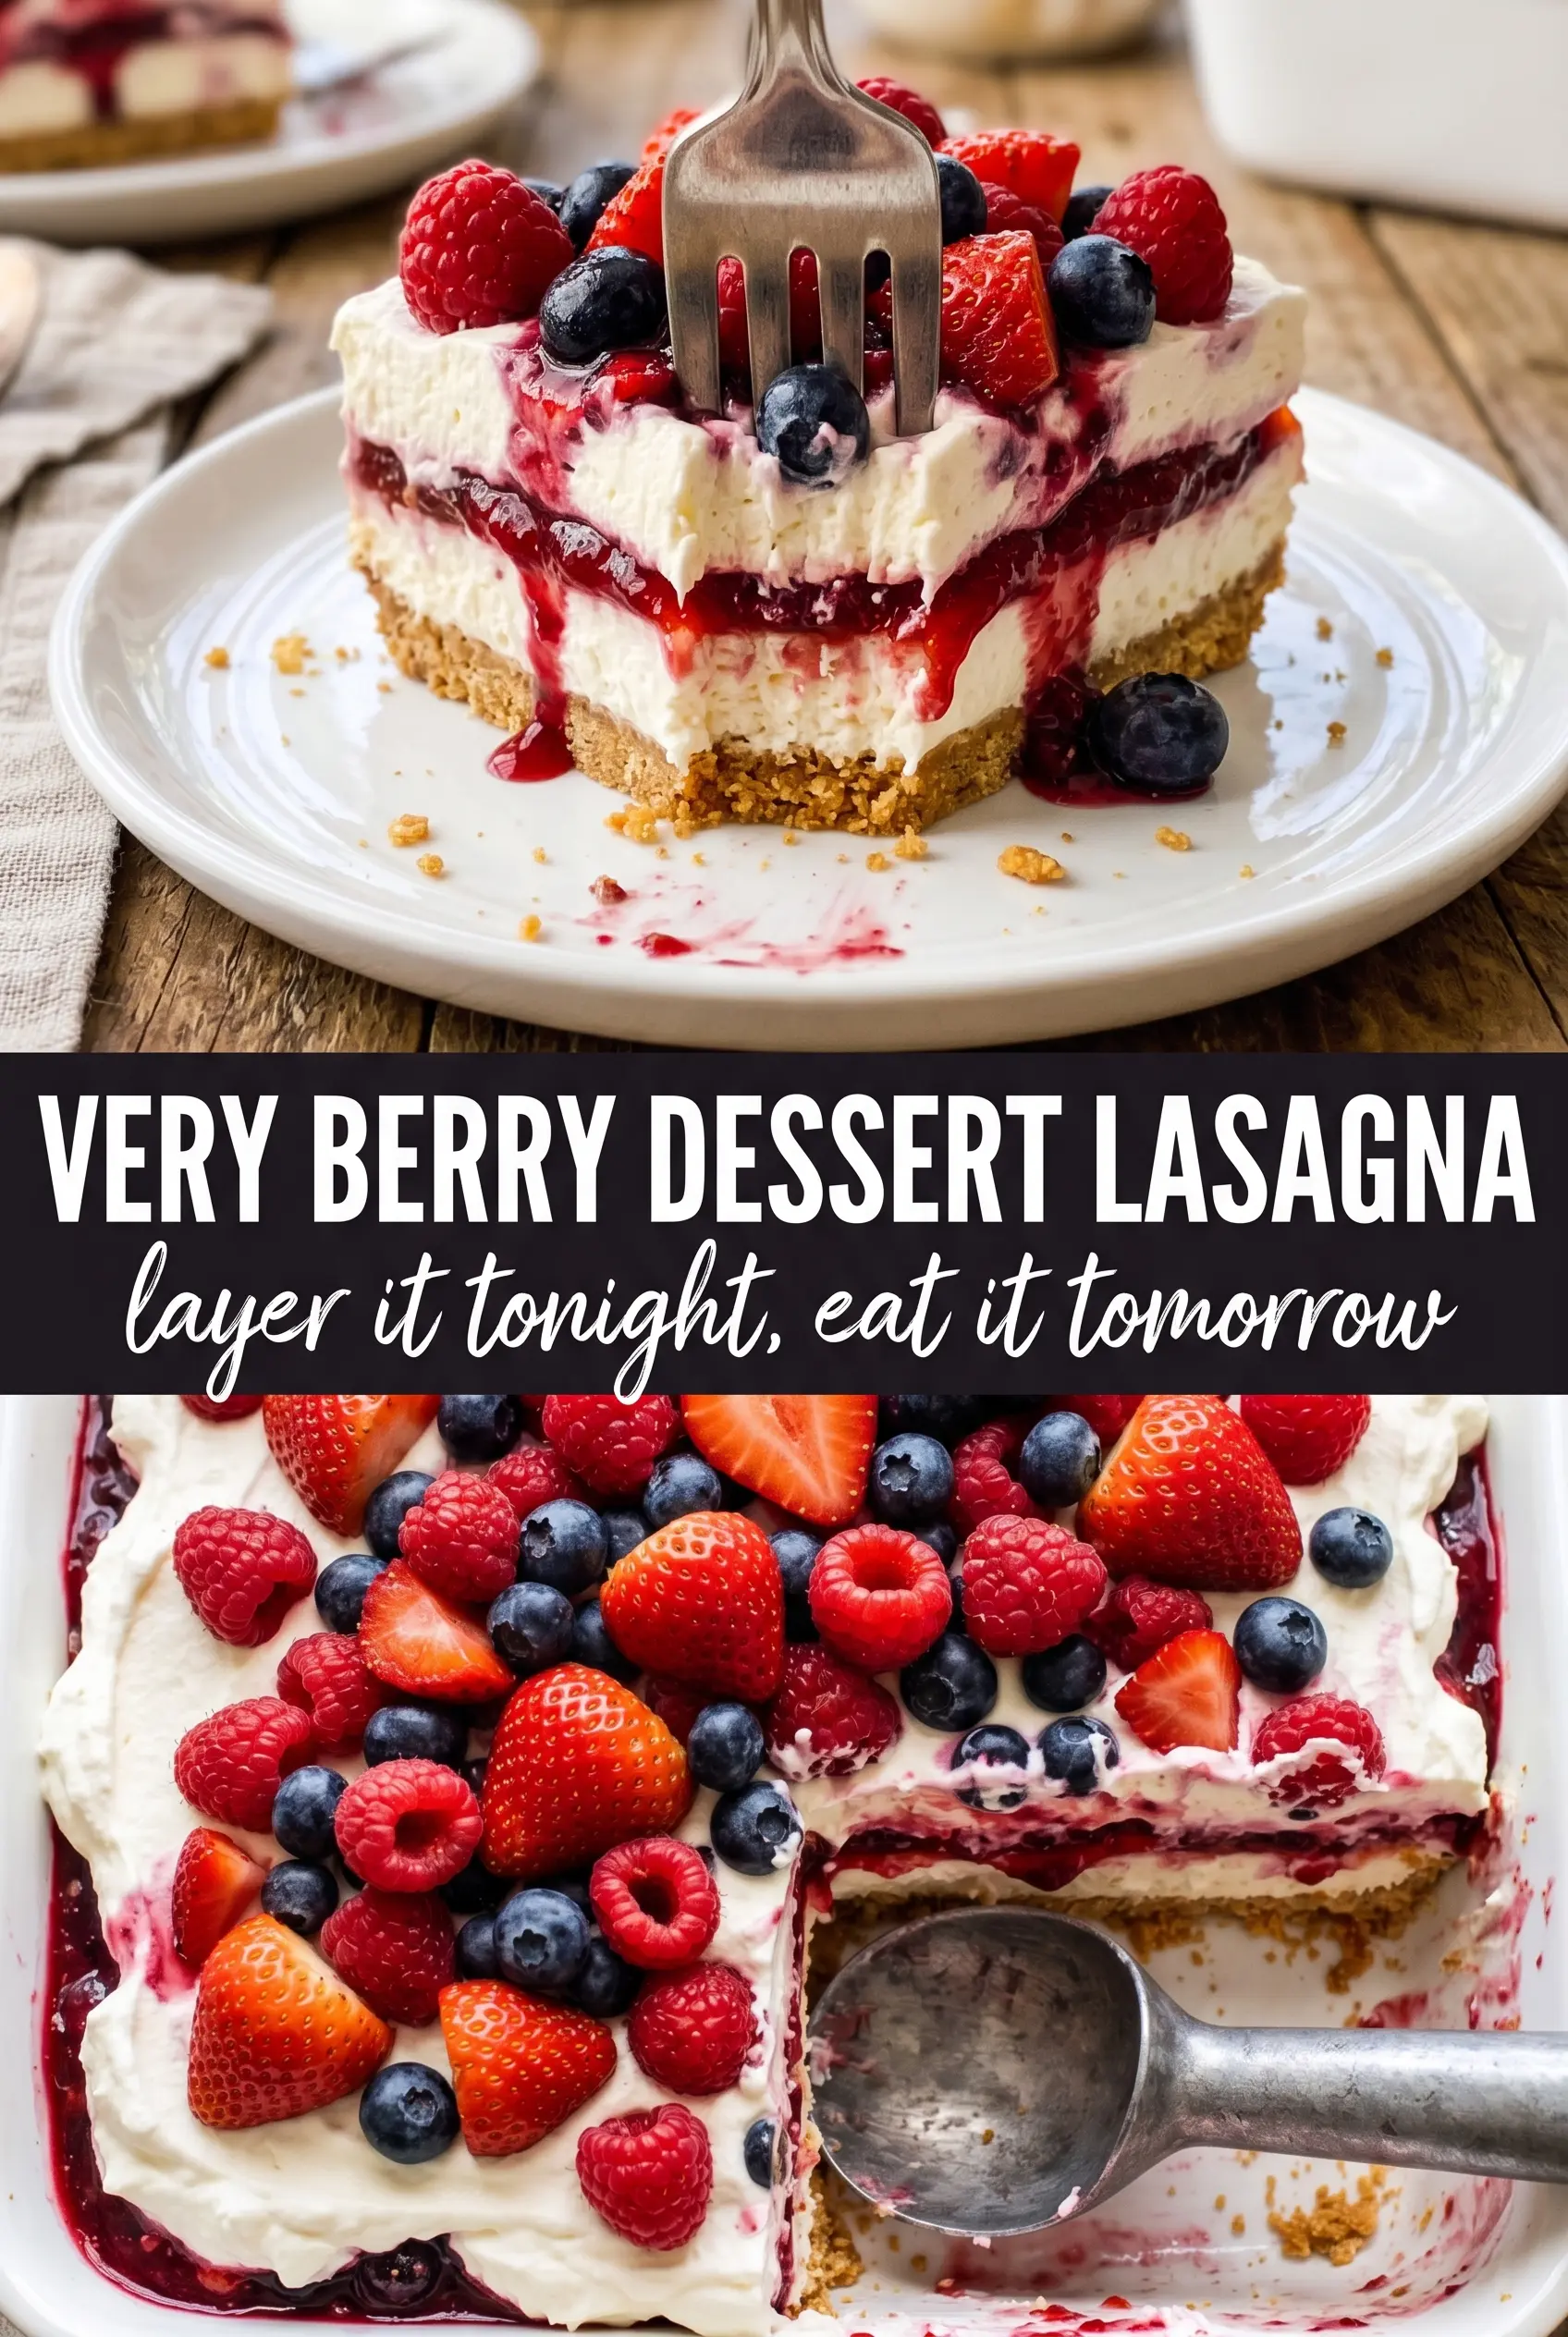
The layers held their shape beautifully after chilling, and the lemon pudding gave it a fresh finish that kept it from tasting too sweet. I got clean slices and everyone went back for seconds.
Love the clean layers and berry-topped finish on this no-bake dessert lasagna? Save it to Pinterest for the next time you need a chilled make-ahead dessert that slices like a dream.
The Chilling Time Is What Gives You Those Clean Layers
The biggest mistake with layered dessert lasagna is rushing the chill. If you cut it too soon, the pudding is still loose, the cream layer smears, and the crust can’t hold the weight above it. Four hours is the minimum here, and overnight is even better if you want those neat, bakery-style slices.
The other thing that matters is how evenly each layer gets spread. Keep the crust packed flat and firm, then spread each filling all the way to the edges so the layers set together instead of pulling apart at the sides. That attention to even thickness is what gives you the tall, tidy cross-section people love about this dessert.
- Golden Oreos — These give the crust a vanilla-cookie flavor that plays nicely with berries. Graham crackers work in a pinch, but the dessert loses some of that buttery, cookie-shop taste.
- Cream cheese — Softened cream cheese is nonnegotiable if you want a smooth layer. Cold cream cheese leaves little lumps that don’t disappear once the whipped topping goes in.
- Instant pudding — Use instant, not cook-and-serve. Cook-and-serve pudding won’t set the same way in a layered dessert and tends to stay too soft.
- Whipped topping — It keeps the filling light and stable. Fresh whipped cream can work, but it softens faster, so the dessert won’t hold as long in the fridge.
- Fresh berries — Dry the berries well after washing. Extra moisture on the top layer can make the whipped topping slide and bleed color.
What Each Ingredient Is Actually Doing in This Recipe
- Primary ingredient (the star) — Quality matters most. Choose the best you can find.
- Cooking medium (oil, butter, or broth) — This carries flavors and prevents dryness.
- Seasonings (salt, pepper, spices, herbs) — Layer flavors so nothing overpowers. Build depth gradually.
- Aromatics (garlic, onion, herbs) — Cook with fat to bloom flavors. Become the foundation.
- Supporting ingredients — Complement the main ingredient without overpowering it.
- Sauce or liquid (if applicable) — Brings flavors together. Balance richness with acid.
- Acid (lemon, vinegar, wine, or other) — Brightens and prevents flat-tasting results.
- Final finish (garnish, glaze, or sauce) — Prevents one-dimensional taste and adds visual appeal.
Building Each Layer So the Dessert Slices Cleanly
Pressing the Crust
Mix the crushed Golden Oreos with melted butter until the crumbs look evenly damp, then press them firmly into the bottom of the dish. A flat-bottomed measuring cup works well here because it compacts the crust without leaving soft spots. If the crust feels sandy or loose, it won’t hold together when you slice into the finished dessert.
Whipping the Cream Cheese Layer Smooth
Beat the cream cheese with powdered sugar and vanilla until it looks glossy and fully smooth before folding in the whipped topping. Lumps at this stage stay lumps, so start with properly softened cream cheese and scrape the bowl once or twice. Spread this layer gently over the chilled crust so you don’t drag crumbs up into it.
Setting the Pudding Layer
Whisk the instant pudding with cold milk for the full two minutes until it thickens noticeably. It should look spoonable, not runny, before it goes onto the cream cheese layer. If you stop too early, it can seep into the layer below and the dessert loses those distinct stripes.
Finishing with the Berries
Spread the final whipped topping layer evenly, then arrange the strawberries, blueberries, and raspberries on top. A dry surface helps the berries stay put, and you can lay them in rows for a cleaner look or scatter them for a looser, more rustic finish. Once the fruit is on, chill the dessert uncovered for a short stretch if needed so the top firms up before you cover it.
Three Ways to Change the Berry Layers Without Losing the Structure
Use all strawberries for a sweeter, softer finish
If raspberries aren’t your thing, replace them with extra strawberries. The flavor turns rounder and sweeter, and the top looks more uniform, but you lose a little of the tart edge that keeps the dessert lively.
Make it gluten-free with a GF vanilla cookie crust
Use gluten-free vanilla sandwich cookies in place of the Golden Oreos and keep the butter the same. The crust still presses and chills well, though some gluten-free cookies crumble a little more, so pack the base firmly before chilling.
Swap in vanilla pudding for a milder flavor
Vanilla instant pudding makes the dessert gentler and a little more kid-friendly. You lose the bright citrus note that lemon pudding brings, so the berries carry more of the flavor, but the texture stays the same.
Storage and Reheating
- Refrigerator: Keep covered and chilled for up to 3 days. The berries stay freshest in the first 24 hours, and the crust softens a little over time.
- Freezer: I don’t recommend freezing this dessert. The pudding and whipped layers can turn icy and separate once thawed, and the berries lose their fresh texture.
- Reheating: No reheating needed. Serve it cold straight from the fridge for the cleanest slices; if it’s too firm, let it sit out for 10 minutes before cutting.
Questions I Get Asked About This Recipe
Very Berry Dessert Lasagna
Ingredients
Equipment
Method
- Mix the finely crushed Golden Oreos with the melted butter until the crumbs look evenly coated, then press firmly into the bottom of a 9x13 dish.
- Refrigerate for 20 minutes until the crust is set to hold clean layers.
- Beat the softened cream cheese with powdered sugar and vanilla extract until smooth, then fold in 1 cup whipped topping.
- Spread the cream cheese mixture over the chilled crust and smooth the surface evenly.
- Whisk the instant pudding with the cold milk for 2 minutes until it thickens to a spreadable consistency.
- Spread the pudding mixture over the cream cheese layer in an even layer.
- Spread 2 cups whipped topping evenly over the pudding layer so it fully covers.
- Arrange the sliced strawberries, blueberries, and raspberries in rows or a scattered pattern across the top.
- Cover and refrigerate for at least 4 hours (or until all layers are set), then slice into rectangles and serve cold.