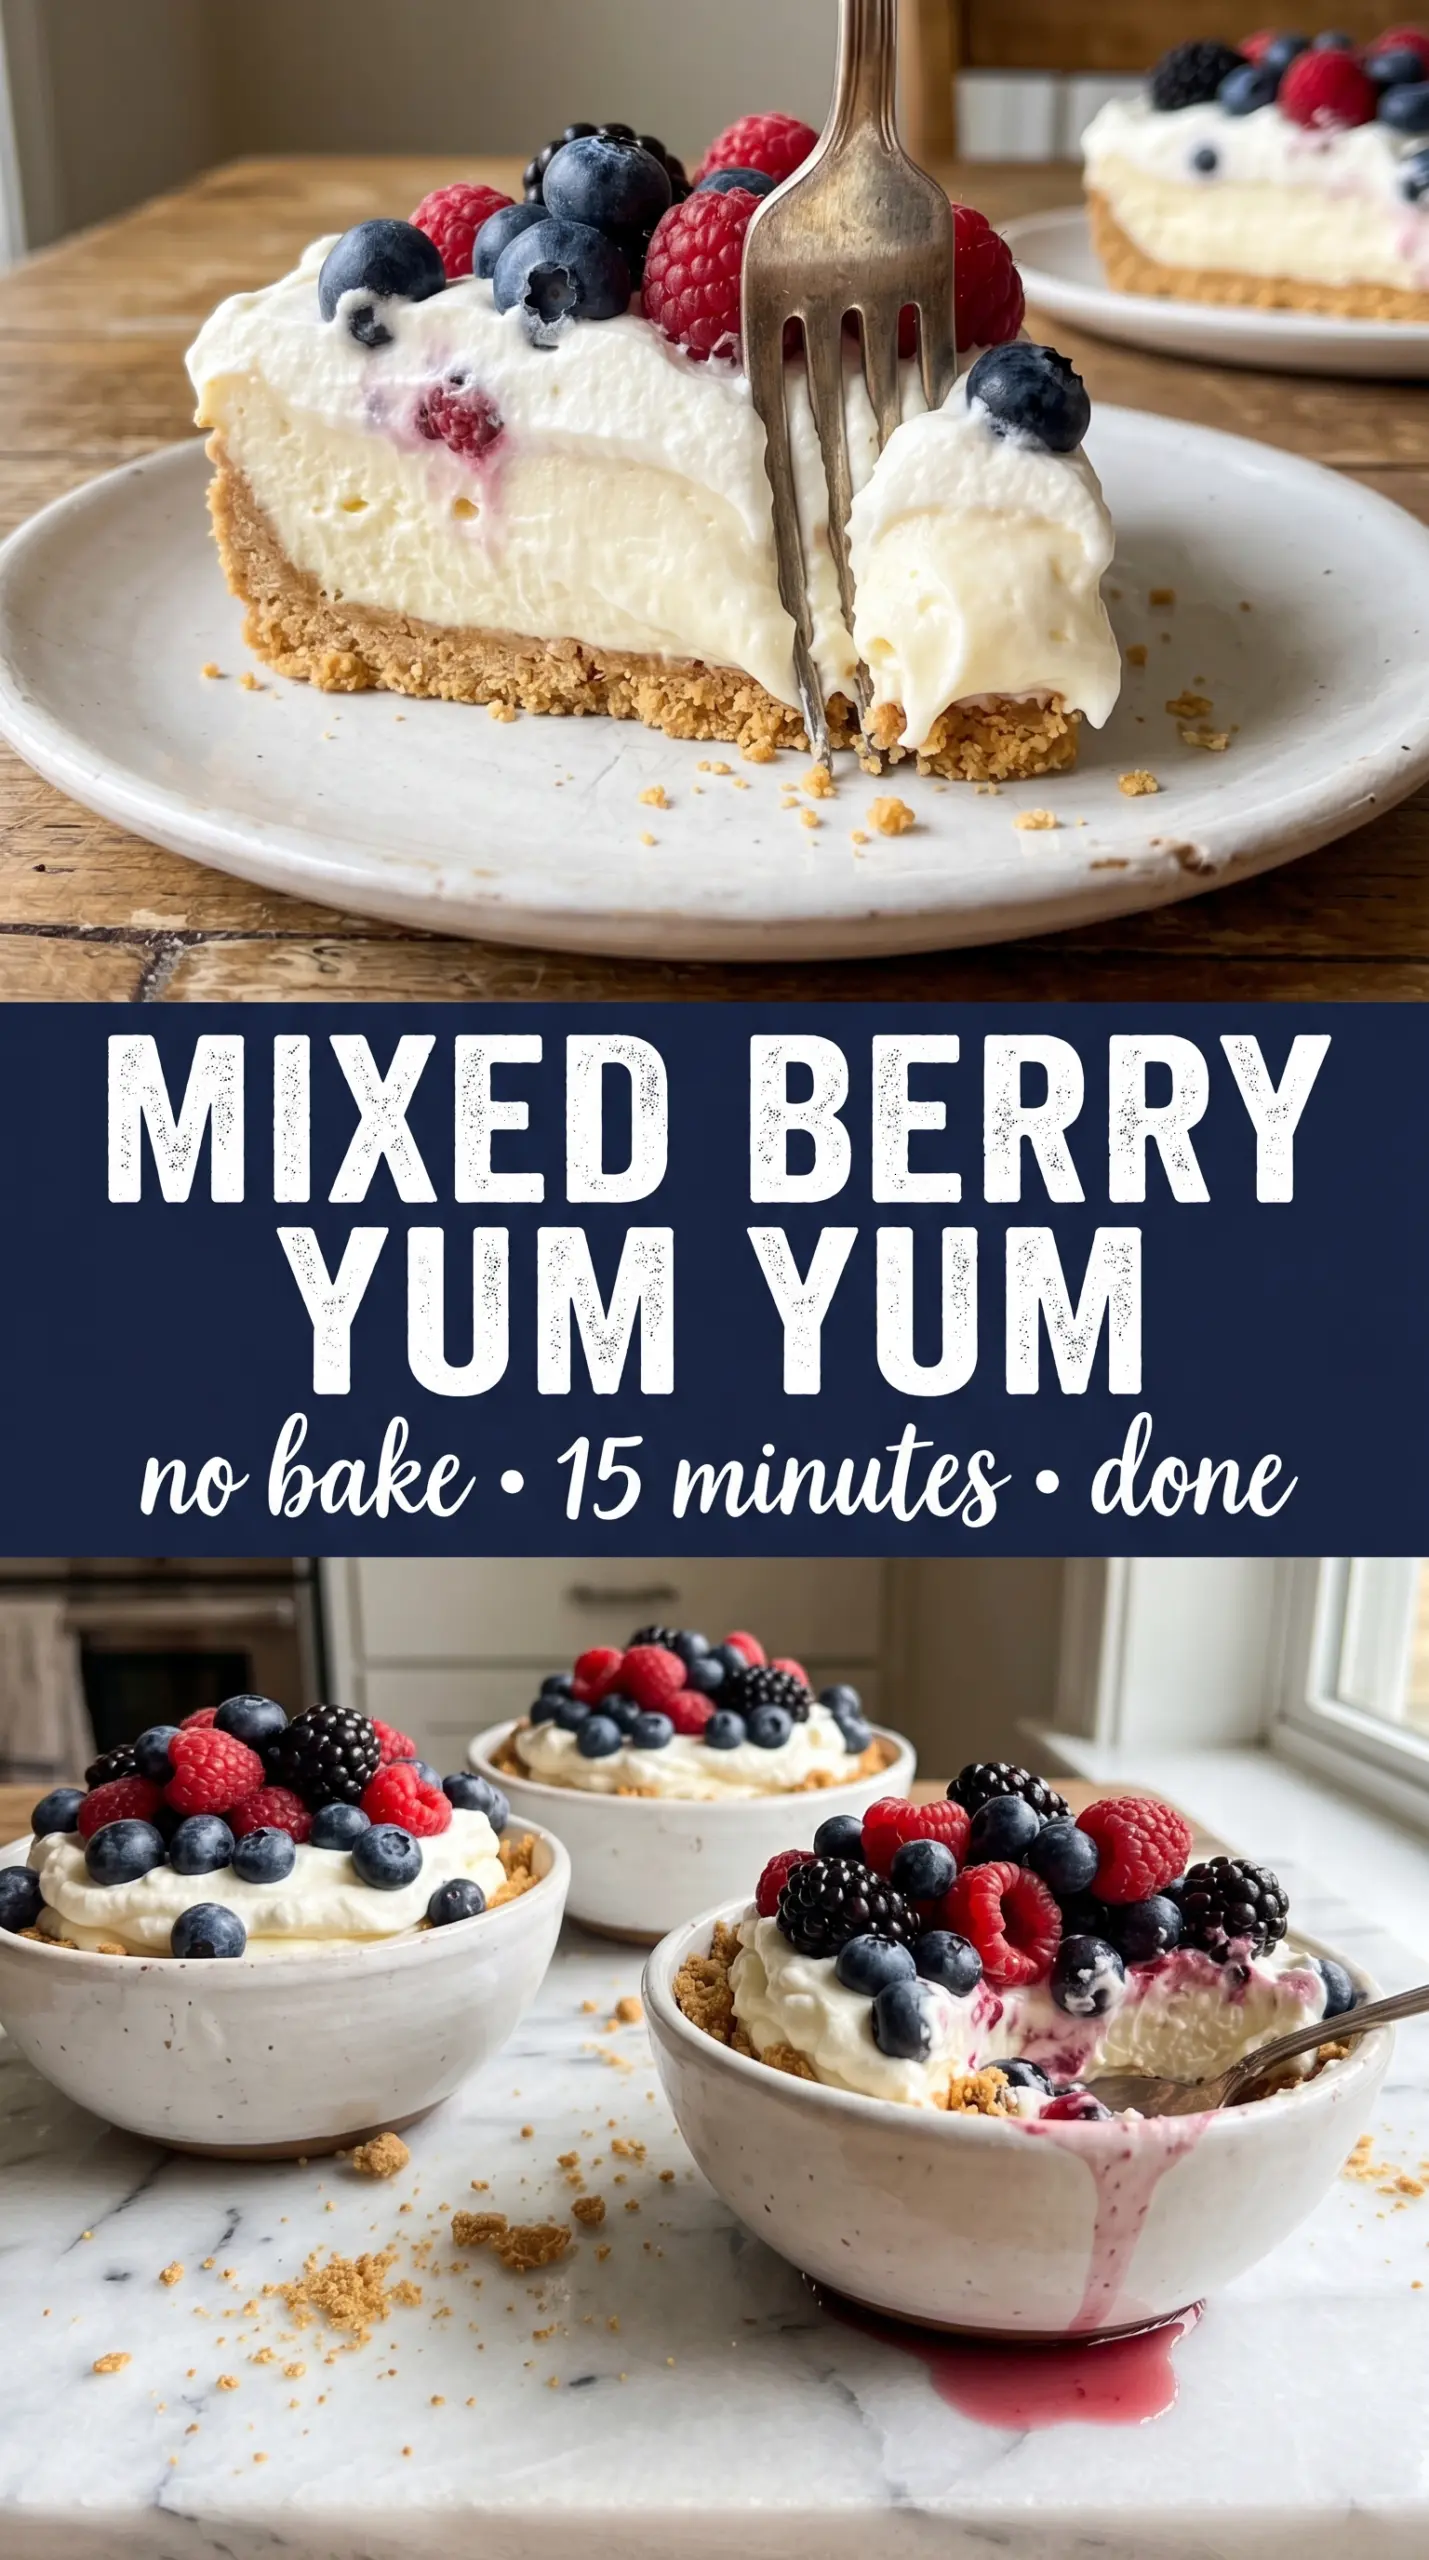
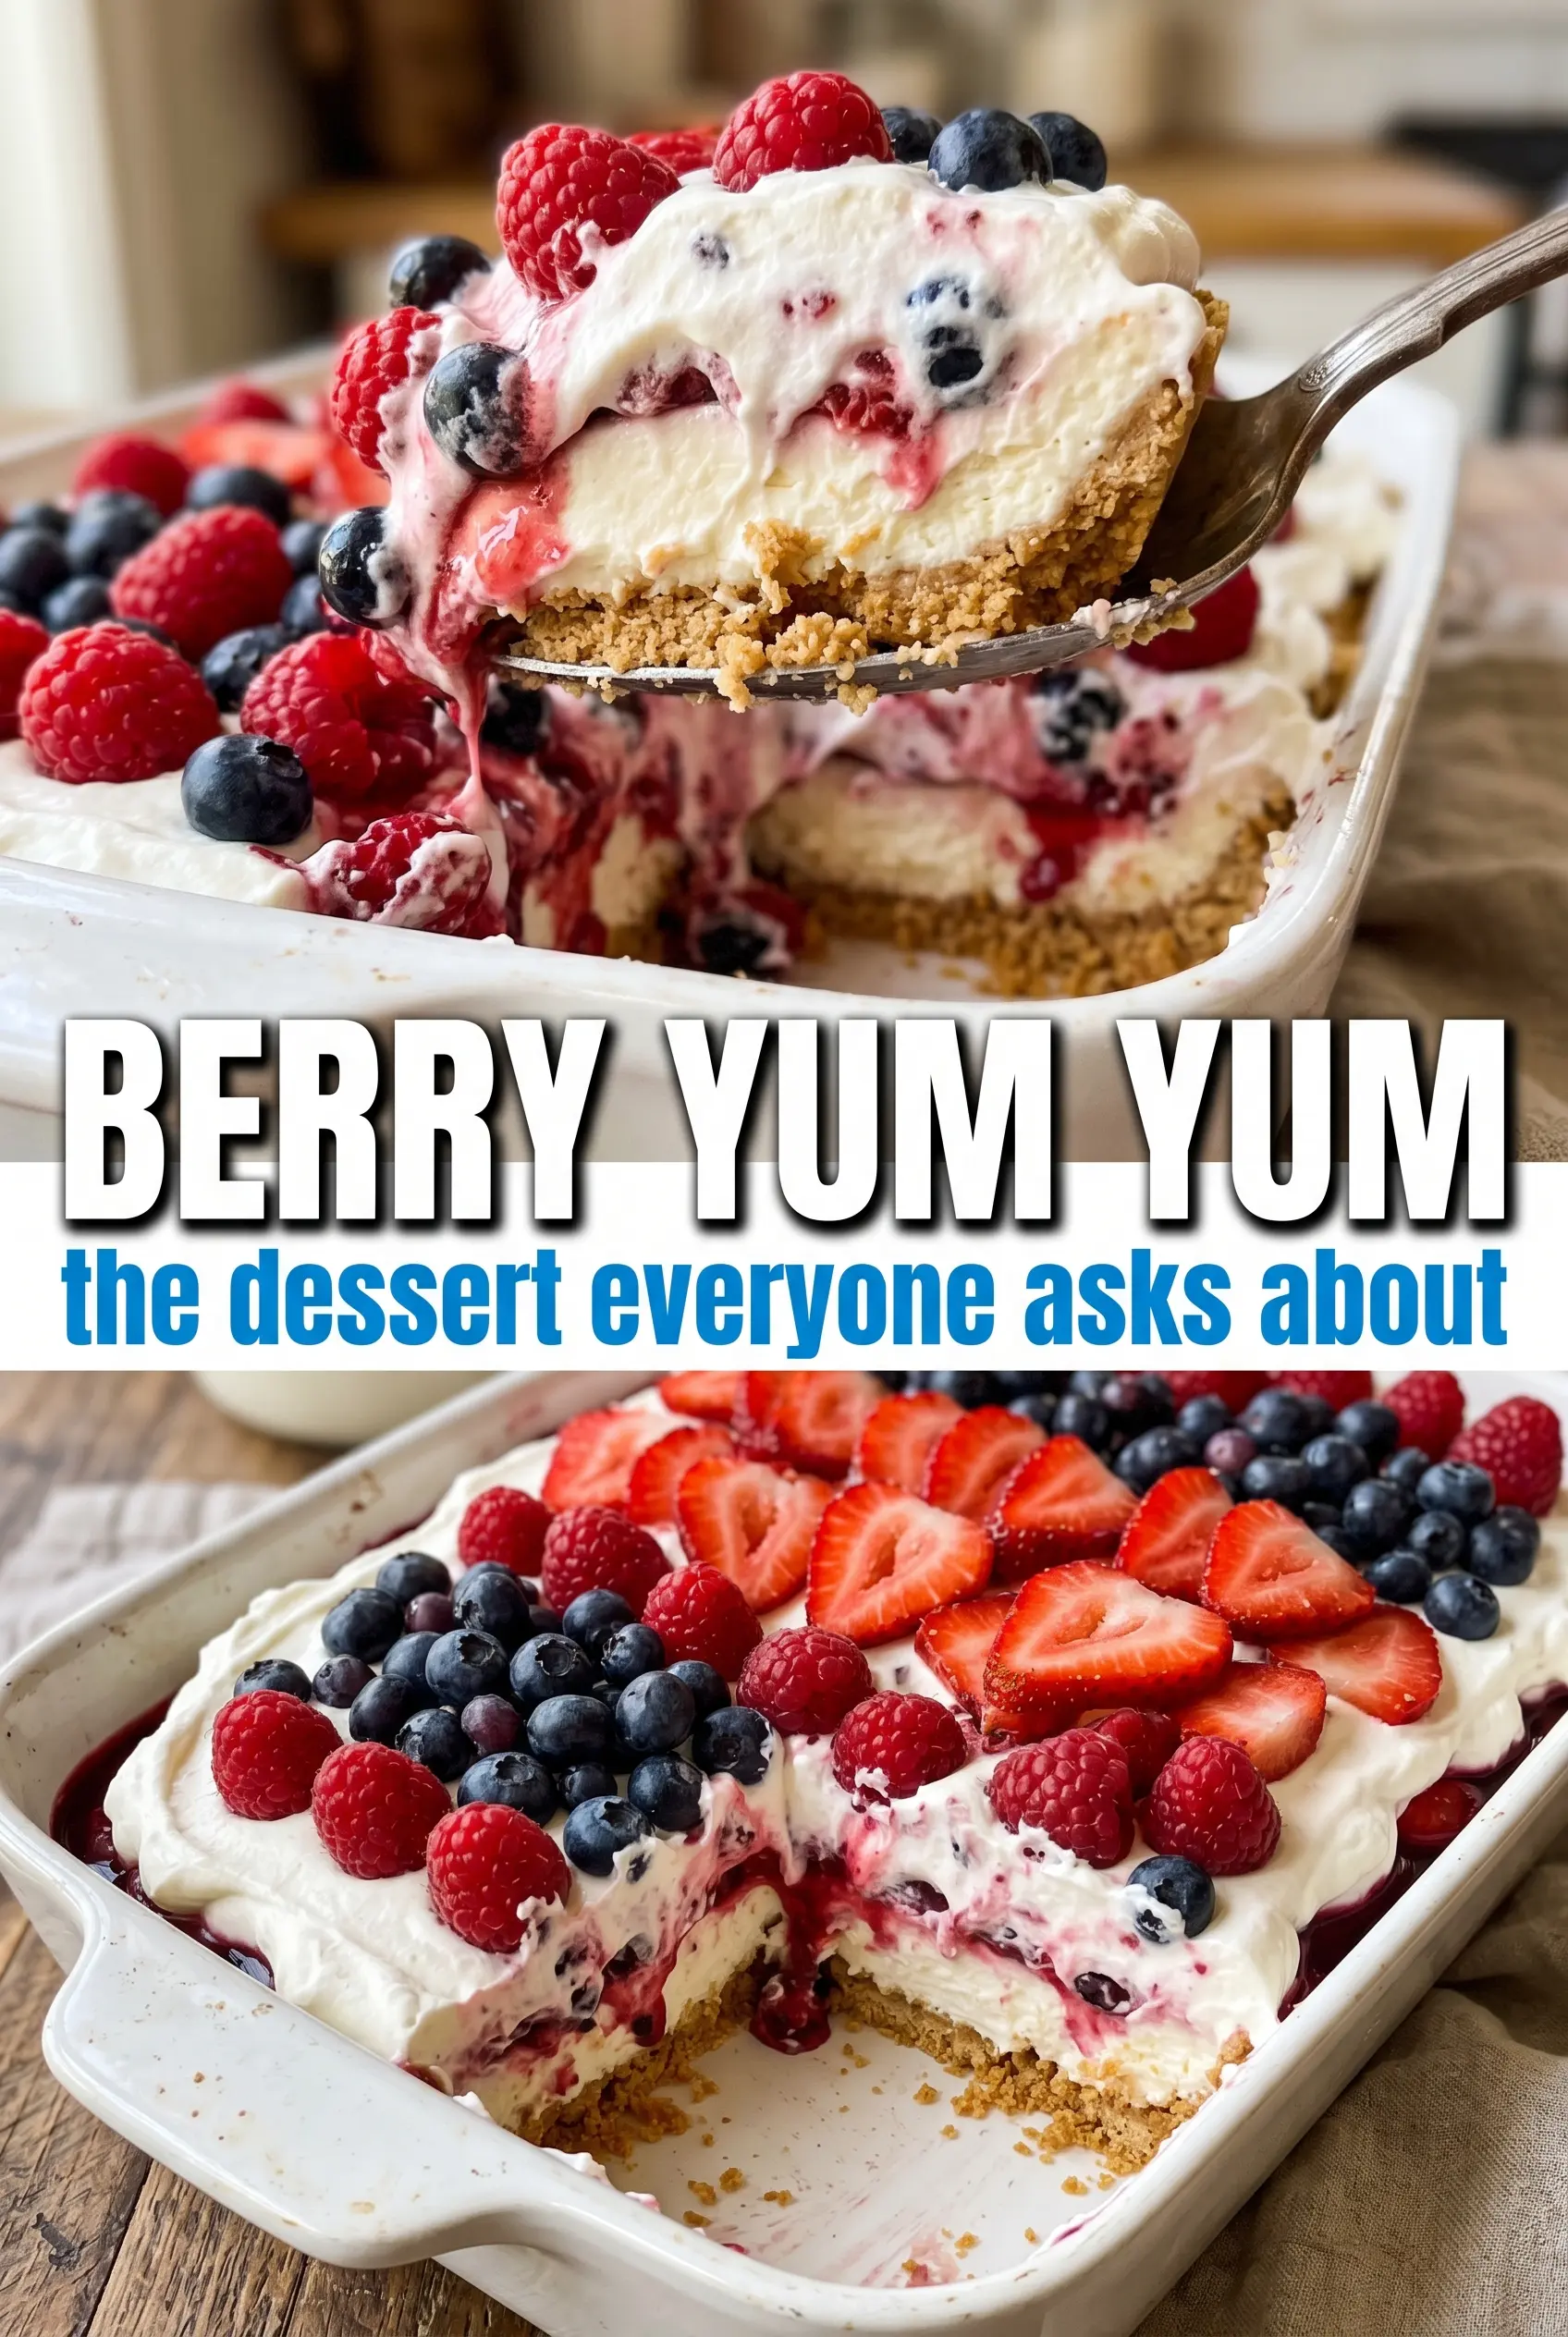
Red, white, and blue mixed berry yum yum lands with the kind of chilled, creamy layers that slice cleanly and disappear fast. The pecan crust stays buttery and just sturdy enough to hold the fluffy cream cheese filling, and the berry topping gives each bite a bright, fresh finish instead of turning the whole dessert heavy. It’s one of those no-bake desserts that looks festive on the pan and still eats like something worth making again.
The trick is in the chill time and the layering order. The crust needs that first rest in the fridge so it firms up before the cream cheese goes on, and the filling needs to be beaten smooth before the whipped topping is folded in. That keeps the middle light instead of grainy or dense. If you’ve ever had a layered dessert slide apart when sliced, this version fixes that with a little patience and a firm, cold set.
Below, I’ll walk through the part that matters most: how to keep the layers distinct, how to avoid a soft crust, and what to change if you want to swap the fruit or make it a little more make-ahead friendly.
The crust held together beautifully and the filling stayed fluffy after chilling overnight. I sliced it into neat squares for our cookout and the berry top looked just like the picture.
Like this red, white and blue mixed berry yum yum? Save it to Pinterest for the next time you need a no-bake layered dessert that slices cleanly and looks party-ready.
The Crust Needs a Cold Set Before the Filling Goes On
The mistake most people make with a no-bake crust is building the layers too fast. If the crust is still soft when the cream cheese mixture goes in, it starts to drag and smear instead of staying in a clean base. Press it firmly into the dish, then give it the full chill so the butter can firm up and lock the pecans and flour together.
A 9×13 dish works best here because it gives the dessert enough surface area for even layers and a neat square cut. If you use a smaller pan, the layers get thicker and the center takes longer to set. The goal is a crust that cuts like a chilled bar, not a crumbly base that falls apart at the first lift of a spatula.
What Each Layer Is Actually Doing Here
- All-purpose flour — This gives the crust structure. It’s not a shortcut pie crust, but it does need the flour so the butter can set into a sliceable base. A one-to-one gluten-free flour blend can work if it includes xanthan gum.
- Pecans — They add the nutty crunch that keeps the bottom from tasting like plain sweet dough. Chop them finely so the crust presses together evenly instead of crumbling at the edges. Walnuts work in a pinch, but pecans taste more right here.
- Cream cheese — This is the backbone of the middle layer. Soften it fully before mixing or you’ll end up with little cold lumps that never smooth out. Full-fat cream cheese gives the best texture; reduced-fat versions can set softer and taste a little thin.
- Whipped topping — It keeps both the cream cheese layer and the top light, airy, and stable after chilling. Homemade whipped cream can be used, but it won’t hold as long in the fridge and may soften faster when sliced. If you do swap it, whip it to medium peaks first.
- Strawberries and blueberries — Use ripe berries with good color and not too much juice. Watery berries can bleed into the topping and turn the top layer messy. Slice the strawberries just before assembling so they stay bright and don’t weep onto the cream.
Building the Layers Without Smearing the Middle
Mixing the Crust Until It Holds
Stir the flour, chopped pecans, melted butter, and powdered sugar until every dry patch disappears and the mixture looks like damp sand. Press it into the bottom of the dish with steady pressure, especially into the corners, because loose spots show up later when you slice. If the crust feels greasy or overly soft, it needs more chill time before you add anything on top.
Beating the Filling Smooth First
Beat the cream cheese, powdered sugar, and vanilla until the mixture looks completely smooth and a little glossy. Any lumps left at this stage stay in the final dessert, because once the whipped topping goes in you’re not fixing texture anymore. Fold the whipped topping in gently so the filling stays fluffy instead of turning dense from overmixing.
Spreading the Top Layer and Fruit
Spread the remaining whipped topping in an even layer, then add the strawberries and blueberries with a light hand. If you drag the berries through the cream, the top gets streaky instead of staying clean and distinct. A patriotic pattern looks pretty, but a scattered pattern works just as well and is faster when you’re making this for a crowd.
Chilling Until the Slices Hold
Four hours is the minimum, but longer is even better if you want crisp squares. The dessert is ready when the top feels set to a light touch and the layers don’t shift as you nudge the dish. Slice with a sharp knife wiped clean between cuts for the neatest squares and the best-looking layers.
Three Ways to Change It Without Losing the Point
Make it gluten-free with a better crust swap
Use a cup-for-cup gluten-free flour blend in place of the all-purpose flour, but keep the pecans and butter the same. The crust will still set, though it may be a little more tender when sliced. Press it firmly and chill it well so it doesn’t crumble at the edges.
Use all homemade whipped cream for a softer finish
Whip cold heavy cream with a little powdered sugar until medium peaks form, then use it in place of the whipped topping. The flavor is fresher and a little less sweet, but the dessert won’t hold quite as long in the fridge. This is the better choice if you’re serving it the same day.
Swap the berries for what’s ripe
Blackberries, raspberries, or sliced cherries can replace part of the berry topping if that’s what you have. Just keep the fruit dry and avoid anything overly juicy, since extra liquid can seep into the whipped layer and blur the top. Mixed berries still give the cleanest red-and-blue look.
Storage and Reheating
- Refrigerator: Keep covered for up to 3 days. The crust stays best on day one and two, while the berries release a little juice as it sits.
- Freezer: This dessert doesn’t freeze well. The whipped layers lose their smooth texture after thawing, and the berries turn watery.
- Reheating: No reheating needed. Serve it straight from the fridge for the cleanest slices, and use a cold knife if the top starts to drag while cutting.
Questions I Get Asked About This Recipe
Red, White and Blue Mixed Berry Yum Yum
Ingredients
Equipment
Method
- Mix all-purpose flour, pecans, melted unsalted butter, and powdered sugar until evenly combined, then press into the bottom of a 9x13 dish so it’s compact. Refrigerate for 30 minutes to set, until firm and cohesive when touched.
- Beat cream cheese, powdered sugar, and vanilla extract until smooth, then fold in 1 cup whipped topping to keep it light. Spread the mixture evenly over the chilled crust to form a uniform layer.
- Spread the remaining 1 cup whipped topping in an even layer over the cream cheese layer. Arrange sliced strawberries and blueberries across the top in a patriotic pattern or scatter evenly so the colors are clearly visible.
- Cover and refrigerate for at least 4 hours until fully set, with layers that cut cleanly. Slice into squares and serve cold.