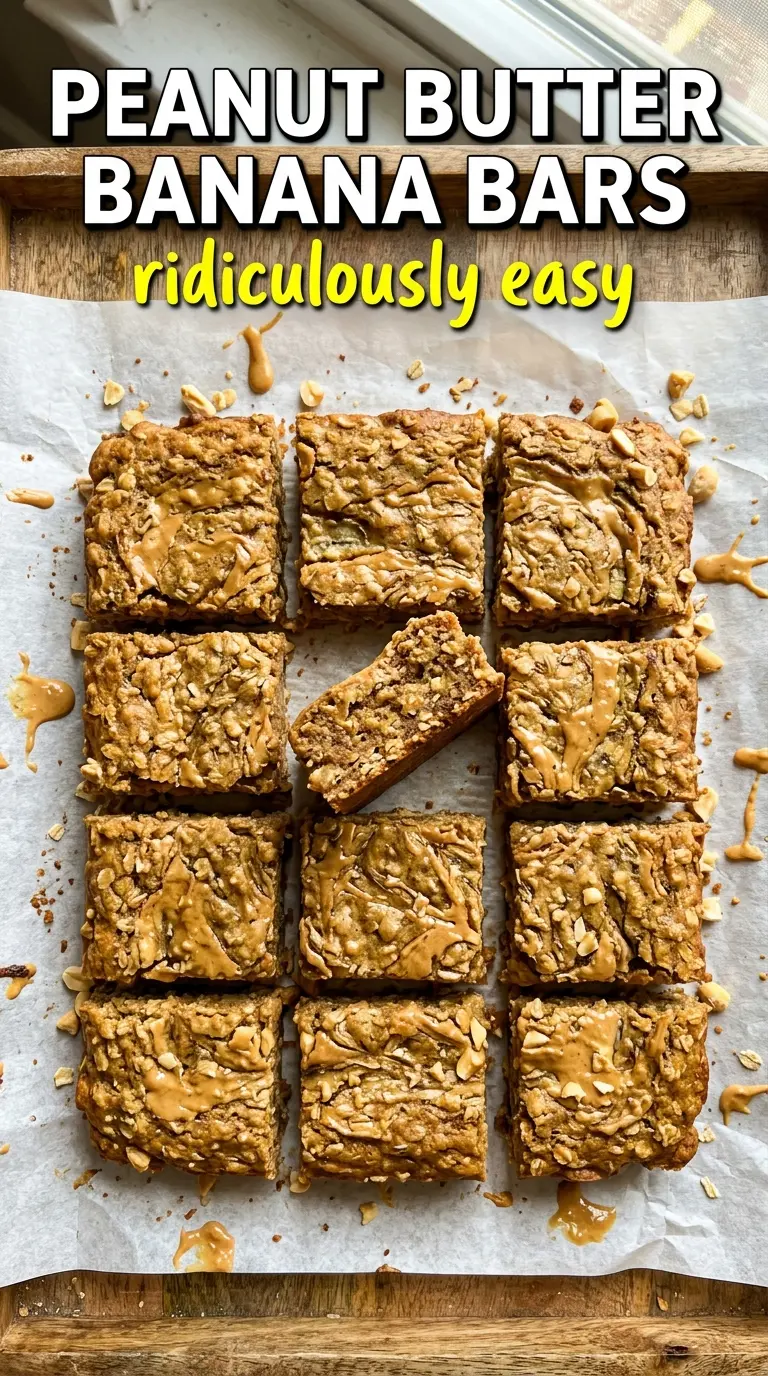
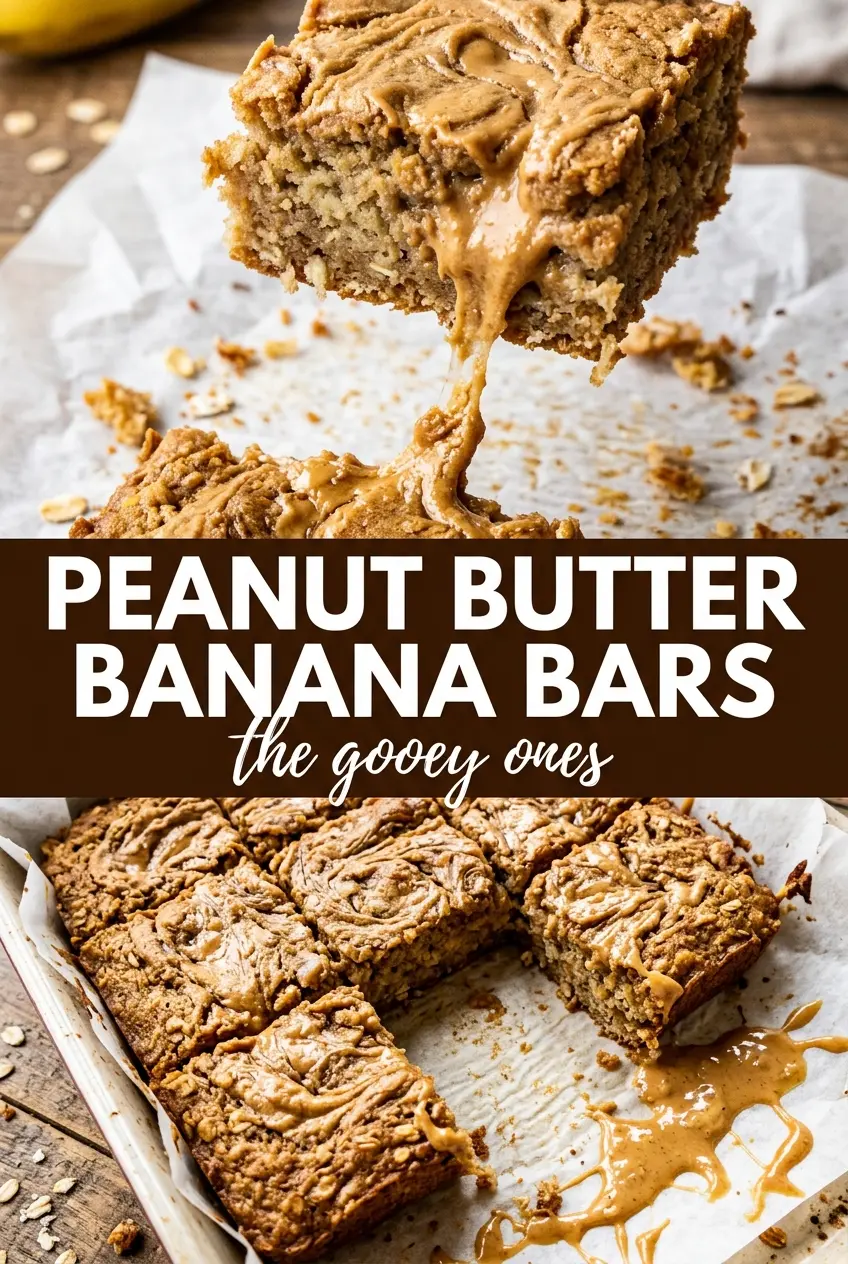
These peanut butter banana bars bake up dense, fudgy, and just a little bit sticky in the best way, with the kind of soft center that makes a square disappear before it even hits the plate. The bananas keep the bars tender, the peanut butter gives them weight and richness, and the chocolate drizzle on top turns them from snacky to dessert-worthy without adding any extra fuss.
What sets this version apart is the balance. Too much flour and bars dry out. Too much banana and they turn gummy. Here, the oats help hold everything together while still keeping that soft, chewy bite, and the batter comes together in one bowl with no mixer needed. It’s the sort of recipe that works as an after-school snack, a lunchbox treat, or a quick sweet tray bake when the bananas on the counter have gone past eating out of hand.
Below, I’ve included the detail that matters most: how to keep the bars fudgy instead of cakey, plus the swaps that still give you a good result if you need to adjust the ingredients.
The bars stayed soft and fudgy for days, and the peanut butter drizzle set up just enough that they sliced cleanly without falling apart.
Peanut butter banana bars with that fudgy center and glossy chocolate drizzle are worth saving for the next time those bananas need baking.
The Reason These Bars Stay Fudgy Instead of Turning Dry
The biggest mistake with banana bars is baking them like cake. Once the edges look set, they’re done enough to pull from the oven; if you wait for a fully dry center, the bars will lose the soft, dense texture that makes them good. The bananas and peanut butter already bring plenty of moisture, so the flour is there to bind, not to create structure like a loaf cake.
Another thing that matters here is the balance between oats and flour. The oats give the bars a little chew and help absorb the banana without turning the crumb heavy, while the flour keeps them sliceable. If your bars ever come out gummy, the usual culprit is too much banana liquid or not enough cooling time before cutting.
- Bananas — Use ripe bananas with plenty of brown spots. They mash smoothly, taste sweeter, and blend into the batter instead of leaving wet pockets. Under-ripe bananas won’t give you the same softness or flavor.
- Peanut butter — Creamy peanut butter works best because it mixes cleanly into the batter. Natural peanut butter can be used, but stir it thoroughly first so the oil doesn’t throw off the texture.
- Honey or maple syrup — Either sweetener works. Honey gives a rounder, slightly thicker sweetness, while maple syrup keeps the bars a touch looser and adds a deeper finish.
- Chocolate chips — These are optional, but they add pockets of melted chocolate that work beautifully with the peanut butter. If you skip them, the bars will still hold together; they’ll just lean more snack-bar than dessert.
What Each Ingredient Is Actually Doing in This Recipe
- Primary ingredient (the star) — Quality matters most. Choose the best you can find.
- Cooking medium (oil, butter, or broth) — This carries flavors and prevents dryness.
- Seasonings (salt, pepper, spices, herbs) — Layer flavors so nothing overpowers. Build depth gradually.
- Aromatics (garlic, onion, herbs) — Cook with fat to bloom flavors. Become the foundation.
- Supporting ingredients — Complement the main ingredient without overpowering it.
- Sauce or liquid (if applicable) — Brings flavors together. Balance richness with acid.
- Acid (lemon, vinegar, wine, or other) — Brightens and prevents flat-tasting results.
- Final finish (garnish, glaze, or sauce) — Prevents one-dimensional taste and adds visual appeal.
Mixing the Batter So the Bars Bake Up Dense, Not Puffy
Getting the Banana Base Smooth
Mash the bananas until they’re completely smooth before anything else goes in. If you leave chunks behind, they stay visible in the finished bars and create wet spots that bake unevenly. Whisk the peanut butter, sweetener, eggs, and vanilla into the banana until the mixture looks glossy and even, with no streaks of egg left behind.
Adding the Dry Ingredients Without Overworking the Batter
Stir in the oats, flour, baking powder, cinnamon, and salt just until the flour disappears. The batter will be thick, and that’s what you want. If you keep mixing once the dry ingredients are incorporated, the bars can turn tougher and lose that soft, fudgy bite.
Baking Until the Center Is Set but Still Soft
Spread the batter evenly into the pan and smooth the top so it bakes in an even layer. The bars are done when the edges look set and a toothpick in the center comes out with a few moist crumbs, not wet batter. If the top looks finished but the middle still sloshes, give it a few more minutes; if the center has dried out completely, they’ve gone too far.
Cooling Before You Drizzle and Slice
Let the bars cool all the way in the pan before you add the drizzle or cut them. Warm bars are fragile, and the chocolate or peanut butter topping will slide around instead of sitting neatly on top. Once fully cool, lift them out with the parchment and slice with a sharp knife for clean edges.
How to Adapt These Peanut Butter Banana Bars
Make Them Gluten-Free
Use certified gluten-free oats and swap the all-purpose flour for a 1:1 gluten-free baking blend. That keeps the bars sliceable without making them gritty. The texture may be a touch softer, so give them the full cooling time before cutting.
Make Them Dairy-Free
The base recipe is already dairy-free if your chocolate chips are dairy-free. Use a chocolate drizzle instead of peanut butter if you want a cleaner finish, since melted peanut butter can set a little softer on top.
Swap the Sweetener
Honey gives a slightly thicker batter and a more rounded sweetness, while maple syrup makes the bars a little looser and more gently flavored. Either one works, but don’t replace it with granulated sugar unless you also add extra moisture, or the bars will bake up drier.
Use Almond Butter Instead of Peanut Butter
Almond butter works if you want a milder, less savory bar, but the flavor will be softer and the batter may spread a little more because almond butter is often looser. Choose a no-stir version for the most reliable texture.
Storage and Reheating
- Refrigerator: Store covered for up to 5 days. The bars firm up as they chill, which makes them even easier to slice.
- Freezer: Freeze sliced bars between layers of parchment for up to 2 months. Thaw at room temperature or overnight in the fridge.
- Reheating: Warm a bar for 10 to 15 seconds in the microwave if you want the chocolate to soften again. Don’t overheat it or the center will turn sticky and the drizzle will melt off.
Questions I Get Asked About These Bars
Peanut Butter Banana Bars
Ingredients
Equipment
Method
- Preheat the oven to 350°F and line an 8x8 or 9x13 baking pan with parchment paper so the bars lift out cleanly.
- Mash the ripe bananas completely smooth, then whisk in creamy peanut butter, honey or maple syrup, eggs, and vanilla extract until fully combined and glossy.
- Stir in rolled oats, all-purpose flour, baking powder, cinnamon, and salt until just combined, avoiding overmixing for a tender crumb.
- Fold in chocolate chips so they distribute throughout the batter without crushing.
- Spread batter evenly into the prepared pan and smooth the top into an even layer with visible swirls as you smooth.
- Bake for 22–25 minutes at 350°F, until the edges are set and a toothpick inserted in the center comes out with just a few moist crumbs.
- Cool completely in the pan so the bars firm up for clean slicing.
- Drizzle with melted peanut butter or chocolate, slice into bars, and serve.