Golden-skinned chicken baked right on top of rice makes one of those dinners that looks humble until you scoop under the crust and hit the best part: fluffy grains underneath that have soaked up every bit of seasoned broth and chicken drippings. The rice isn’t just a side here. It turns into the main event, with the top layer getting a little toasty at the edges while the chicken stays juicy enough to pull apart with a fork.
This version works because the rice goes in raw, in the same dish, with enough broth and aromatics to cook evenly under a tight foil cover before the top is uncovered to crisp. Bone-in, skin-on thighs matter here; they give you flavor and protect the meat from drying out while the rice finishes. Using long-grain white rice also matters because it stays separate and tender instead of turning mushy in the oven.
Below you’ll find the timing that keeps the rice from overcooking, the one step that makes the chicken skin turn properly golden, and a few smart swaps if you need to work with what you already have.
The rice came out fluffy, not mushy, and the chicken skin on top got crisp during the last 15 minutes just like you said. I used thighs and the whole pan had this great savory onion-and-herb taste that my kids actually ate without complaining.
Like this one-pan chicken and rice bake? Save it for the nights when you want crispy chicken, fluffy herb rice, and only one dish to wash.
The Reason the Rice Stays Fluffy Instead of Turning to Paste
The biggest mistake with chicken and rice bakes is treating the rice like a casserole filler and adding too much liquid or stirring it too much after it goes in the pan. Long-grain white rice needs enough broth to cook through, but it also needs space. In this recipe, the rice sits undisturbed under the chicken so it can absorb steam and broth without getting broken up into a sticky mass.
The foil cover does most of the work early on. It traps moisture, keeps the surface from drying out, and lets the rice finish at the same time as the chicken underneath. Then the foil comes off for the last stretch so the skin can brown and the top layer of rice can dry out a little instead of staying soggy.
What the Onion, Broth, and Thighs Are Doing Here
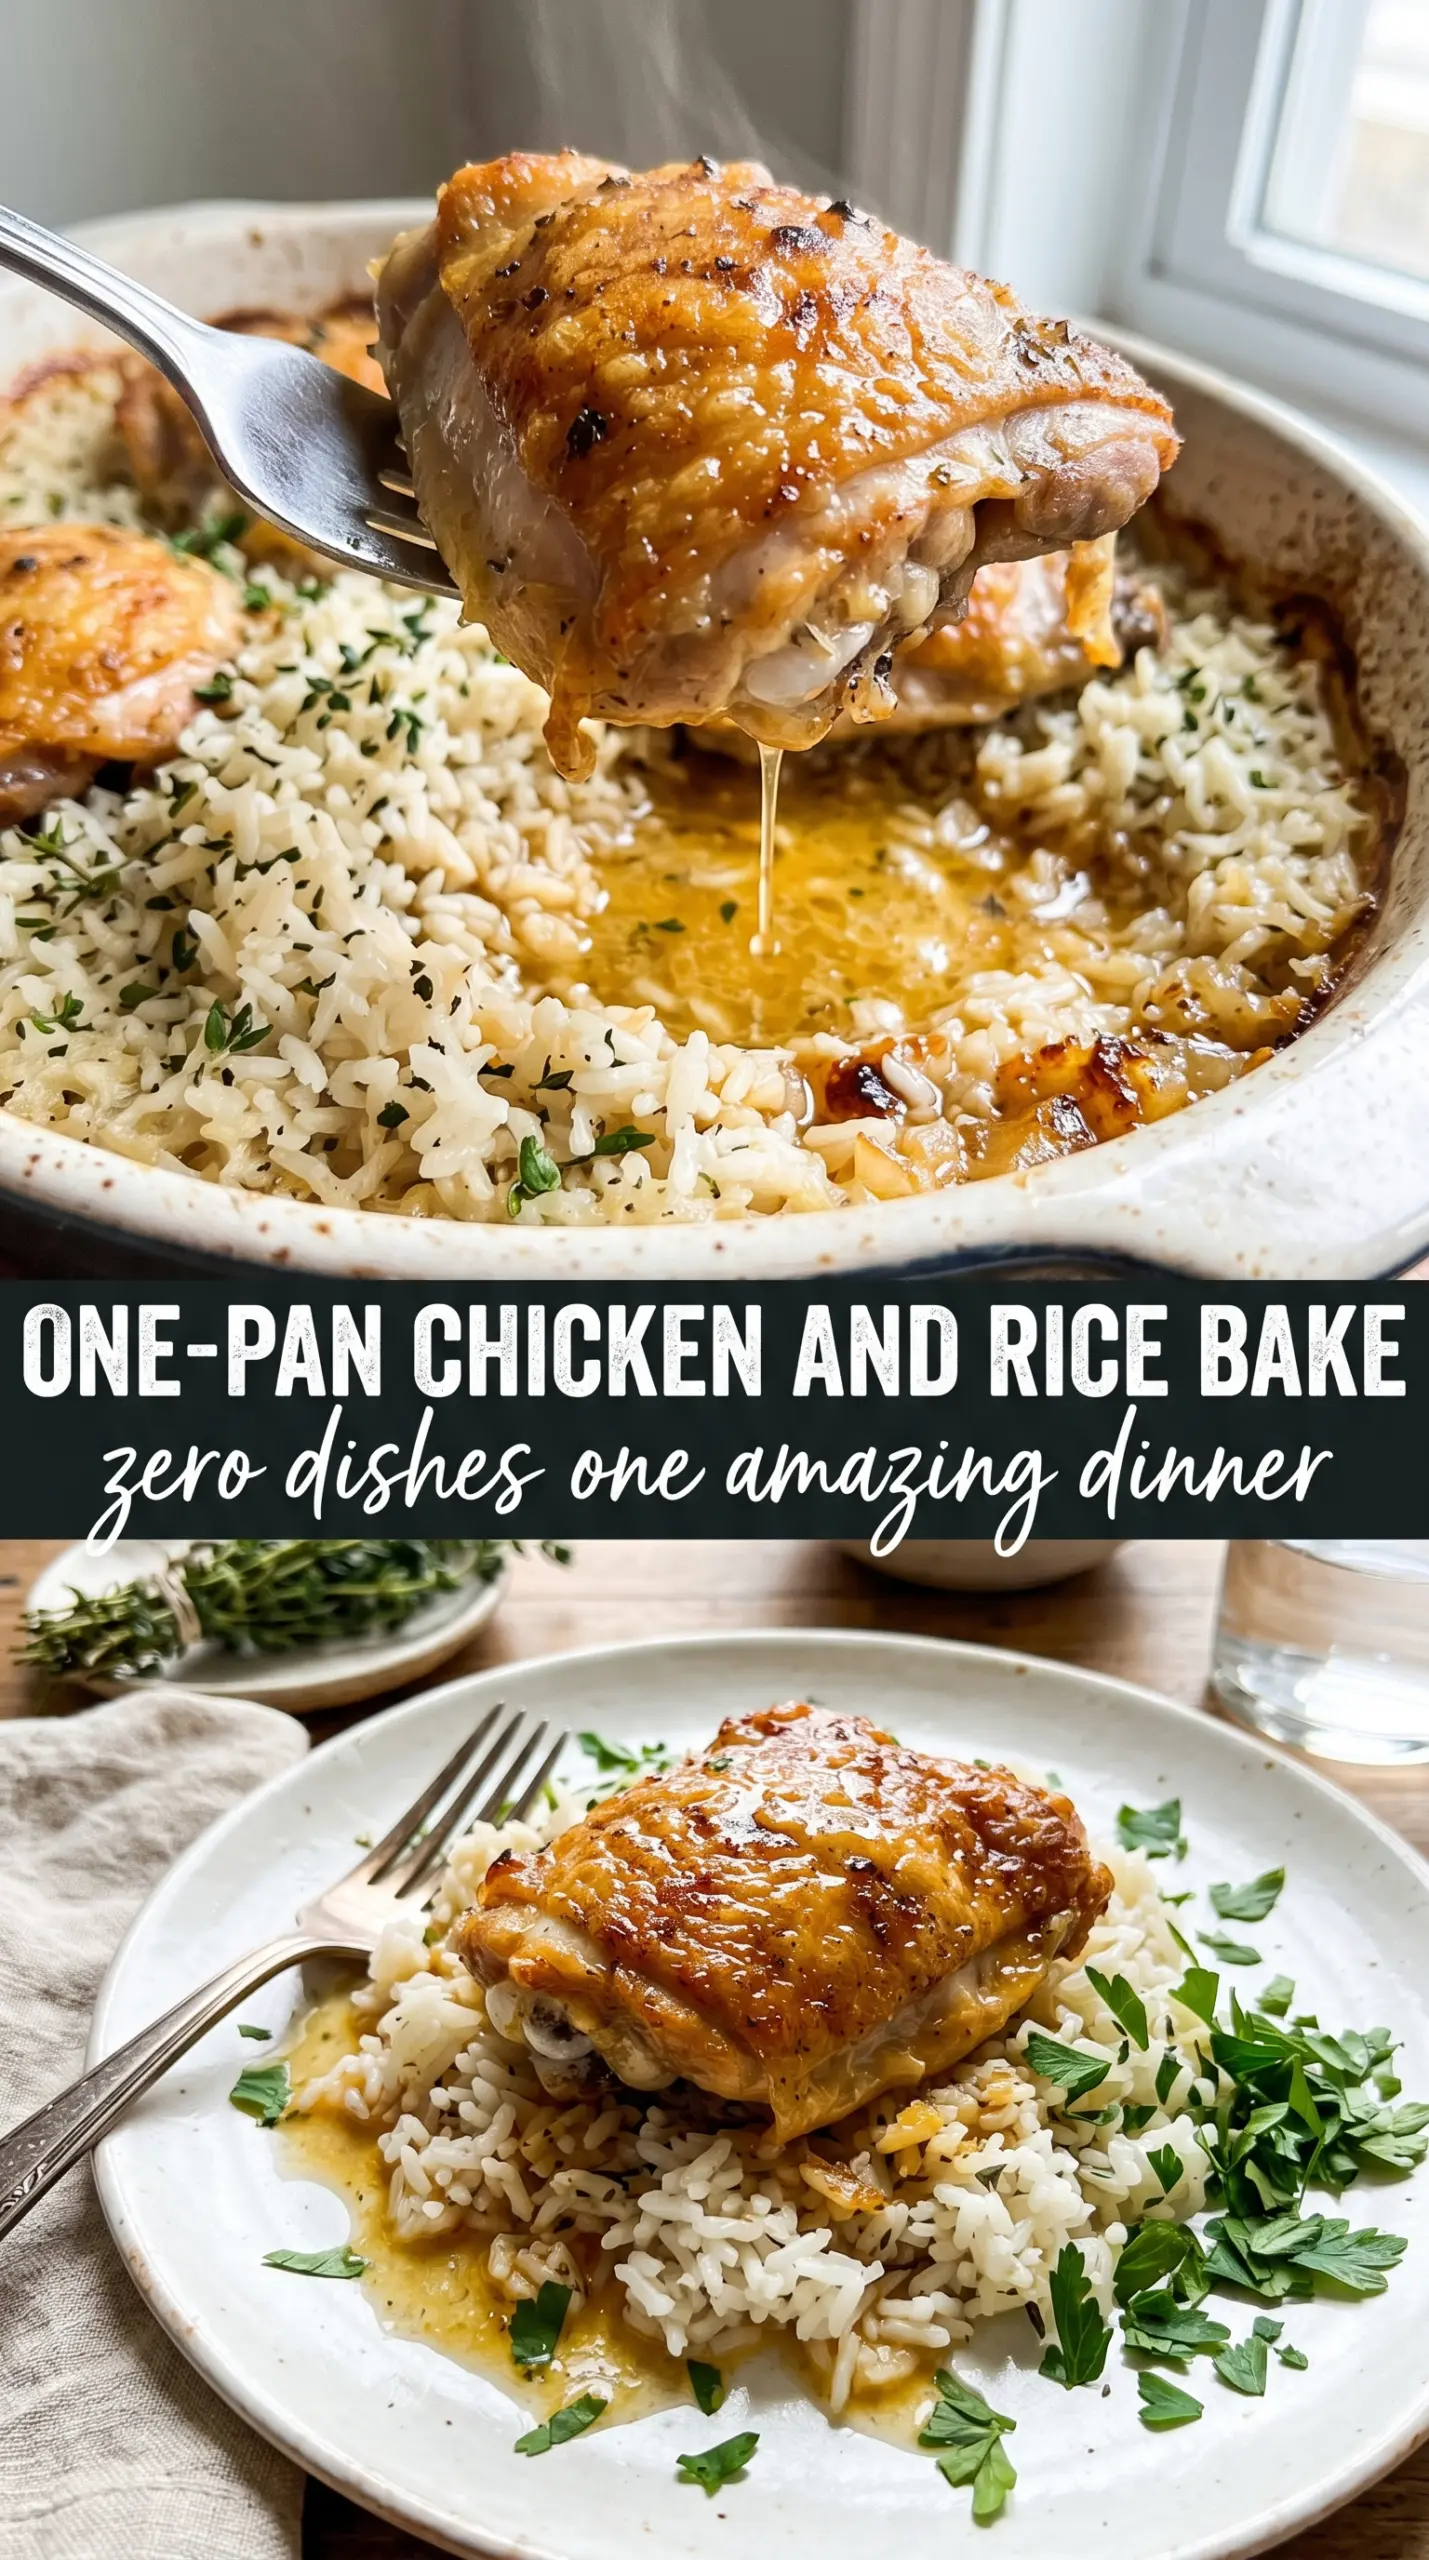
- Bone-in, skin-on chicken thighs — Thighs stay tender through the long bake and the skin protects the meat while it cooks. If you swap in boneless thighs, cut the covered bake time by about 10 minutes so they don’t dry out. Chicken breasts work in a pinch, but they need a gentler hand and a shorter uncovered finish.
- Long-grain white rice — This is the right rice for a fluffy baked result. Short-grain rice turns denser, and brown rice needs more liquid and a much longer bake. If you only have jasmine rice, it works well and stays light.
- Chicken broth — Use a broth you actually like tasting, because the rice drinks in all of it. Low-sodium broth gives you more control over the salt, especially since the chicken gets seasoned separately. Stock works too, but a weak broth will give you a flatter-tasting pan.
- Onion and garlic — These soften in the broth and season the rice from the inside out. Dice the onion small so it cooks evenly under the chicken. If you use garlic powder instead of fresh garlic, add it with the dry seasonings on the chicken so it doesn’t disappear into the liquid.
How to Bake It So the Chicken Browns and the Rice Finishes at the Same Time
Building the Rice Base
Start by mixing the uncooked rice with broth, onion, garlic, thyme, Italian seasoning, and salt directly in the baking dish. Stir once so the rice is evenly distributed, then stop. If you keep stirring after the chicken goes on top, you break the surface and invite uneven cooking. The mixture should look loose and brothy, not packed down.
Seasoning and Nestling the Chicken
Season the thighs generously on both sides, then place them skin-side up on top of the rice. That skin needs to stay above the liquid so it can render and crisp later. Drizzle the olive oil over the tops before the pan goes into the oven; it helps the seasoning bloom and gives the skin a little head start on color.
The Covered Bake That Steams the Rice
Cover the dish tightly with foil and bake until the rice has absorbed most of the liquid and the chicken is nearly cooked through. Tight foil matters here. If steam escapes, the rice can end up underdone at the edges while the center gets soft. By the end of this stage, the rice should look plump and the chicken should no longer be raw on the bottom.
The Final Uncovered Browning
Remove the foil and bake until the skin turns deep golden and crisp at the edges. This is the part people rush, and that’s how you end up with pale skin and watery rice. The pan is done when the liquid is gone, the rice is tender, and the chicken skin looks crackly and browned rather than just colored.
How to Adjust This Bake Without Losing the Texture
Make It Dairy-Free Without Changing a Thing
This recipe is naturally dairy-free as written, which is part of why it works so well for a weeknight pan dinner. The broth, herbs, and olive oil give you plenty of richness without needing cream or butter. Keep the seasoning bold enough to stand up to the rice.
Use Chicken Breasts When That’s What You Have
Chicken breasts can work, but they dry out faster than thighs. Use bone-in breasts if possible, and check them a few minutes earlier on the uncovered bake so they stay juicy. The rice stays the same, but the chicken will be less forgiving.
Swap in Jasmine Rice for a Fragrant Finish
Jasmine rice gives you a softer, more aromatic result and still bakes up fluffy. Keep the liquid amount the same, but check for doneness at the end of the covered bake since some brands soften faster than standard long-grain rice. Avoid using instant rice here; it turns mushy before the chicken is done.
Add Peas or Spinach Near the End
If you want vegetables in the pan, stir in peas during the last 10 minutes or scatter a few handfuls of spinach over the rice right after the foil comes off. Adding them too early makes them dull and overcooked. This keeps the greens bright without interrupting the bake.
Storage and Reheating
- Refrigerator: Store leftovers in an airtight container for up to 4 days. The rice will firm up a bit as it chills, but it reheats well.
- Freezer: This freezes better than a creamy casserole. Pack portions tightly and freeze for up to 2 months; thaw overnight in the fridge before reheating.
- Reheating: Reheat covered in a 325°F oven with a splash of broth or water until hot. The common mistake is microwaving it dry, which turns the rice tough and the chicken stringy.
Questions I Get Asked About This Recipe

One-Pan Chicken and Rice Bake
Ingredients
Equipment
Method
- Preheat oven to 375°F. This ensures the casserole starts cooking immediately for properly hydrated rice and crisping skin.
- Mix long-grain white rice, chicken broth, diced onion, minced garlic, dried thyme, dried Italian seasoning, and salt in a 9x13 baking dish; stir to combine. Spread into an even layer so the rice cooks uniformly.
- Season bone-in skin-on chicken thighs generously on all sides. Use a light, even coat so seasoning distributes as the chicken stews in the broth.
- Nestle chicken skin-side up on top of the rice mixture; drizzle with olive oil. Keep thighs snug to maximize crispy skin contact with hot air.
- Cover tightly with foil and bake at 375°F for 40 minutes. You should see bubbling in the edges of the rice as the broth is absorbed.
- Remove foil and bake at 375°F for 15 minutes until chicken skin is golden and rice has absorbed all liquid. The top should look dry and set, with visible golden-brown spots on the chicken.
- Garnish with fresh parsley and serve from the baking dish. Resting is not required, but serving hot helps keep the skin crisp.