Crispy-edged chicken coated in a glossy, sticky Mongolian sauce earns its place in the weeknight rotation fast. The chicken stays tender inside because it gets tossed in cornstarch before it ever hits the pan, which gives it that light crust that catches the sauce instead of turning soggy. The sauce lands dark and savory-sweet with just enough ginger, garlic, and heat to keep every bite moving.
What makes this version work is the order. The chicken browns first, the aromatics go into the same pan, and the sauce gets a brief boil before the slurry goes in, so it thickens cleanly instead of tasting raw or gummy. I also like cutting the green onions into bigger pieces here; they soften just enough while still keeping a little bite and char.
Below you’ll find the small details that keep the sauce glossy, the chicken crisp, and the whole dish tasting closer to takeout than to a rushed stir-fry.
The chicken got that crisp edge even after the sauce went on, and the glaze turned thick and shiny without clumping. My husband kept picking at the green onions from the pan before dinner was even served.
Save this Mongolian Chicken for the nights when you want crispy chicken, a sticky soy-ginger glaze, and one pan to clean.
The Trick to Keeping Mongolian Chicken Crispy Under the Sauce
The texture falls apart when the chicken goes into a wet pan too early. Cornstarch needs direct heat and enough space to form a thin crust first, or it just turns into a paste as soon as the sauce hits. That first high-heat sear is what gives this dish its takeout-style edges, and it only works if the pan is hot enough that the chicken sizzles the second it lands.
Another common miss is crowding the skillet. If the chicken pieces sit on top of each other, they steam instead of browning, and the sauce never gets a chance to cling to those crisp spots. Work in batches if your pan looks packed. You want deep color on the outside before the sauce goes in, not pale chicken waiting for flavor to show up later.
What the Cornstarch, Hoisin, and Sesame Oil Are Doing Here

- Cornstarch — This is what gives the chicken its light crust and also thickens the sauce into that glossy finish. Flour won’t behave the same way here; it tends to make the coating heavier and the sauce cloudier. If you need a gluten-free dish, cornstarch already has you covered.
- Soy sauce — This carries the savory backbone of the dish, so use a brand you like the taste of. Low-sodium soy sauce works if that’s what you keep on hand, but the sauce will need a little less salt at the start. Don’t swap in a teriyaki-style sauce, which is sweeter and changes the balance completely.
- Hoisin sauce — A small spoonful adds depth, sweetness, and that slightly fermented note that makes the sauce taste layered instead of just salty-sweet. If you don’t have it, you can leave it out, but the sauce will taste flatter. I wouldn’t replace it with more soy sauce.
- Sesame oil — This goes in for aroma, not for cooking. Use the toasted kind and keep it measured; too much will take over the whole pan. If you only have plain sesame oil, the sauce will lose some of its nutty finish.
- Fresh ginger and garlic — These need a quick stir in the hot pan to wake them up, but not long enough to brown hard. If they scorch, the sauce turns bitter fast. Fresh ginger matters more than ground here because it gives the sauce that bright, sharp lift.
Building the Sauce So It Turns Glossy, Not Gluey
Coating and Browning the Chicken
Toss the sliced chicken with cornstarch, salt, and pepper until every piece looks lightly dusty. That coating should be thin, not caked on. Heat the oil until it shimmers, then lay the chicken in without moving it right away so the bottom can set and brown. If you start stirring too soon, the coating tears and sticks to the pan instead of sealing onto the chicken.
Boiling the Sauce Before the Slurry Goes In
Once the chicken comes out, the same pan should still have those browned bits stuck to the bottom. Garlic and ginger go in for just 30 seconds, then the sauce mixture gets poured in and brought to a real boil. That boil is important because the cornstarch slurry needs active heat to thicken cleanly; if the pan is only barely simmering, the sauce stays thin and watery.
Finishing With the Green Onions
Stir in the slurry and let the sauce bubble until it turns glossy and coats the back of a spoon. Add the chicken back only after the sauce has thickened, then toss in the green onions at the end so they soften slightly without losing their shape. If the sauce seems too tight, a splash of water loosens it. If it seems thin, give it another minute. It should cling to the chicken in a shiny layer, not pool at the bottom of the skillet.
How to Adapt This for the Pantry You Actually Have
Gluten-Free Mongolian Chicken
Use tamari or a certified gluten-free soy sauce and check that your hoisin is gluten-free, too. The texture stays the same because cornstarch is already doing the thickening work. This swap keeps the sauce dark and glossy without changing the cooking method.
Lower-Sugar Version
Cut the brown sugar to 1/4 cup and add an extra tablespoon of water if the sauce tastes too sharp. The glaze won’t be as sticky or lacquered, but it still clings well if you let it reduce for a minute after the slurry goes in. This is the easiest way to lighten the sweetness without losing the Mongolian-style balance.
Chicken Thigh Swap
Boneless skinless thighs work well here and stay juicy under high heat. They need about the same cook time, but they release a little more fat, which gives the sauce a richer finish. Slice them evenly so the pieces cook at the same pace.
Storage and Reheating
- Refrigerator: Store leftovers in an airtight container for up to 4 days. The chicken softens a little in the sauce, but the flavor holds up well.
- Freezer: It freezes, though the sauce loses a bit of its original sheen after thawing. Freeze in a sealed container for up to 2 months and thaw overnight in the refrigerator.
- Reheating: Warm it gently in a skillet over medium-low heat with a splash of water to loosen the sauce. The common mistake is blasting it on high heat, which can dry out the chicken and make the glaze seize.
Questions I Get Asked About This Recipe
Mongolian Chicken
Ingredients
Equipment
Method
- Toss the sliced chicken with cornstarch, salt, and pepper until coated.
- Set the coated chicken aside while you mix the sauce.
- Whisk together soy sauce, brown sugar, water, hoisin sauce, sesame oil, and red pepper flakes until smooth.
- Heat the vegetable oil in a large skillet or wok over high heat; cook the chicken for 3-4 minutes per side until deeply golden and cooked through, then remove.
- Add garlic and ginger to the same pan and stir-fry for 30 seconds until fragrant.
- Pour in the sauce and bring it to a boil.
- Stir in the cornstarch slurry and cook for 1-2 minutes until thickened and glossy.
- Return the chicken to the pan, add the green onions, and toss to coat until the sauce clings and the onions are charred-tender.
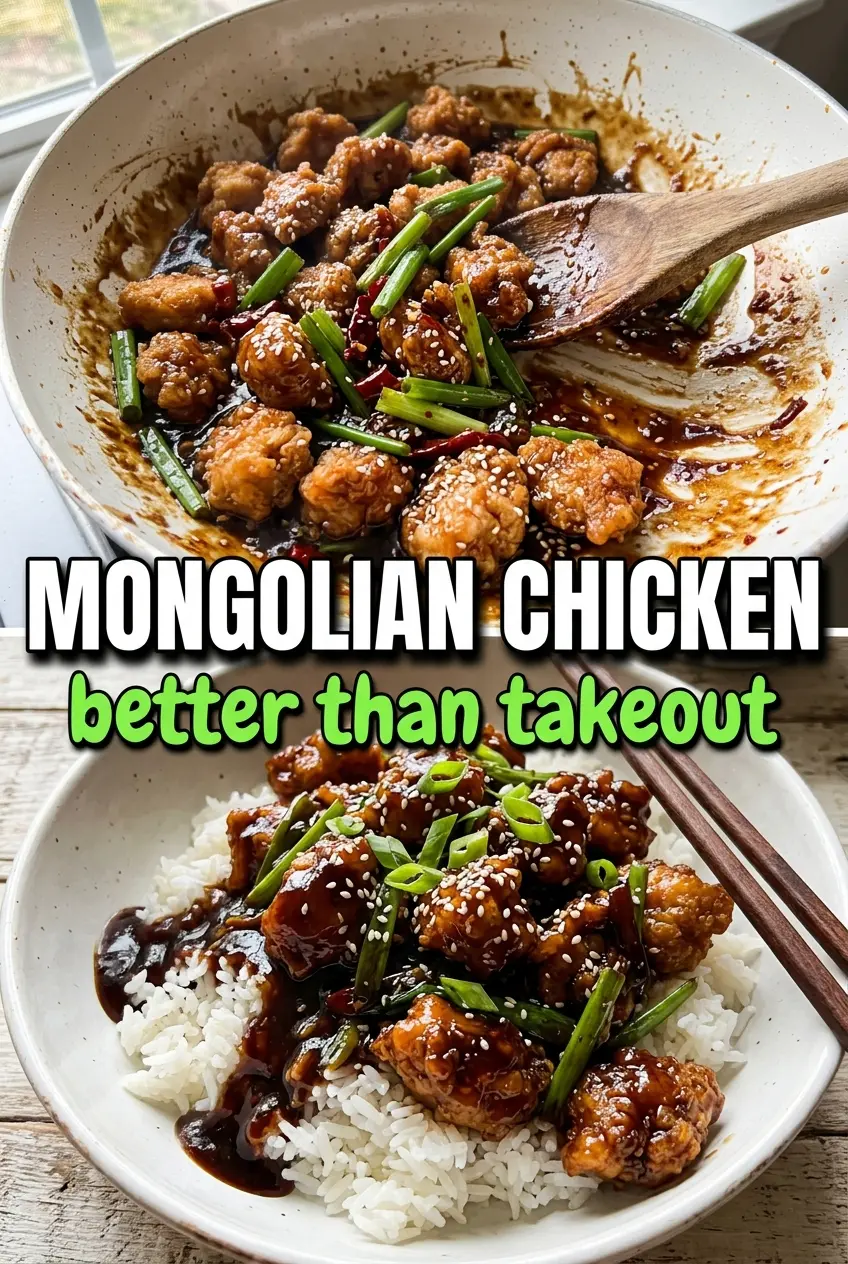
- Serve the Mongolian chicken over steamed rice and top with sesame seeds.