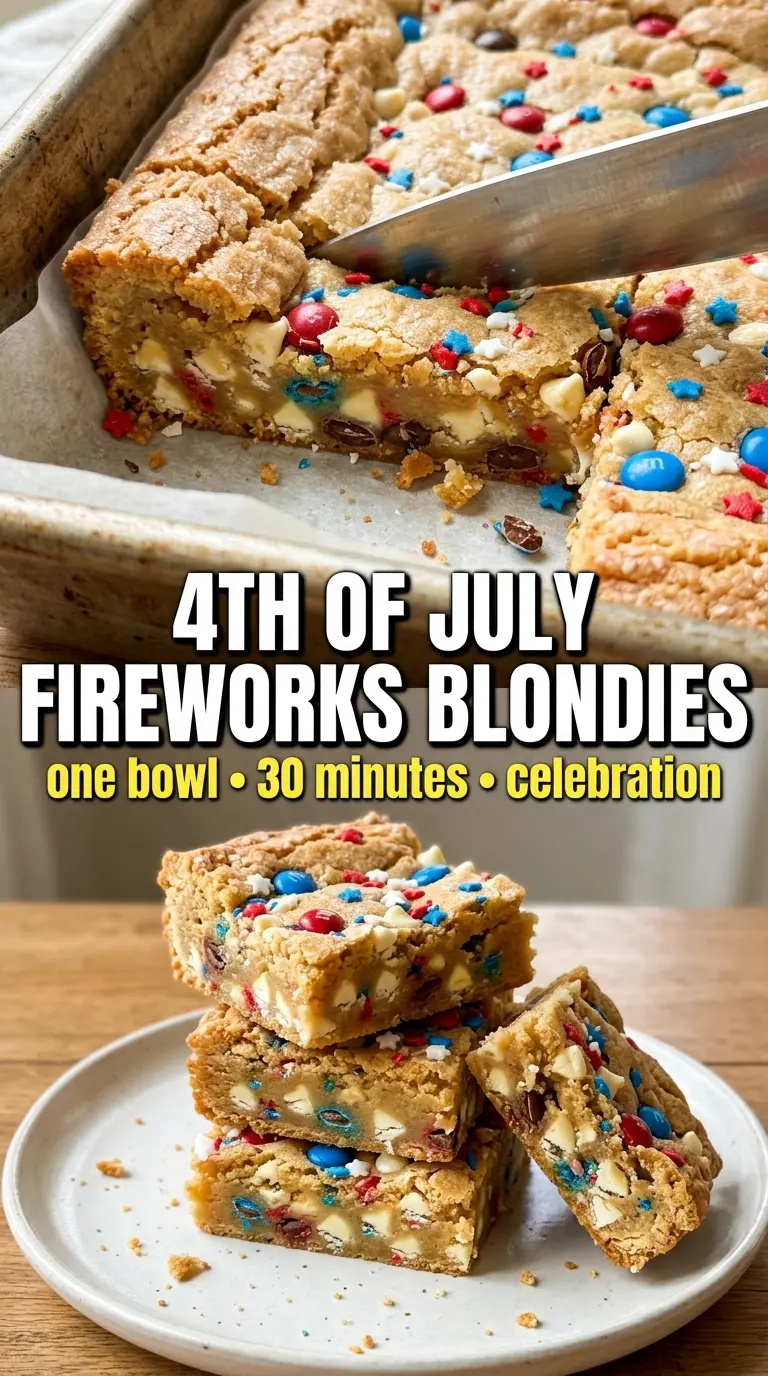
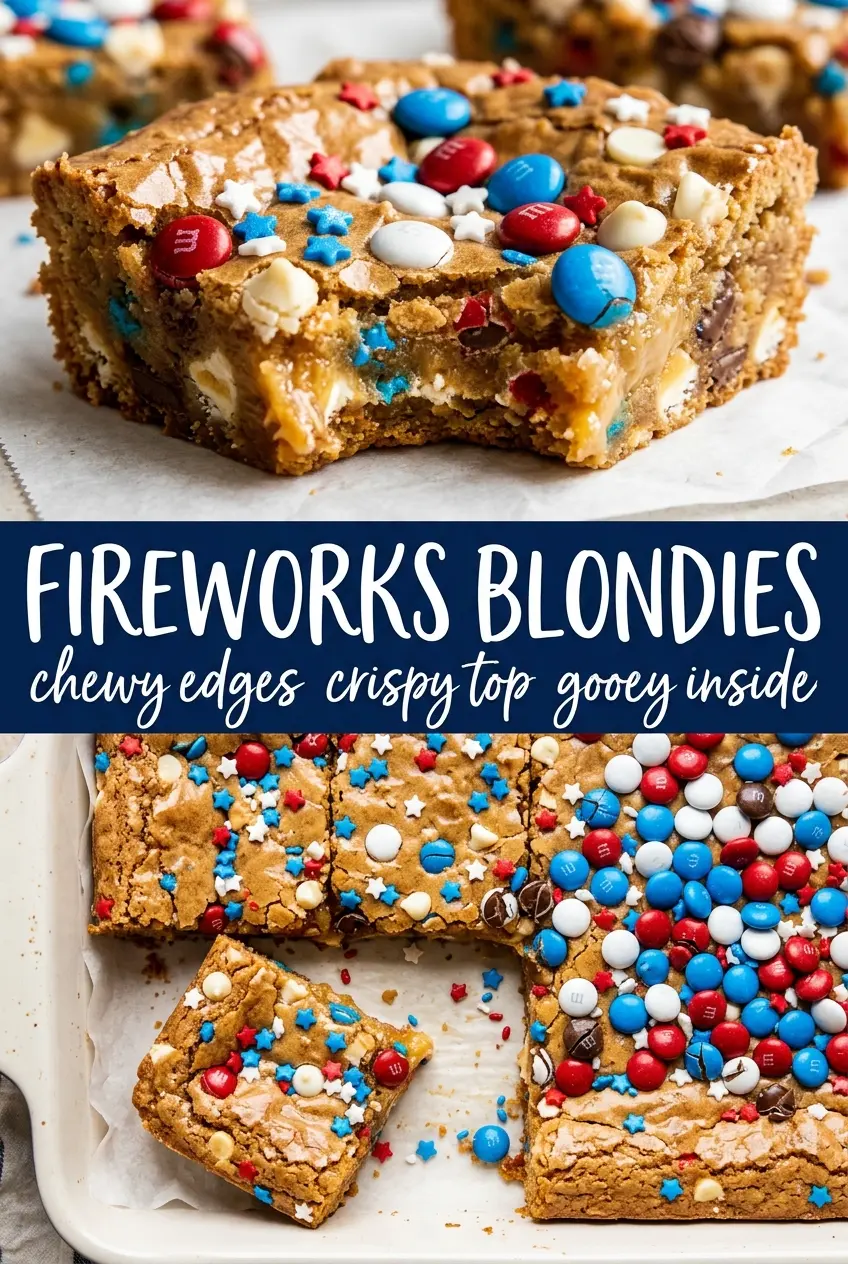
Thick, chewy blondies with glossy tops and colorful bursts of red, white, and blue in every bite have a way of disappearing fast from a dessert table. These fireworks blondies bake up dense in the best way: buttery, vanilla-forward, and packed with just enough candy and sprinkles to make each square feel festive without turning the crumb soggy or cakey.
The key is starting with melted butter and brown sugar, which gives you that deep caramel note and the fudgy chew blondies are supposed to have. An extra egg yolk adds richness and keeps the texture tender, while the flour gets mixed in just until the batter comes together. That small detail matters. Overmix the flour and you’ll lose the dense, bakery-style bite that makes these bars worth cutting into once they’ve cooled.
Below, I’m walking through the one texture cue that matters most in the oven, plus the ingredient swaps that still keep the bars chewy. If you’ve ever had blondies come out dry, pale, or too soft to slice cleanly, this version fixes those problems without any fussy steps.
The centers stayed chewy and the sprinkles held their color instead of bleeding everywhere. I baked mine for 24 minutes and the blondies set up perfectly after cooling.
Love the chewy texture and confetti-sprinkled look of these Fireworks Blondies? Save this one for the next time you need a bright, crowd-pleasing pan dessert.
The Trick to Keeping Fireworks Blondies Chewy Instead of Cake-Like
Blondies go wrong when they’re treated like brownies that need extra beating or extra time in the oven. This batter should stay thick and a little glossy, not fluffy. The melted butter and brown sugar create a dense base, and the egg yolk adds richness without loosening the structure too much.
The other place people lose the texture is the bake. Pull the pan when the center still has the faintest jiggle and the top looks set. If the middle is fully firm in the oven, the bars will finish dry after cooling. Blondies keep cooking in the hot pan, which is why that short rest on the counter matters just as much as the bake itself.
What Each Add-In Is Doing in These Blondies
- Brown sugar — This does the heavy lifting for both flavor and chew. Packed brown sugar gives the bars that caramel-like depth and helps them stay moist after cooling.
- Egg plus egg yolk — The whole egg sets the batter, and the extra yolk adds tenderness and a richer bite. If you skip the yolk, the blondies still bake, but they lose some of that fudgy center.
- All-purpose flour — This is one place where a swap changes the result fast. A 1:1 gluten-free blend can work, but the bars may be a touch more fragile, so let them cool completely before cutting.
- Red, white, and blue M&Ms and star sprinkles — These give the blondies their fireworks look and a little crunch in every slice. Don’t overload the batter with extra candy or the bars can bake up greasy and crumbly.
- White chocolate chips — They melt into creamy pockets and soften the candy-heavy texture. Chips work better than chopped white chocolate here because they hold their shape just enough to keep the bars neat.
Getting the Batter into the Pan Without Losing the Chew
Whisking the Base Until It Turns Glossy
Start by whisking the melted butter and brown sugar until the mixture looks smooth and shiny, almost like wet sand turning into caramel. That sheen matters because it tells you the sugar is evenly dispersed and ready to give the blondies their dense chew. Add the egg, yolk, and vanilla next, and whisk until the batter looks lighter and glossy on top. If it still looks separated or greasy, keep whisking for a few more seconds before adding the dry ingredients.
Mixing the Dry Ingredients Just Enough
Stir in the flour, baking powder, and salt only until you no longer see streaks of flour. The moment the dry ingredients disappear, stop. Overmixing builds gluten and makes the bars tough, which is the opposite of what you want in a chewy blondie. The batter will be thick, and that’s exactly what it should be.
Folding in the Candy and Sprinkles
Fold in the M&Ms, sprinkles, and white chocolate chips with a spatula so the mix-ins stay intact. If you stir aggressively, the sprinkles can streak through the batter and the candy can sink toward the bottom. Spread the batter into the pan in an even layer, then scatter a few extra sprinkles on top for a finished look once baked.
Baking for the Set Center
Bake at 350°F for 22 to 25 minutes. The top should look golden and set, and the center should still have the slightest wobble when you nudge the pan. If the edges look done but the middle is still shiny and loose, give it a couple more minutes; if the whole pan looks fully firm, you’ve probably gone a little too far. Cool completely in the pan before cutting so the bars can finish setting without crumbling.
How to Adjust These Blondies for Different Occasions
Make Them Gluten-Free with a 1:1 Baking Blend
A good 1:1 gluten-free flour blend can replace the all-purpose flour without changing the method. The texture will be a little more delicate, so let the blondies cool fully before lifting them from the pan and slicing. That cooling time keeps the squares neat instead of crumbly.
Swap the M&Ms for Chopped Chocolate
If you want a less colorful bar, use chopped milk or semisweet chocolate instead of the candy-coated pieces. You’ll lose the crunchy pop and the patriotic look, but you’ll gain deeper chocolate pockets that melt into the chewy crumb. The bars still stay festive if you keep the sprinkles on top.
Use Dairy-Free Butter and Chips
A plant-based butter that melts cleanly and dairy-free white chips both work here. The flavor will be a touch less rich than the original, but the bars still bake up chewy as long as the butter substitute behaves like real butter and isn’t overly soft from the package.
Storage and Reheating
- Refrigerator: Store in an airtight container for up to 5 days. The bars stay chewy, though the sprinkles may soften slightly.
- Freezer: These freeze well. Wrap individual squares and freeze for up to 2 months, then thaw at room temperature so the texture stays dense and soft.
- Reheating: Warm a square for 8 to 10 seconds in the microwave if you want the white chocolate to go soft again. Don’t overheat them, or the edges turn dry and the candy can get sticky.
Answers to the Questions Worth Asking
Fireworks Blondies
Ingredients
Equipment
Method
- Preheat the oven to 350°F and line an 8x8 baking pan with parchment paper for easy lifting. Keep the pan ready so the batter can go in immediately.
- Whisk the melted butter and brown sugar until smooth. The mixture should look glossy and cohesive.
- Add the large egg, egg yolk, and vanilla extract, then whisk until the batter turns shiny. Stop as soon as everything looks fully combined.
- Stir in the all-purpose flour, baking powder, and salt until just combined—do not overmix. Stop when no dry streaks remain.
- Fold in the red, white, and blue M&Ms, red and blue star sprinkles, and white chocolate chips. Spread-ins should be evenly distributed through the batter.
- Spread the batter evenly into the prepared pan and scatter extra star sprinkles on top. Use a light touch so the top stays mostly level.
- Bake at 350°F for 22–25 minutes, until the top is golden and set but the center has a very slight jiggle. Look for edges that appear set while the middle still trembles when gently nudged.
- Cool completely in the pan before cutting into squares. As it cools, the blondies firm up for clean slices.