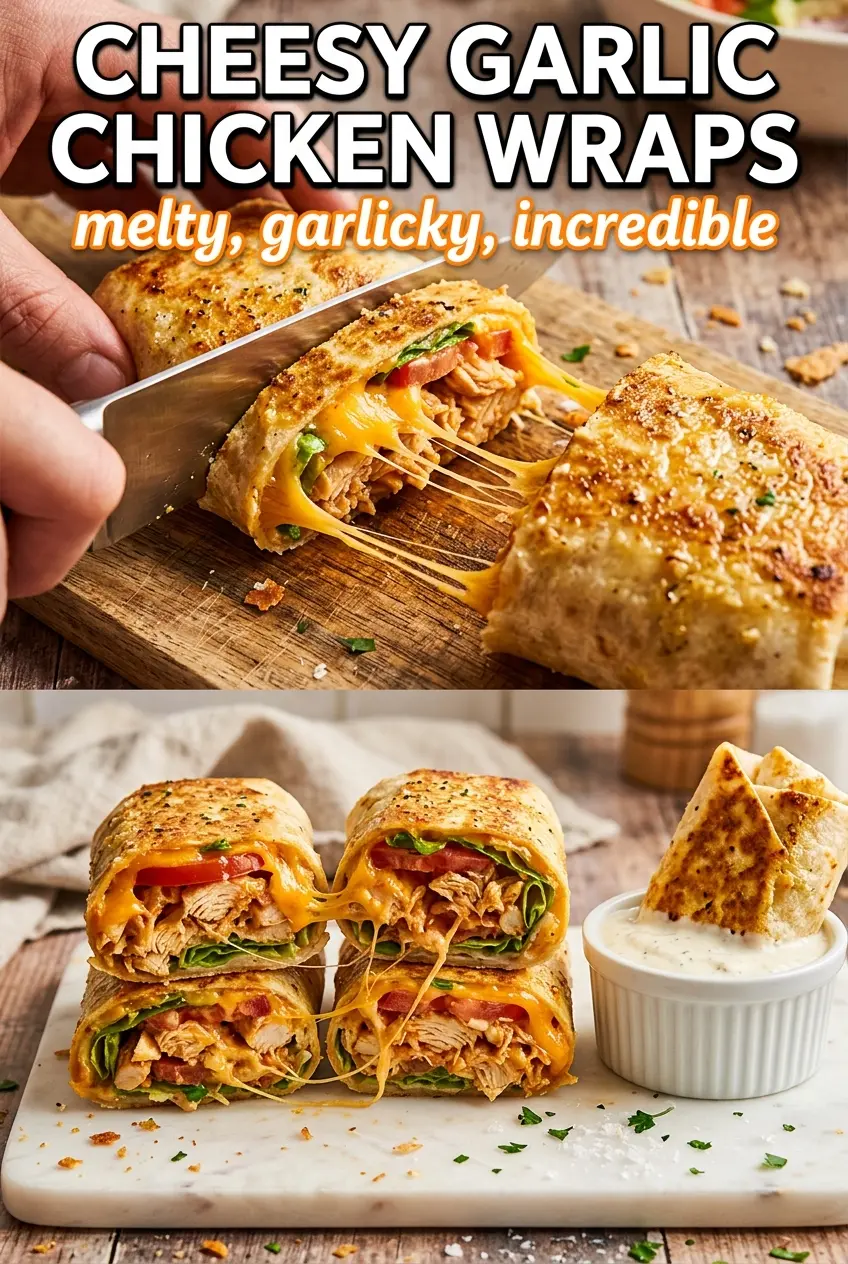
Golden tortillas, melted mozzarella, and garlicky chicken make these wraps the kind of lunch or quick dinner that disappears fast. The outside gets crisp and toasted while the inside stays juicy, creamy, and just messy enough to feel worth making. Cutting them in half is the best part: you get that stretch of cheese, the garlicky chicken, and the fresh crunch of romaine and tomato all in one bite.
What makes this version work is the order. The chicken gets cooked first so it can pick up color without steaming, then it gets tossed in butter and garlic off the heat long enough for the garlic to stay fragrant instead of bitter. The tortillas are warmed before rolling, which keeps them from cracking, and the final skillet toast seals everything together so the wrap eats like a grilled sandwich instead of a floppy burrito.
Below, I’m breaking down the small details that matter most: how to keep the chicken juicy, how to avoid soggy tortillas, and which dressing gives you the best balance with all that garlic and cheese.
The chicken stayed juicy and the garlic butter coated every strip without making the wrap greasy. I toasted mine a little longer and the cheese melted into the romaine just enough to hold everything together.
Save these cheesy garlic chicken wraps for the nights when you want a toasted wrap with melty mozzarella, juicy chicken, and minimal cleanup.
The Part Most Wraps Get Wrong: Filling Them Before the Tortilla Is Ready
The biggest problem with a chicken wrap is usually the tortilla, not the filling. If the tortilla is cold, it cracks when you roll it. If it’s overfilled, the seam pops open in the skillet before the cheese has a chance to melt and hold everything together. Warming the tortilla for just a few seconds makes it flexible enough to roll tight without tearing.
The other trap is moisture. Romaine and tomatoes belong in the wrap, but they need to sit above the cheese layer, not directly against the tortilla. The cheese acts like a barrier and helps the wrap toast into a crisp shell instead of soaking through. That little bit of structure is what turns this from a tossed-together lunch into something that actually eats cleanly.
What Each Ingredient Is Doing Inside the Wrap
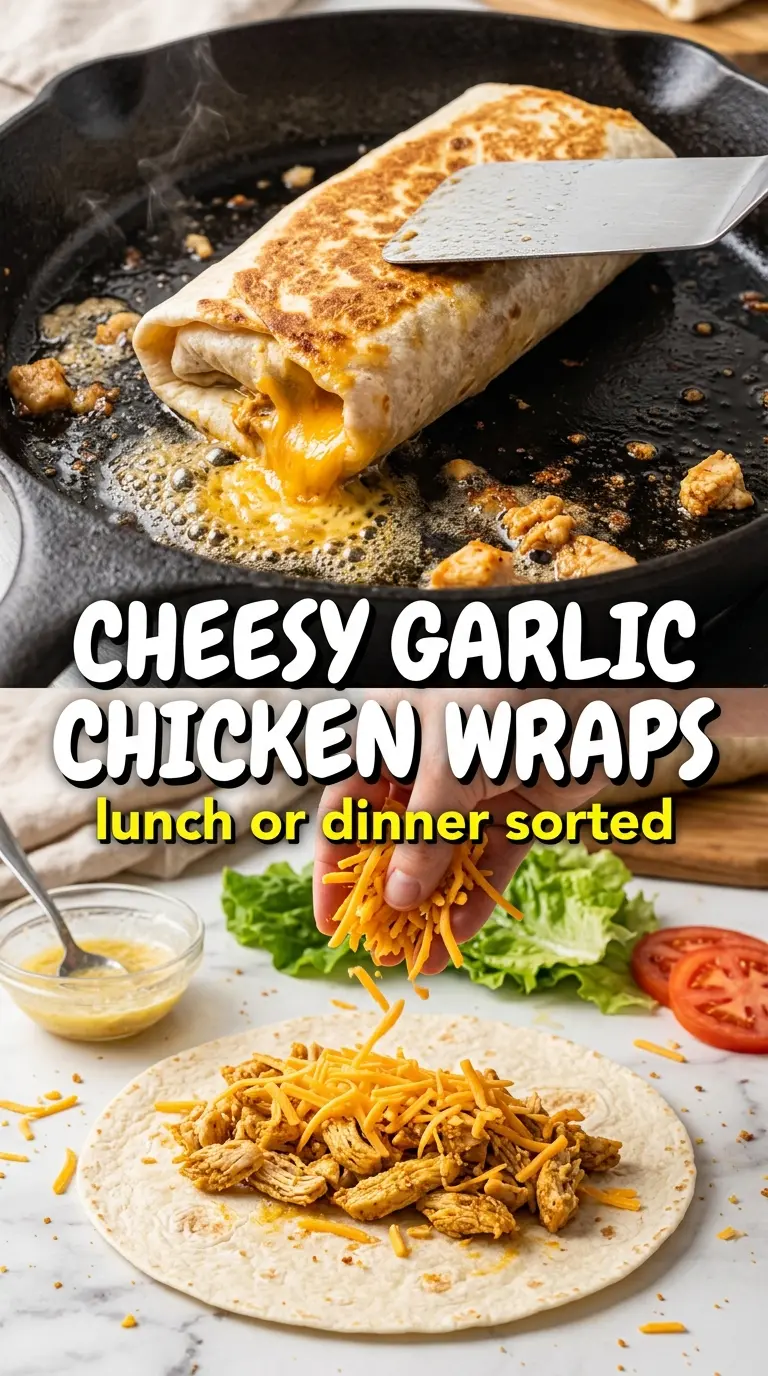
- Chicken breasts — Cutting them into strips helps them cook fast and evenly, and it gives you more surface area for browning. Chicken thighs will work if that’s what you have, but they’ll be a little richer and less lean.
- Butter and garlic — This is the backbone of the flavor. The garlic needs just a minute in the butter; any longer and it can turn sharp or bitter, especially once it hits the hot chicken.
- Mozzarella — Mozzarella gives you the melt and stretch that makes the wrap feel complete. A low-moisture shredded mozzarella melts best here; fresh mozzarella will release too much liquid and make the tortilla soft.
- Romaine and cherry tomatoes — They bring crunch and freshness so the wrap doesn’t taste heavy. Keep them cold and dry, and don’t add extra tomato juice from the cutting board or the wrap will go soggy fast.
- Ranch or Caesar dressing — This is the creamy layer that ties the garlic chicken and cheese together. Ranch gives you a little tang; Caesar leans saltier and more savory. Either one works, but keep it to a thin spread so the wrap doesn’t slide apart.
Building the Garlic Chicken So It Stays Juicy
Getting Color on the Chicken First
Cook the chicken strips in a hot skillet with half the butter and let them sit long enough to brown before you move them. If you stir constantly, they’ll steam instead of sear and the filling will taste flat. You’re looking for golden edges and opaque centers, and the safest point to pull them is 165°F in the thickest piece.
Turning Butter into Garlic Sauce Without Burning It
Once the chicken is done, lower the heat and add the remaining butter with the garlic. The garlic should sizzle gently and smell sweet within a minute. If the pan is too hot, pull it off the burner for a few seconds before stirring the garlic in; burned garlic will take over the whole wrap.
Rolling and Toasting for a Clean Slice
Spread the dressing first, then layer the cheese, chicken, lettuce, and tomatoes in that order. Roll it tightly, tuck the sides in, and place it seam-side down in the skillet so it seals shut. Two minutes per side over medium heat is enough to brown the tortilla and melt the cheese; if you rush it over high heat, the outside will darken before the center gets warm.
How to Adapt These Wraps for Different Days and Different Diets
Make It Gluten-Free
Use sturdy gluten-free tortillas that can handle folding and skillet toasting. Some brands crack if they’re rolled cold, so warm them longer than you would a wheat tortilla and work while they’re still soft. The filling doesn’t need to change.
Make It Lighter Without Losing the Garlic Chicken Flavor
Swap the ranch for a thin layer of plain Greek yogurt mixed with a pinch of salt and garlic powder, or use a lighter Caesar. You’ll lose a little richness, but the garlic butter chicken still carries the wrap, and the extra tang keeps it from tasting flat.
Use What You Have in the Cheese Drawer
Mozzarella is best for stretch, but Monterey Jack or a mild provolone will melt well too. Cheddar adds stronger flavor but not the same pull, so it’s better mixed with mozzarella than used alone. Stick with a low-moisture shredded cheese for the cleanest toast.
Turn It Into a Meal Prep Lunch
Cook the chicken and garlic ahead of time, then keep the components separate until you’re ready to assemble. Store the lettuce and tomatoes on the side so the wrap stays crisp, then toast it fresh when you’re eating. That keeps the tortilla from turning soft in the fridge.
Storage and Reheating
- Refrigerator: Store assembled wraps for up to 2 days, but expect the tortilla to soften a bit from the dressing and tomatoes.
- Freezer: I don’t recommend freezing assembled wraps because the lettuce and tomatoes turn watery. You can freeze the cooked garlic chicken on its own for up to 2 months.
- Reheating: Reheat the chicken filling in a skillet or microwave, then assemble fresh if possible. If the wrap is already rolled, warm it in a dry skillet over medium-low heat so the tortilla crisps without drying out the filling.
Questions I Get Asked About This Recipe
Cheesy Garlic Chicken Wraps
Ingredients
Equipment
Method
- Season the chicken strips with salt and pepper. Cook them in 2 tablespoons butter in a skillet over medium-high heat for 5-6 minutes, stirring occasionally, until golden and cooked through to 165°F.
- In the remaining 2 tablespoons butter, cook the minced garlic for 1 minute over medium-high heat until fragrant. Toss the cooked chicken strips in the garlic butter and stir in the chopped fresh parsley, then turn off the heat.
- Warm the tortillas until pliable so they roll without cracking. Spread ranch dressing over each tortilla in an even layer.
- Layer shredded mozzarella on each tortilla first, then add the garlic butter chicken strips. Top with shredded romaine lettuce and halved cherry tomatoes.
- Roll tightly and toast seam-side down in a skillet over medium heat for 2 minutes per side until golden and the cheese is melted.
- Slice the wraps diagonally and serve immediately so the cheese stays stretchy.