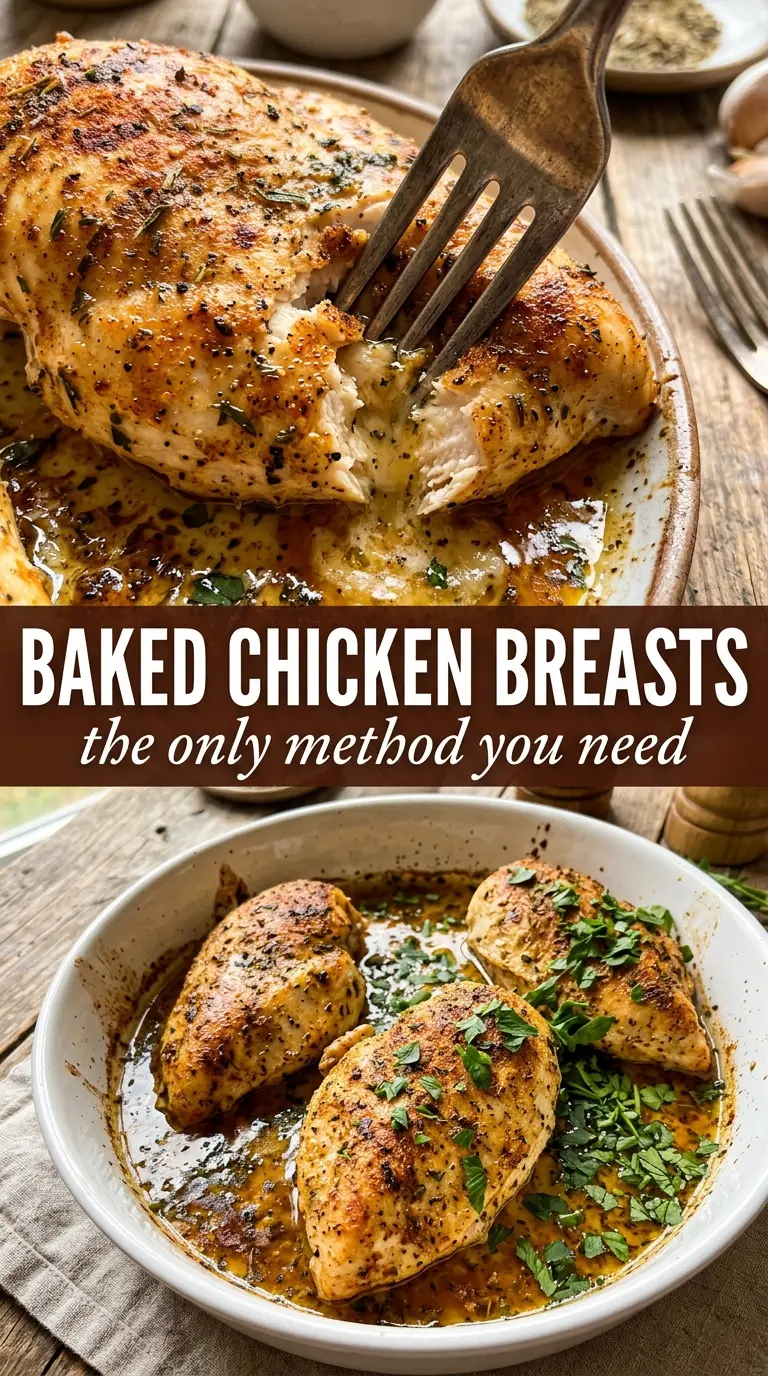
Juicy baked chicken breasts don’t happen by accident. The difference between dry, bland chicken and a pan of tender, golden cutlets comes down to thickness, heat, and pulling them from the oven at the right moment. This version gives you seasoned chicken with a lightly caramelized crust and a clean, simple finish that works with almost anything on the table.
Pounding the breasts to an even thickness matters here more than almost anything else. Uneven chicken cooks unevenly, which is how you end up with one end dry while the thicker part is still catching up. A hot oven helps the surface brown before the meat has time to lose too much moisture, and the olive oil carries the spices so they actually cling instead of baking off into the dish.
Below, I’m walking through the small details that make baked chicken breasts stay tender instead of stringy, plus a few ways to adapt the seasoning when you want a different direction without changing the method.
The chicken stayed juicy all the way through, and the spice rub formed a gorgeous crust instead of sliding off in the pan. I checked it at 18 minutes and it was perfect with a quick rest.
Juicy baked chicken breasts with a golden herb crust are worth saving for busy nights when you need a reliable main dish.
The Reason Most Baked Chicken Dries Out Before It Browns
The usual mistake is chasing color in the oven for too long. Chicken breasts are lean, and if they sit in the heat until the middle finally looks done, the outer layers have already lost the moisture they had. That’s why this method starts with even thickness and a hot oven; the surface gets a chance to take on that golden, seasoned crust before the interior goes past 165°F.
Another thing that helps is the oil. It isn’t there just to keep the chicken from sticking. It helps the seasoning bloom on the surface and gives the spices a better chance to toast instead of turning dusty. If the chicken looks pale at the end, the oven likely wasn’t fully preheated or the breasts were crowded in a dish that trapped steam around them.
What Each Ingredient Is Actually Doing in This Recipe
- Primary ingredient (the star) — Quality matters most. Choose the best you can find.
- Cooking medium (oil, butter, or broth) — This carries flavors and prevents dryness.
- Seasonings (salt, pepper, spices, herbs) — Layer flavors so nothing overpowers. Build depth gradually.
- Aromatics (garlic, onion, herbs) — Cook with fat to bloom flavors. Become the foundation.
- Supporting ingredients — Complement the main ingredient without overpowering it.
- Sauce or liquid (if applicable) — Brings flavors together. Balance richness with acid.
- Acid (lemon, vinegar, wine, or other) — Brightens and prevents flat-tasting results.
- Final finish (garnish, glaze, or sauce) — Prevents one-dimensional taste and adds visual appeal.
What the Seasoning Is Actually Doing Here
- Olive oil — This helps the spices stick and encourages browning. A neutral oil works if that’s what you have, but olive oil gives the surface a little more depth.
- Garlic powder, onion powder, smoked paprika, and Italian seasoning — This mix gives the chicken a savory crust without needing a marinade. Fresh garlic can burn in this short bake, so powder is the better choice here.
- Chicken breasts — Look for pieces that are close in size so they finish together. If one breast is much thicker, pound it to match the others instead of letting the thinner pieces overcook while you wait for the thick one.
- Lemon wedges and parsley — They don’t just garnish the plate. The lemon wakes up the seasoned surface right before serving, which matters on a simple dish like this where every bite counts.
How to Bake Chicken Breasts So They Stay Juicy
Evening Out the Thickness
Start by pounding the chicken breasts to an even 3/4-inch thickness if they’re uneven. Put them between two sheets of plastic or inside a zip-top bag and use a rolling pin or meat mallet to flatten the thicker end. The goal isn’t to make them thin; it’s to make them uniform. If you skip this, the narrow end will turn dry before the center is ready.
Coating the Surface
Brush both sides with olive oil, then rub on the seasoning mix in an even layer. You want the spices to look like a light blanket, not a clumpy paste. If the seasoning falls off, the chicken was too wet when it was coated, so pat it dry first next time. Dry surface plus oil equals better color and a better crust.
Watching for the Right Finish
Bake at 425°F for 18 to 22 minutes, depending on the thickness of the breasts. Start checking early if your pieces are on the smaller side. Pull them when the internal temperature reaches 165°F and the tops are golden. The carryover heat finishes the center during the rest, so don’t wait for the chicken to look overdone in the oven.
Letting the Juices Settle
Rest the chicken for 5 minutes before slicing. That short pause keeps the juices from running out onto the cutting board the second the knife goes in. If you cut too soon, even perfectly cooked chicken can seem dry because the moisture hasn’t had time to redistribute through the meat.
How to Adapt These Baked Chicken Breasts for Different Meals
Make it dairy-free and gluten-free without changing the method
This recipe already fits both of those needs as written, which is one reason it works so well for mixed-diet dinners. Just check that your seasoning blend doesn’t contain anti-caking additives or hidden gluten if you’re using a pre-mixed Italian seasoning.
Swap the spice profile for a different direction
Keep the oil and salt, then change the seasonings to chili powder, cumin, and a pinch of cayenne for a warmer, smokier version. The method stays the same, but the flavor shifts from herby to more savory and bold.
Use chicken cutlets for a faster bake
If you buy thin-sliced chicken breasts, shorten the bake time and start checking around 12 to 15 minutes. They cook fast, and the biggest mistake is treating them like full-sized breasts and letting them dry out before the center reaches temperature.
Storage and Reheating
- Refrigerator: Store for up to 4 days in an airtight container. The crust softens a little, but the chicken stays useful for salads, sandwiches, and grain bowls.
- Freezer: Freezes well for up to 2 months if you slice it first and wrap it tightly. Thaw in the refrigerator so the texture stays as even as possible.
- Reheating: Warm gently in a covered skillet with a splash of water or broth, or in a 300°F oven until just heated through. The common mistake is blasting it in the microwave too long, which turns the edges tough before the center is warm.
Answers to the Questions Worth Asking

Baked Chicken Breasts
Ingredients
Equipment
Method
- Preheat oven to 425°F and lightly grease a baking dish to create a hot surface for even browning.
- Pound chicken breasts to an even 3/4-inch thickness if they vary in size so they finish cooking at the same time.
- Brush both sides of each chicken breast with olive oil to help the crust brown.
- Mix garlic powder, onion powder, smoked paprika, Italian seasoning, salt, and cracked black pepper, then rub evenly over both sides of the chicken for fragrant, golden seasoning coverage.
- Bake for 18-22 minutes at 425°F until internal temperature reaches 165°F and the tops are golden; do not overbake to keep the interior juicy.
- Rest for 5 minutes before slicing, then garnish with fresh parsley and lemon wedges for a bright finish.