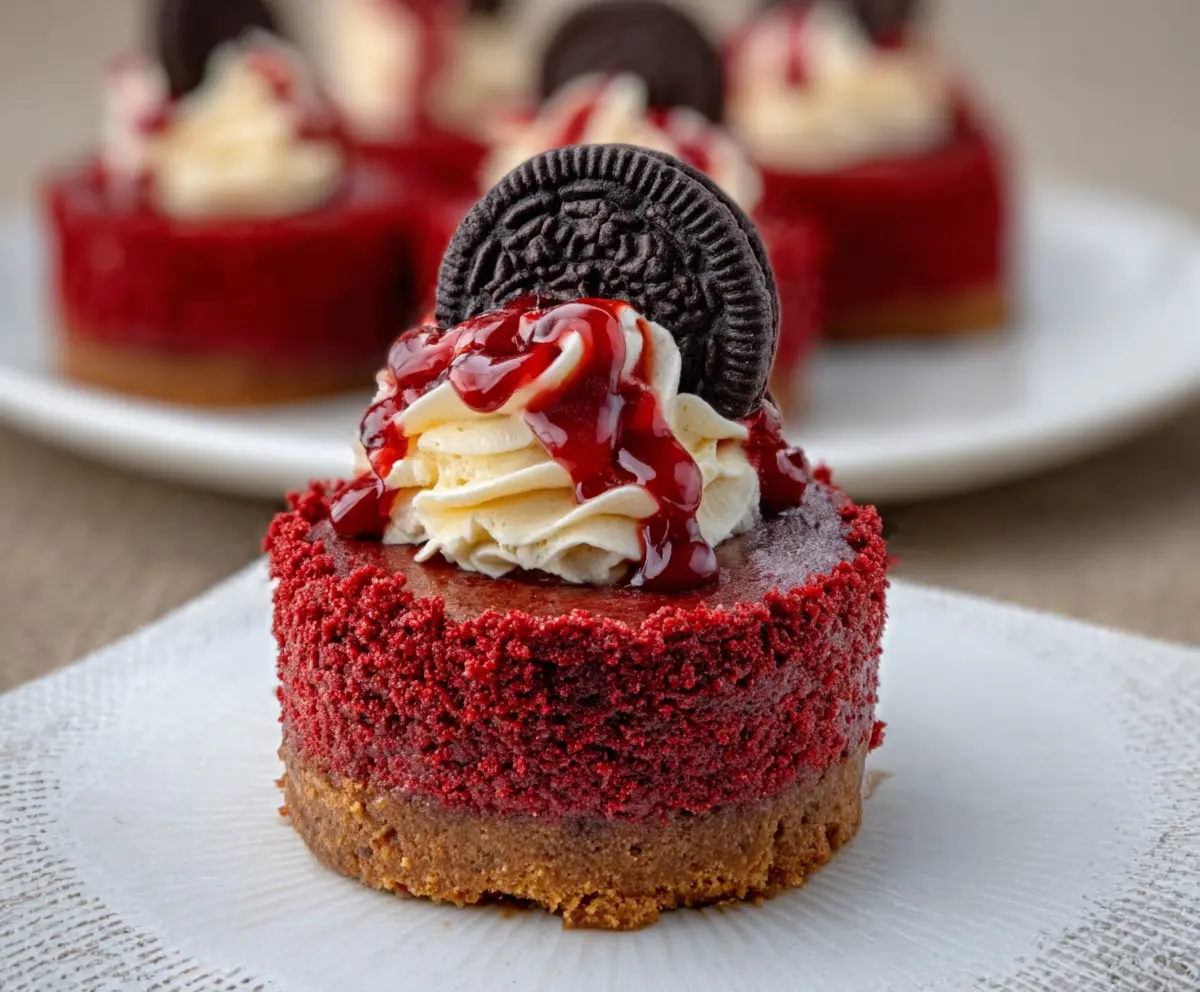
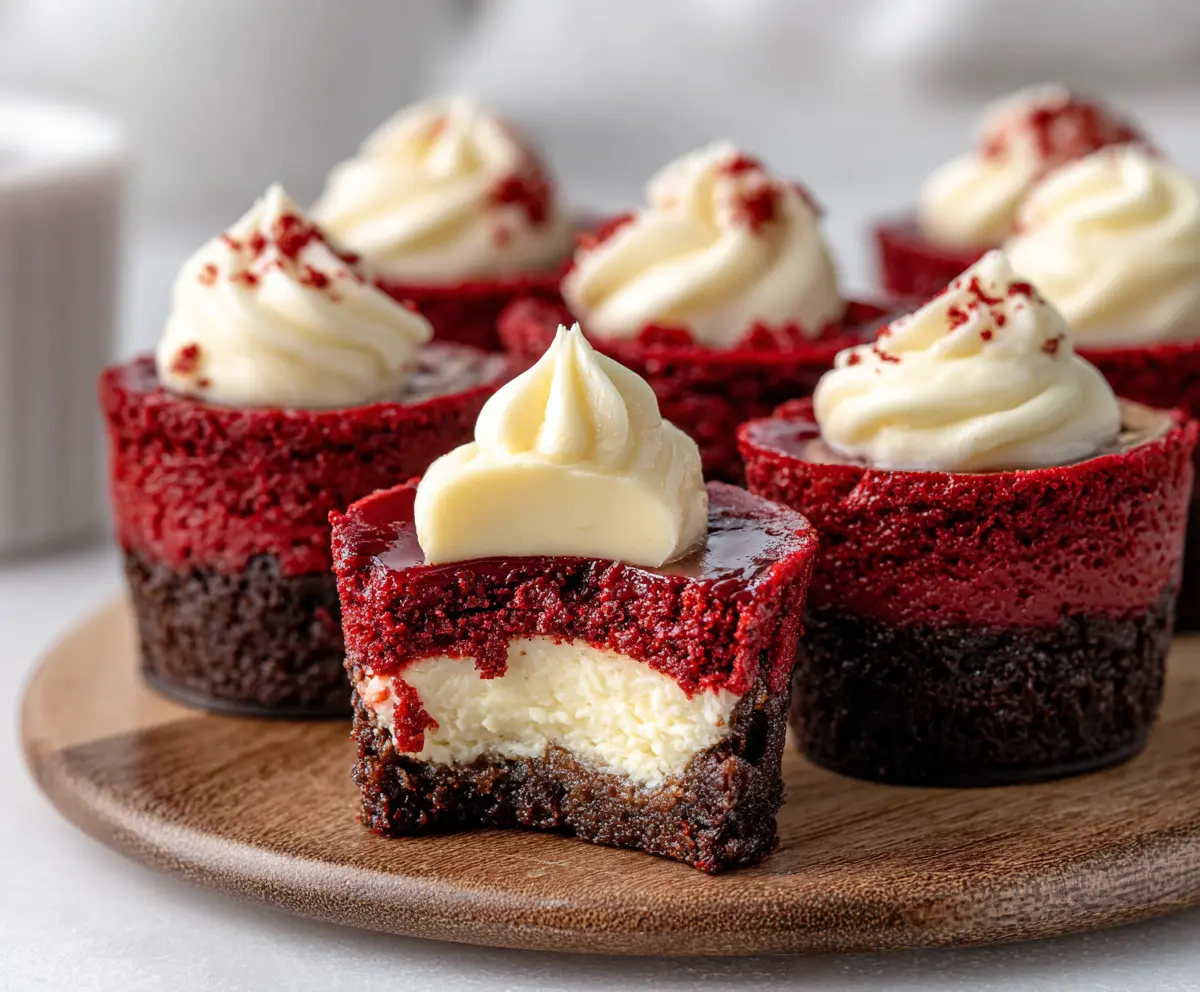
Mini Red Velvet Cheesecakes are the perfect little treats that bring together the rich, velvety taste of red velvet cake and the smooth, creamy goodness of cheesecake. These bite-sized desserts are just the right balance of sweet, tangy, and colorful, making them stand out on any dessert table or after-dinner spread.
I love making these because they’re so easy to share and everyone seems to smile a little bigger when they see these cute, festive mini cheesecakes. One of my favorite things about this recipe is how the classic red velvet flavor is complemented by the creamy cheesecake filling—it’s like having the best of both worlds in one tasty bite. Plus, the little swirl of cream cheese frosting on top is my favorite finishing touch!
Whenever I serve these, I like to chill them well so they hold their shape and taste extra refreshing. They’re great for parties or just as a little sweet pick-me-up during the week. Honestly, once you try these mini red velvet cheesecakes, you might find yourself making them again and again, just like I did!
Key Ingredients & Substitutions
Graham cracker crumbs: These create a crunchy base for the cheesecake. If you don’t have them, crushed digestive biscuits or vanilla wafer cookies work well too.
Red velvet cake layer: The classic ingredients include cocoa powder and red food coloring. If you prefer natural options, beet juice or pomegranate juice can add color, but the flavor will be a little different.
Cream cheese: It’s important the cream cheese is softened for smooth cheesecake batter. You can use Neufchâtel cheese for a lighter option, but the texture will be slightly less creamy.
Heavy cream: For whipping the topping, cold heavy cream whips best. If dairy is an issue, coconut cream is a good alternative that whips nicely and adds a subtle flavor.
Mini Oreo cookies: These are a cute garnish. You can swap them for chocolate chips, sprinkles, or any mini cookie you like to suit your taste or theme.
How Can I Prevent Cracks in Mini Cheesecake?
Cracks happen when the cheesecake cools too fast or gets overbaked. Here’s a simple way to avoid that:
- Don’t overbeat the cheesecake batter—mix just until smooth to avoid adding too much air.
- Bake at a lower temp (like 300°F) and check the cheesecake early. It should feel firm on the edges with a slight jiggle in the center.
- Cool gradually by turning the oven off, cracking the door, and leaving the cheesecakes inside for one hour.
- Chill thoroughly after cooling. Refrigerating overnight helps the texture set and flavors develop.
These steps help keep the cheesecake smooth and crack-free, making your mini treats look as nice as they taste!
Equipment You’ll Need
- 12-cup muffin tin – I find it helps keep the cheesecakes perfectly shaped and easy to serve.
- Paper liners or silicone molds – they make removing the mini cheesecakes simple and mess-free.
- Mixing bowls – for preparing the crust, cake layer, and topping.
- Whisk or hand mixer – to mix ingredients smoothly without lumps.
- Small saucepan – to melt butter and warm ingredients if needed.
- Piping bag or spoon – to neatly add the cheesecake batter over the crust.
- Electric mixer or whisk – for whipping the heavy cream for topping.
- Spatula – for spreading and smoothing layers.
Flavor Variations & Add-Ins
- Use cream cheese plus mascarpone or sour cream for extra richness or tang.
- Top with crushed cookies, candies, or chopped nuts for added texture and flavor.
- Replace raspberry or strawberry sauce with caramel, chocolate, or lemon glaze for a different twist.
- Add a splash of vanilla, peppermint extract, or citrus zest to customize the flavor profile.
Mini Red Velvet Cheesecake
Ingredients You’ll Need:
For the Crust:
- 1 ½ cups graham cracker crumbs
- 2 tbsp granulated sugar
- 6 tbsp unsalted butter, melted
For the Red Velvet Cake Layer:
- 1 cup all-purpose flour
- 1 tbsp unsweetened cocoa powder
- ½ tsp baking powder
- ¼ tsp salt
- ⅓ cup buttermilk
- 2 tbsp red food coloring
- 1 large egg
- ¼ cup granulated sugar
- 2 tbsp vegetable oil
- 1 tsp vanilla extract
- 1 tsp white vinegar
For the Cheesecake Layer:
- 8 oz cream cheese, softened
- ⅓ cup granulated sugar
- 1 large egg
- 1 tsp vanilla extract
For the Topping:
- ½ cup heavy cream
- 2 tbsp powdered sugar
- ¼ tsp vanilla extract
- Red velvet cake crumbs (reserved from trimming or extra crumb mix)
- Raspberry or strawberry sauce for drizzling
- Mini Oreo cookies (or similar chocolate sandwich cookies)
How Much Time Will You Need?
Getting these mini cheesecakes ready will take about 20 minutes of prep time, plus around 40 minutes for baking in two stages. Then, allow about 1 hour to cool in the oven and at least 4 hours (or overnight) in the fridge to set properly. Altogether, plan for around 6 hours, mostly hands-off chilling time.
Step-by-Step Instructions:
1. Prepare the crust:
Preheat your oven to 325°F (165°C). In a medium bowl, mix graham cracker crumbs, sugar, and melted butter until everything is evenly moistened. Press about a tablespoon of this mixture into the bottom of each cup of a 12-cup muffin tin lined with paper liners or silicone molds. Bake the crusts for 5 to 7 minutes until they’re set. Take them out and set aside.
2. Make the red velvet cake batter:
In one bowl, whisk together flour, cocoa powder, baking powder, and salt. In another bowl, combine buttermilk, red food coloring, egg, sugar, vegetable oil, vanilla extract, and vinegar. Mix the wet ingredients until smooth. Gradually stir the dry mixture into the wet, just until combined.
3. Bake the cake base:
Add about 1 to 2 tablespoons of the red velvet batter on top of each crust in the muffin cups. Bake at 325°F (165°C) for 10 to 12 minutes, or until a toothpick comes out mostly clean. Let them cool a bit before moving on.
4. Prepare the cheesecake layer:
Lower the oven temperature to 300°F (150°C). Beat the softened cream cheese in a large bowl until smooth. Add sugar and mix well. Then add the egg and vanilla, mixing until creamy. Gently spoon or pipe the cheesecake batter over each red velvet cake base, filling nearly to the top.
5. Bake the cheesecakes:
Bake at 300°F (150°C) for about 20 to 25 minutes, until the cheesecake is set but still slightly jiggly in the center. Turn off the oven and crack the door open, letting cheesecakes cool inside for an hour — this helps prevent cracking. Afterward, remove them from the oven, let cool completely at room temperature, and then chill in the refrigerator for at least 4 hours or overnight.
6. Prepare the topping:
Whip the heavy cream with powdered sugar and vanilla extract until stiff peaks form. Pipe a pretty swirl of whipped cream on top of each chilled mini cheesecake. Drizzle raspberry or strawberry sauce over the top, sprinkle red velvet crumbs around or on the whipped cream, and finish with a mini Oreo cookie.
7. Serve and enjoy:
Carefully remove the cheesecakes from the muffin tin or molds. Serve these delightful mini red velvet cheesecakes chilled. Enjoy their creamy, festive flavor!
Can I Use Frozen Cream Cheese for the Cheesecake Layer?
It’s best to use cream cheese that’s fully thawed and softened for smooth, creamy batter. Thaw frozen cream cheese overnight in the fridge and bring it to room temperature before mixing.
Can I Make Mini Red Velvet Cheesecakes Ahead of Time?
Absolutely! Prepare them the day before and keep them refrigerated in an airtight container. This actually helps the flavors meld and makes serving easier.
How Should I Store Leftover Mini Cheesecakes?
Store leftovers in an airtight container in the fridge for up to 4 days. For longer storage, freeze them for up to 2 months and thaw in the refrigerator overnight before serving.
Can I Substitute the Red Food Coloring?
Yes! You can use natural alternatives like beet juice or pomegranate juice, but the color and flavor will be slightly different. Adjust quantities to get the desired shade.