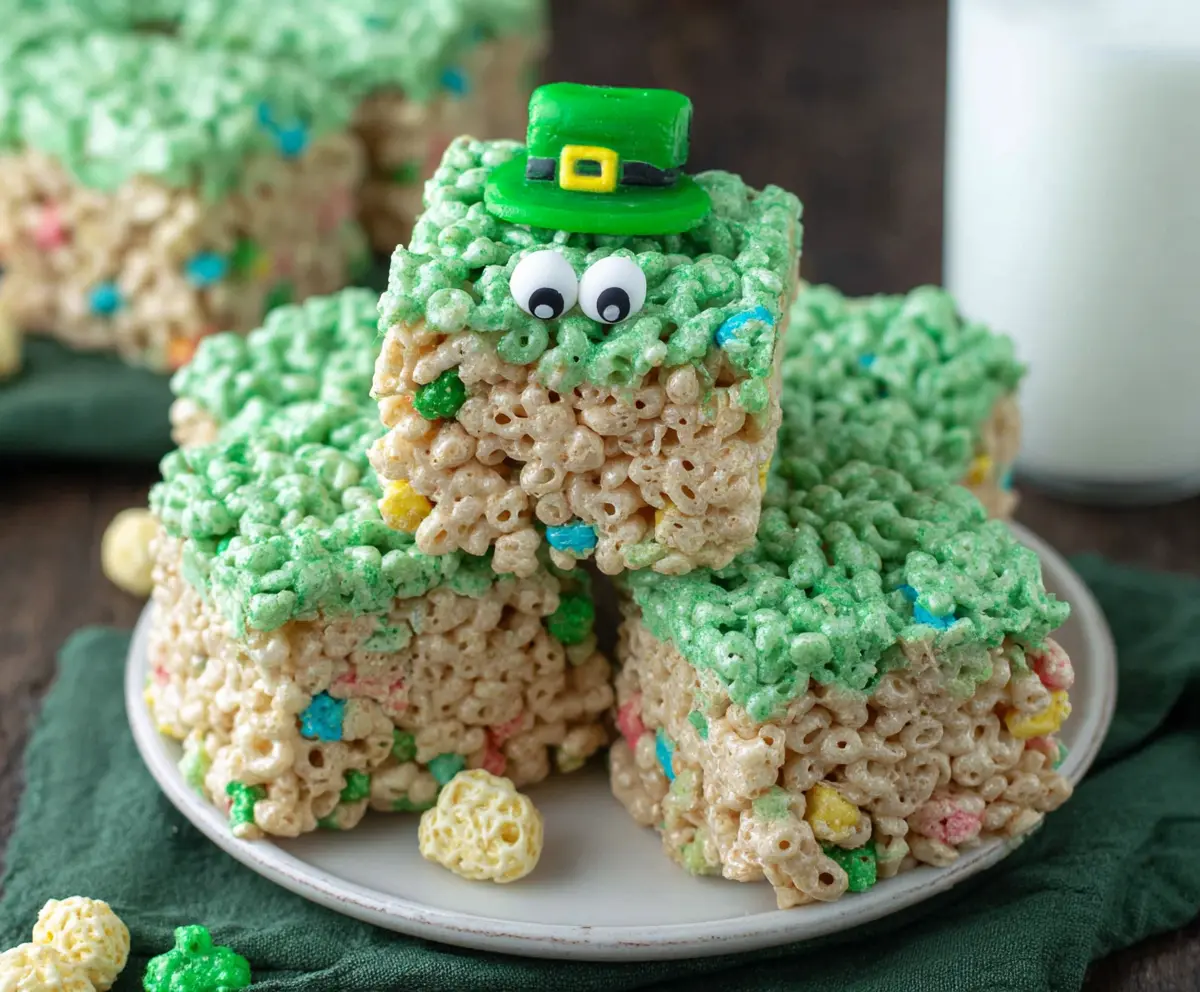
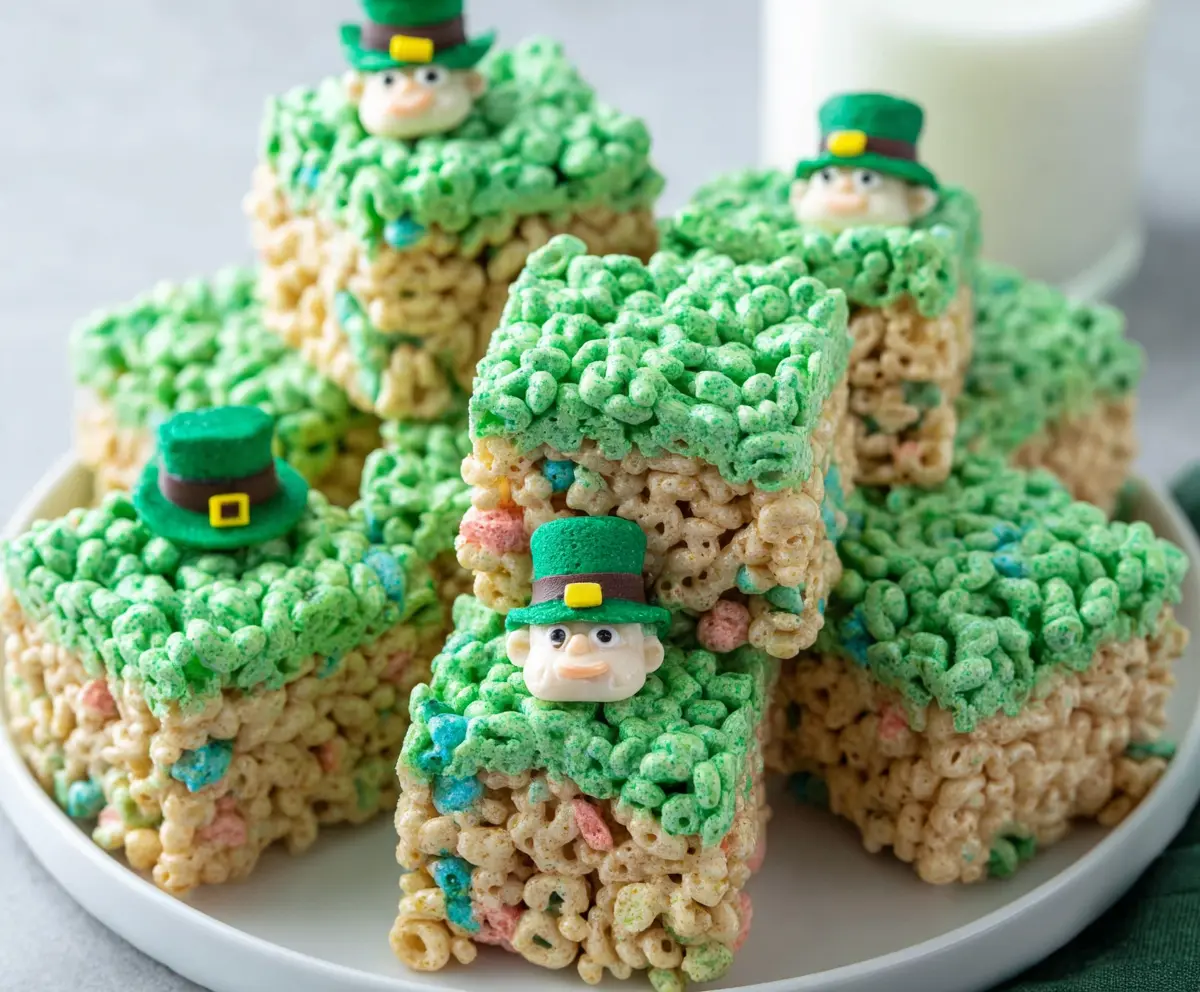
Lucky Leprechaun Rice Krispie Treats are a fun and festive twist on the classic Rice Krispie treat. These sweet, crispy, and chewy treats usually feature colorful green marshmallows or sprinkles that give them a cheerful St. Patrick’s Day vibe. They’re light, crunchy, and just the right amount of sticky, making them a perfect snack for kids and adults alike.
I love making these treats with my family because they’re so easy and bring everyone together in the kitchen. Adding a bit of green food coloring or some lucky-themed decorations makes the whole process even more enjoyable. I always find that the kids get extra excited when they help shape or decorate the treats, which turns baking into a fun little party.
These Lucky Leprechaun Rice Krispie Treats are great to bring to a gathering or to add a bit of holiday cheer to your day. I like cutting them into small squares and serving them alongside a glass of milk. They’re sweet without being heavy, and they always bring smiles around the table. Plus, they’re one of those recipes you can whip up quickly if you need a last-minute festive snack!
Key Ingredients & Substitutions
Lucky Charms cereal: This is the star for flavor and fun marshmallow bits. If you can’t find it, regular Rice Krispies work fine, but add some colored mini marshmallows to mimic the look.
Mini marshmallows: These give the treats their gooey texture. You can use vegan marshmallows if you prefer a dairy-free or vegan option.
Butter: Helps melt and bind the marshmallows. If you’re dairy-free, coconut oil or a dairy-free butter substitute can work just as well.
Green gel food coloring: This adds the festive color without watering down the marshmallow mix. Liquid food coloring can be used but start with less to avoid thinning the mixture.
How Do You Get the Perfect Sticky and Crispy Texture?
Getting the marshmallows melted just right is key to treat success. Overheating makes them tough; underheating leaves clumps.
- Melt butter on low heat first, to prevent burning.
- Add marshmallows gradually and stir constantly.
- Once smooth and fully melted, remove from heat immediately before adding cereal.
- Work quickly to mix the cereal while the marshmallow is still warm and sticky.
- Press mix firmly but not too hard into the pan using a buttered spatula or wax paper to prevent sticking.
- Let cool fully at room temperature—cutting too soon can cause crumbling.
Following these tips will give you soft, chewy, yet crispy treats that hold their shape well.
Equipment You’ll Need
- 9×13 inch baking pan – I like it because it’s the perfect size to hold the treats and makes cutting easy.
- Large saucepan – essential for melting the butter and marshmallows smoothly.
- Wooden spoon or spatula – helps stir everything together and keeps the mixture from sticking.
- Measuring cups and spoons – for accurate ingredient amounts.
- Wax paper or parchment paper (optional) – for pressing the mixture into the pan without sticking.
Flavor Variations & Add-Ins
- Use different cereals like Cocoa Pebbles or Fruity Pebbles for new flavors and colors.
- Add mini chocolate chips or colorful sprinkles to make treats more festive.
- Mix in chopped nuts or dried fruit for extra texture and flavor.
- Swirl in a spoonful of peanut butter or melted white chocolate for a richer treat.
Lucky Leprechaun Rice Krispie Treats
Ingredients You’ll Need:
- 6 cups Lucky Charms cereal
- 4 cups mini marshmallows
- 3 tablespoons unsalted butter
- Green gel food coloring
- Edible candy eyes (optional, for decoration)
- Small fondant or icing decorations (like little leprechaun hats) for garnish (optional)
Time You’ll Need:
This recipe takes about 10 minutes to prepare, plus about 1 hour to let the treats cool and set before cutting and decorating. It’s a quick and fun treat for your St. Patrick’s Day celebrations!
Step-by-Step Instructions:
1. Prepare Your Pan:
Lightly grease a 9×13 inch baking pan with butter or line it with parchment paper. This makes it easy to remove the treats later.
2. Melt Butter and Marshmallows:
In a large saucepan over low heat, melt the butter. When melted, add the mini marshmallows. Stir constantly until the marshmallows are completely melted and the mixture is smooth.
3. Add Color and Mix with Cereal:
Remove the pan from heat. Quickly stir in green gel food coloring until the marshmallow mixture is the shade of green you like.
Pour this green mixture over about half of the Lucky Charms cereal. Gently fold together until the cereal is evenly coated. Set this green portion aside.
4. Mix the Remaining Cereal:
In a large bowl, combine the remaining Lucky Charms cereal with the other half of the marshmallow mixture without coloring (or keep it plain if you prefer). You can also mix all cereal with marshmallow first, then separate and color part of it green to create a two-toned look.
5. Assemble and Set:
Press the green-coated cereal mixture firmly and evenly into the prepared pan first, then layer or swirl the plain cereal mixture on top if you want the two-tone effect. Use a buttered spatula or wax paper to press the mix in without sticking.
Let the treats cool and set for about 1 hour at room temperature.
6. Decorate and Serve:
Once set, cut the treats into squares. Decorate some pieces by adding edible candy eyes and small fondant leprechaun hats to make fun “lucky leprechaun” faces. Enjoy your festive, tasty treats!
Can I Use Regular Rice Krispies Instead of Lucky Charms?
Yes! Regular Rice Krispies work perfectly. To keep the fun St. Patrick’s Day spirit, consider adding colorful mini marshmallows or green sprinkles to mimic the marshmallows in Lucky Charms.
How Should I Store Leftover Treats?
Store them in an airtight container at room temperature for up to 3 days. Avoid refrigerating, as that can make them hard and less chewy.
Can I Make These Treats Ahead of Time?
Absolutely! You can prepare and shape the treats a day in advance. Just keep them covered at room temperature to maintain freshness.
How Do I Avoid the Treats from Sticking to My Hands?
Lightly butter or spray your hands with nonstick spray before pressing or shaping the treats. You can also use a buttered spatula or wax paper to help press the mixture evenly.