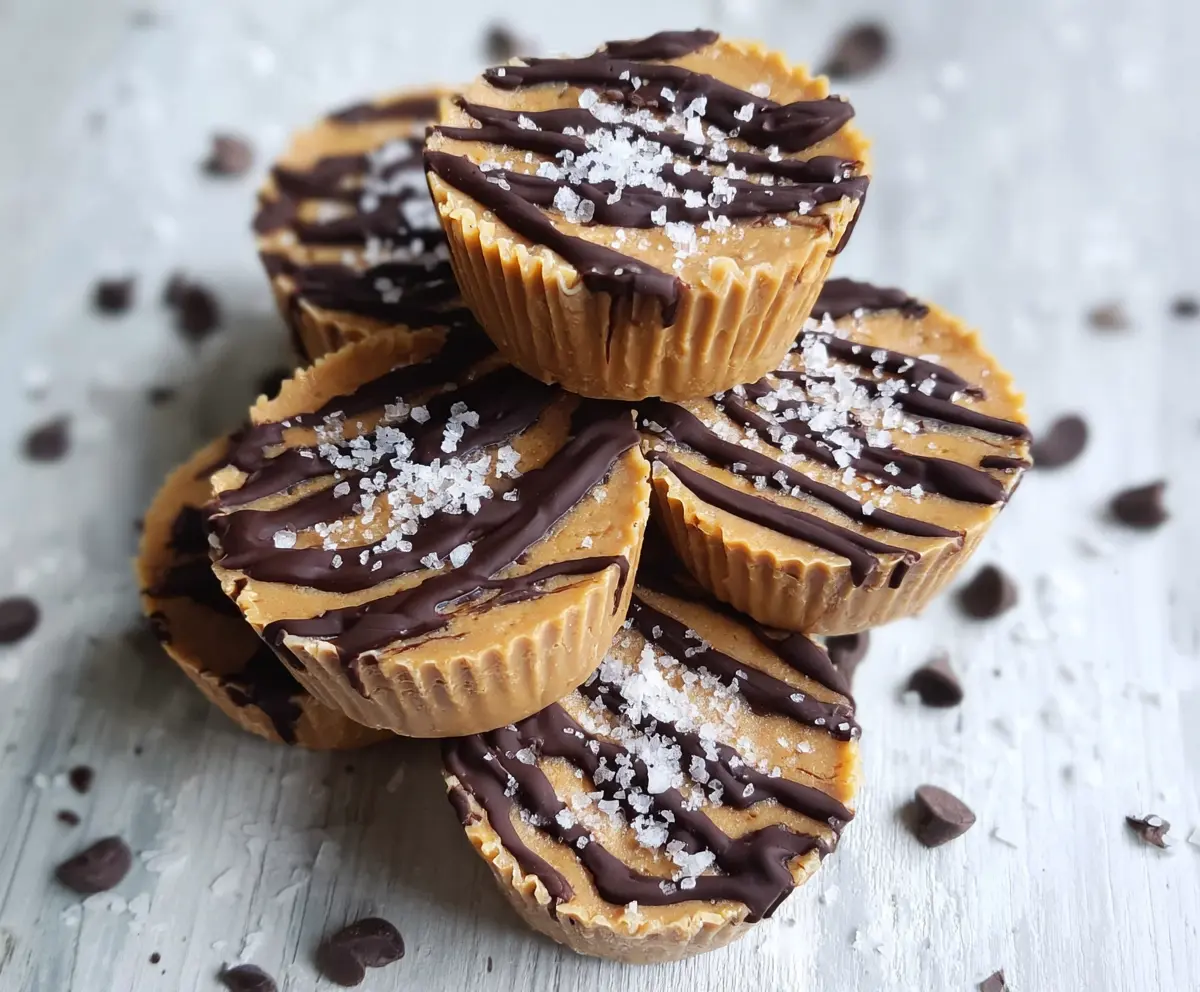
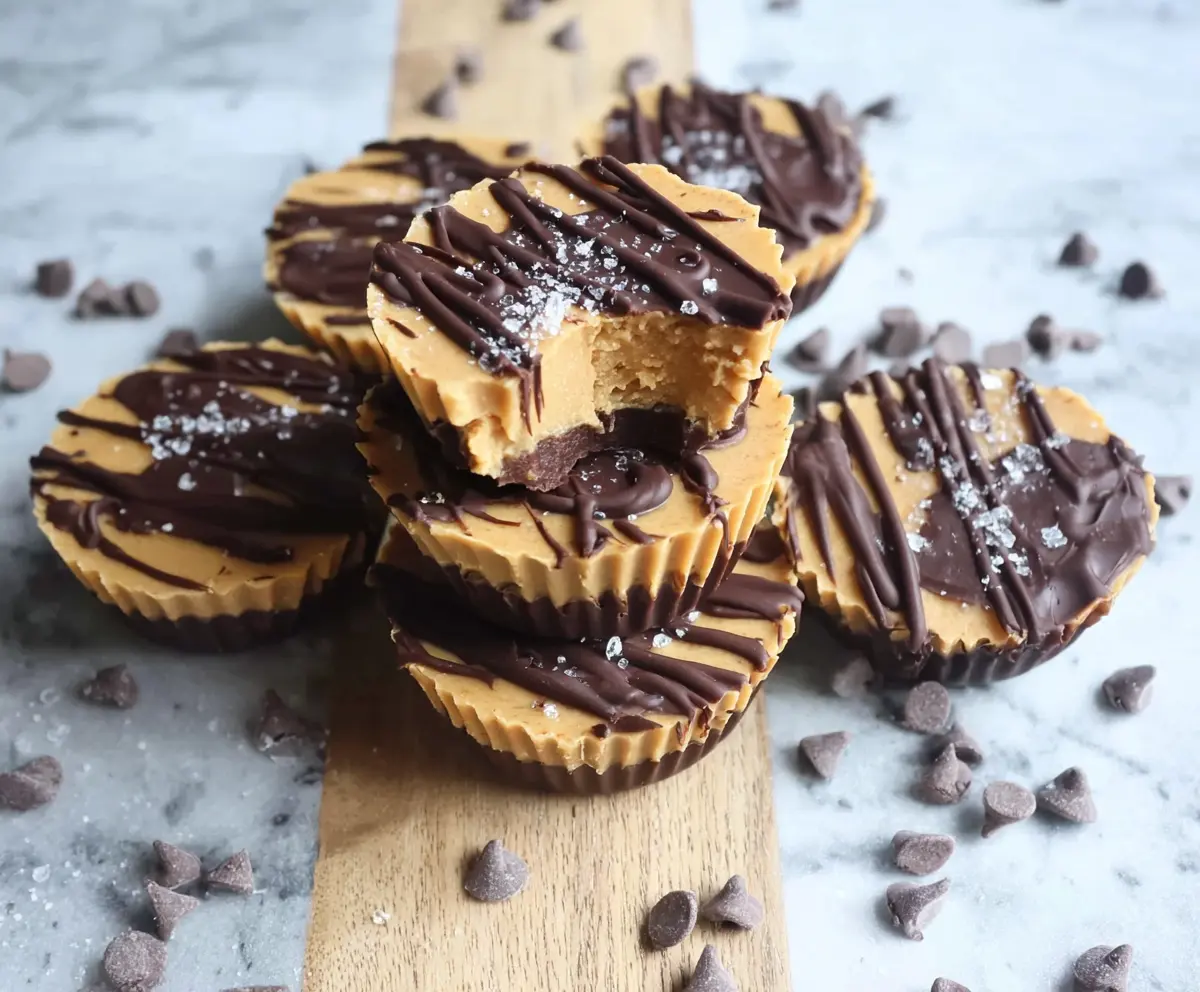
These Healthy 3-Ingredient Peanut Butter Cups are a simple and tasty treat you can whip up in no time. Made with just peanut butter, a bit of natural sweetener, and dark chocolate, they’re rich, creamy, and perfect for satisfying your sweet tooth without a long ingredient list.
I love making these because they don’t require any fancy baking skills or hard-to-find ingredients. Plus, I can control exactly what goes into them, making them a guilt-free snack that still feels like a little celebration. They’re a great way to enjoy a classic peanut butter cup but with fewer additives and less sugar.
My favorite way to enjoy them is straight from the freezer when they’re perfectly firm but still soft enough to melt in your mouth. I usually keep a batch in the freezer ready to grab when I need a quick treat or a little energy boost. They’re also fun to share with friends or pack for a sweet but healthy snack on the go!
Key Ingredients & Substitutions
Peanut Butter: Natural peanut butter is best here—choose one with no added sugar or oils. If you prefer, almond or cashew butter works well too, just keep it natural for that creamy texture.
Maple Syrup or Honey: This adds natural sweetness and helps bind the peanut butter. You can swap with agave nectar or brown rice syrup if you want a vegan option or a different flavor.
Dark Chocolate: Choose chocolate with at least 70% cocoa for less sugar and a richer taste. You can use vegan or dairy-free chocolate if you need. Semi-sweet also works but will be sweeter.
How Do You Get the Perfect Layered Look with Peanut Butter Cups?
The trick to neat peanut butter cups is layering and chilling each layer to set. Here’s how I do it:
- Spoon melted chocolate into liners, then freeze for 5-10 minutes so the base is firm.
- Add the peanut butter mixture, pressing it gently to spread evenly over the hardened chocolate.
- Drizzle chocolate on top and freeze again until completely firm—this keeps the layers intact.
Chilling between steps is key—it stops the layers from mixing. Also, melt chocolate slowly in short bursts to avoid burning it.
Equipment You’ll Need
- Mini muffin tin – I use this to shape the cups, and it makes removing them easy.
- Silicone spatula or spoon – helps mix ingredients smoothly and spread the chocolate evenly.
- Microwave-safe bowl – for melting the chocolate; quick and easy cleanup.
- Paper liners or silicone molds – to hold the cups and keep them from sticking.
- Fork or small spoon – for drizzling chocolate over the layered cups.
Flavor Variations & Add-Ins
- Use almond or cashew butter instead of peanut butter for a different nutty flavor.
- Add a handful of crushed nuts or dried fruit on top for extra texture.
- Mix a pinch of cinnamon or sea salt into the peanut butter for a flavor twist.
- Swap dark chocolate for milk chocolate for a sweeter, creamier texture.
Healthy 3-Ingredient Peanut Butter Cups
Ingredients You’ll Need:
Main Ingredients:
- 1 cup natural peanut butter (smooth or crunchy, unsweetened)
- 1/4 cup pure maple syrup or honey (natural sweetener)
- 1/2 cup dark chocolate chips or chopped dark chocolate (at least 70% cocoa)
Optional:
- Sea salt flakes for sprinkling
How Much Time Will You Need?
This recipe takes about 10 minutes to prepare, plus an hour in the freezer to get your peanut butter cups firm and ready to enjoy. It’s super quick and perfect for a tasty homemade treat!
Step-by-Step Instructions:
1. Prepare Your Cups:
Line a mini muffin tin with paper liners or silicone molds. This helps the peanut butter cups hold their shape and makes them easy to remove later.
2. Mix the Peanut Butter Filling:
In a medium bowl, stir together the natural peanut butter and maple syrup (or honey) until smooth and well combined. This will be the creamy center of your cups.
3. Melt the Chocolate:
Place the dark chocolate chips in a microwave-safe bowl. Microwave in 20 to 30 second intervals, stirring between each, until the chocolate is melted and silky smooth.
4. Create the Chocolate Base:
Drop about 1 teaspoon of melted chocolate into the bottom of each muffin liner. Use the back of the spoon to spread the chocolate evenly. Freeze the muffin tin for 5 to 10 minutes so the chocolate sets firm.
5. Add the Peanut Butter Layer:
Take the muffin tin out of the freezer and spoon about 1 tablespoon of the peanut butter mixture over each chocolate base. Press down gently with the back of the spoon to spread evenly.
6. Top With Chocolate and Finish:
Drizzle the remaining melted chocolate over the peanut butter layer for a pretty finish. If you like, sprinkle a pinch of sea salt on top to heighten the flavors.
7. Chill and Serve:
Freeze the cups for at least 1 hour until fully firm. Once set, peel off the liners and store the peanut butter cups in an airtight container in the fridge or freezer. Enjoy your healthy homemade treat chilled!
Can I Use Frozen Peanut Butter for This Recipe?
It’s best to use peanut butter at room temperature for easy mixing. If your peanut butter is chilled or a bit firm, warm it slightly in the microwave for 10-15 seconds and stir before using.
Can I Substitute the Sweetener?
Yes! Maple syrup and honey both work well, but you can also use agave nectar or brown rice syrup as vegan alternatives. Just keep the amount the same to maintain the right sweetness and texture.
How Should I Store Leftover Peanut Butter Cups?
Store leftovers in an airtight container in the refrigerator for up to 2 weeks or in the freezer for up to 2 months. When ready to eat, let them thaw briefly at room temperature for a softer texture.
Can I Make These Peanut Butter Cups Ahead of Time?
Absolutely! Prepare them ahead and keep them frozen until you’re ready to enjoy. They’re perfect for meal prep or to have on hand when a sweet craving hits.