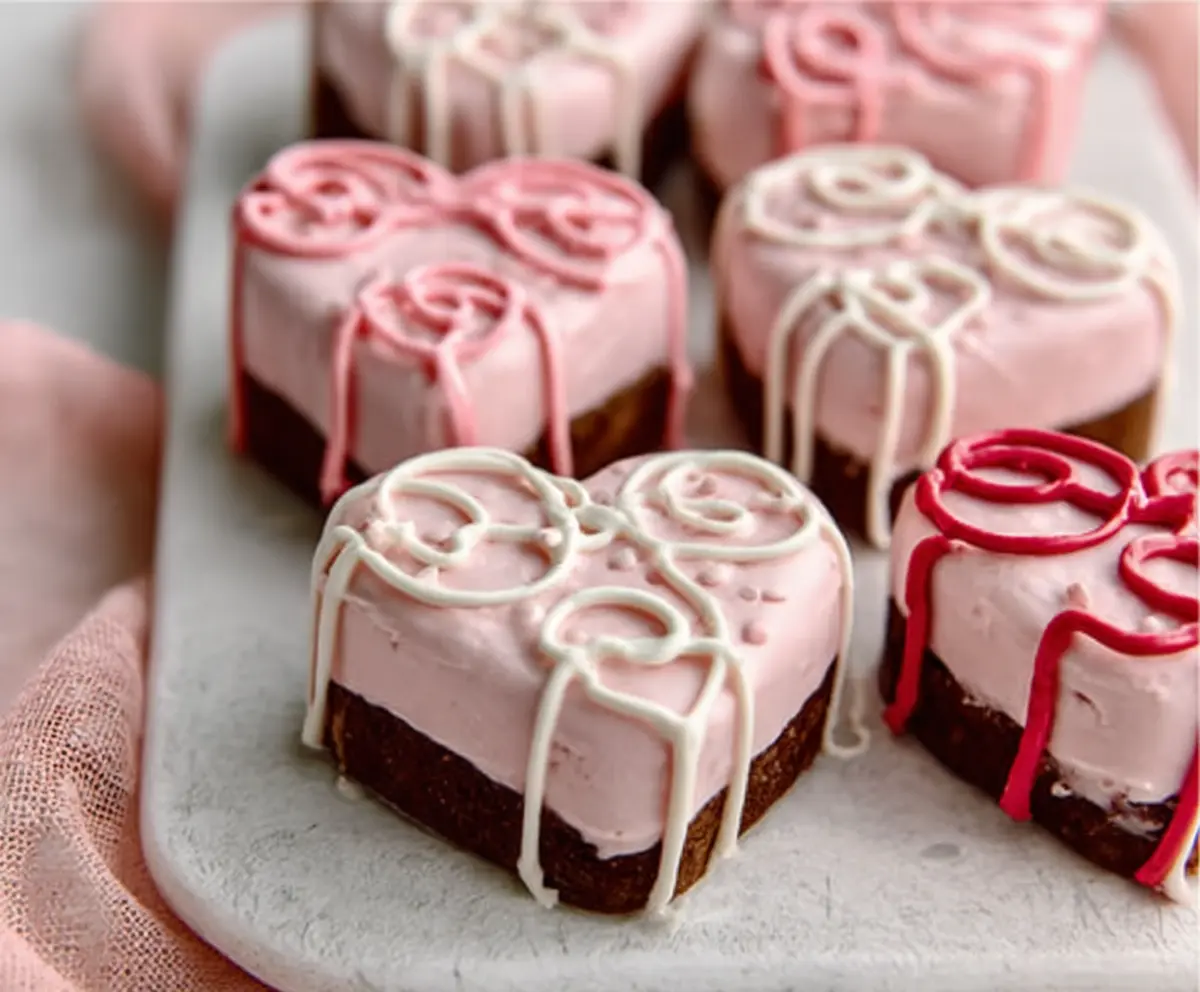
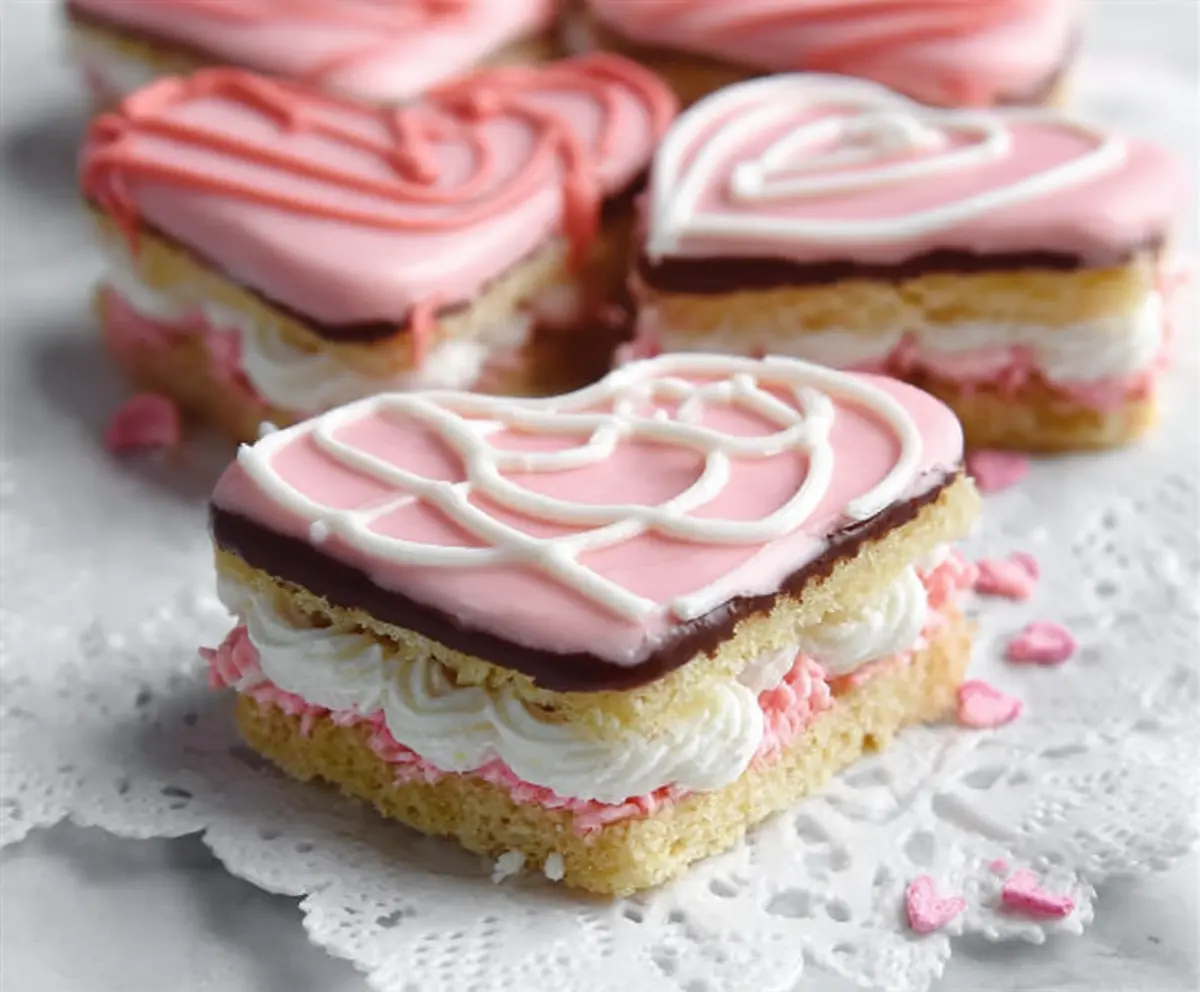
Copycat Little Debbie Valentines Cakes are those iconic treat cakes with a light, fluffy texture, layered with creamy filling, and covered in a smooth, pink frosting sprinkled with festive heart-shaped sprinkles. They bring back memories of grabbing a pack at the store and feeling like every bite was a little celebration of sweetness and Valentine’s Day cheer.
I love making these at home because it’s a fun way to share those nostalgic flavors with family and friends. I usually keep them in the fridge and pull them out as a surprise snack, which always brings smiles. Plus, you can add your own twist with different fillings or sprinkles if you want to get creative while still feeling that classic vibe.
These cakes are perfect for parties, lunchbox treats, or just because you want a bit of pink, fluffy happiness in your day. I find they taste best when you let them sit out for a few minutes after taking them out of the fridge, so the frosting softens just enough but the cake stays fresh and tender. It’s a sweet little reminder that sometimes the simplest treats can make the most fun memories.
Key Ingredients & Substitutions
Cake Base: Using cocoa powder adds that nice chocolate flavor. If you don’t have buttermilk, mix 1/2 cup milk with a teaspoon of lemon juice or vinegar and let it sit 5 mins. Butter makes the cake rich, but you can swap for a mild oil if you prefer.
Pink Cream Filling: Heavy cream whipped with powdered sugar gives a fluffy, smooth filling. The strawberry or raspberry extract is optional but adds a nice subtle fruit flavor. You can skip the food coloring or use natural beet juice if you want a healthier option.
Decorating Chocolate: Candy melts are best for bright colors and easy melting. If you don’t have any, white chocolate or colored icing pens can also work for decorating your Valentines Cakes.
How Do You Get the Cream Layer Smooth and Neat Like in the Image?
To get that smooth, even pink layer, start with chilling your whipped cream to stiff peaks—this helps it hold shape well. Use a large spoon or offset spatula to ice the cakes and gently smooth the sides and top.
- Freeze the layered cakes for 30 minutes so the cream firms up and doesn’t move when decorating.
- Handle them carefully when cutting and frosting to keep edges sharp for a clean look.
- For piping the chocolates, melt them gently to avoid burning, and use small piping bags or zip bags with a tiny corner snipped off to create delicate swirls.
Equipment You’ll Need
- 9×9-inch baking pan – I prefer it because it’s just the right size for this cake and bakes evenly.
- Mixing bowls – for mixing the cake batter and whipping the cream; I use a big one for the cream so it whips faster.
- Sifter or fine mesh sieve – makes sure your dry ingredients are lump-free for a smooth cake batter.
- Hand or electric mixer – essential for creaming butter and whipping cream to perfect peaks.
- Heart-shaped cookie cutter – adds that cute Valentine’s shape to your cakes.
- Spatula and piping bags with small tips – for smoothing the cream and piping decorative chocolates.
- Microwave-safe bowls or double boiler – for melting chocolate candies easily and smoothly.
Flavor Variations & Add-Ins
- Swap vanilla for almond or coconut extract in the cream for extra flavor. It adds a fun twist to the frosting.
- Add a layer of fruit preserves or jam between the cake and whipped cream for a fruity surprise.
- Use different colors of candy melts or chocolate for decorating, matching your Valentine’s theme or preferred colors.
- Mix mini sprinkles or heart-shaped candies into the whipped cream for extra texture and cheer.
Copycat Little Debbie Valentines Cakes
Ingredients You’ll Need:
For the Cake Base:
- 1 cup all-purpose flour
- 1/2 cup unsweetened cocoa powder
- 1/2 teaspoon baking powder
- 1/4 teaspoon baking soda
- 1/4 teaspoon salt
- 1/2 cup unsalted butter, softened
- 3/4 cup granulated sugar
- 2 large eggs
- 1 teaspoon vanilla extract
- 1/2 cup buttermilk
For the Pink Cream Filling and Frosting:
- 1 cup heavy whipping cream, chilled
- 1/4 cup powdered sugar
- 1/2 teaspoon vanilla extract
- 1/2 teaspoon strawberry or raspberry extract (optional)
- A few drops of pink food coloring
For Decorating:
- White, pink, and red colored melting chocolate or candy melts for piping decorative swirls
How Much Time Will You Need?
This recipe takes about 15 minutes to prepare the cake batter and another 25-30 minutes to bake. Cooling the cake takes about 30 minutes, plus 30 minutes chilling after frosting so the cream layer firms up. Decorating takes roughly 15-20 minutes with an additional chilling time of 15 minutes. Altogether, plan for about 2 to 2.5 hours.
Step-by-Step Instructions:
1. Prepare and Bake the Cake:
Start by preheating your oven to 350°F (175°C). Line a 9×9-inch baking pan with parchment paper, letting some hang over the sides to lift the cake out easily later. In a medium bowl, sift together the flour, cocoa powder, baking powder, baking soda, and salt. Set this aside.
In a large bowl, cream the softened butter and sugar together until light and fluffy, about 3 to 4 minutes. Beat in the eggs one at a time, mixing well after each. Stir in the vanilla extract.
Now, alternate adding the dry ingredients and buttermilk to the butter mixture—start and end with the dry ingredients—and mix gently until just combined.
Pour this batter into your prepared pan and spread it out evenly. Bake for about 25 to 30 minutes, or until a toothpick inserted in the center comes out clean. Once baked, cool the cake completely in the pan on a wire rack.
2. Make the Pink Cream Filling:
While the cake is cooling, whip the chilled heavy cream with powdered sugar, vanilla extract, and strawberry or raspberry extract if you’re using it. Beat until soft peaks form.
Add pink food coloring a drop at a time until you have your desired shade, then continue whipping until stiff peaks form. Set aside.
3. Assemble and Decorate the Cakes:
Use the parchment to lift the cooled cake from the pan. Cut the cake into heart shapes using a cookie cutter. Place these cake hearts on a lined baking sheet.
Pipe a thick layer of the pink cream filling on top of each cake heart. Smooth the sides and top gently for a neat look.
Freeze the cakes for at least 30 minutes to help the cream layer firm up—it will make decorating easier.
Meanwhile, melt the colored chocolates in separate bowls according to package directions. Pour each melted color into a piping bag fitted with a small tip (or use a plastic bag with a tiny corner snipped off).
Pipe decorative spirals and lines on top of each heart-cake in red, pink, and white, just like the picture.
Return the decorated cakes to the fridge for about 15 minutes so the chocolate sets well.
4. Serve and Enjoy:
Keep the cakes refrigerated until you’re ready to serve. For the best texture and taste, take them out 5-10 minutes before eating to let the cream soften just a little.
These sweet, creamy Valentine’s cakes are perfect for sharing or treating yourself during the season of love!
Can I Use Frozen Cake for This Recipe?
Yes! If you have leftover cake or want to prep ahead, you can freeze the baked cake before cutting and frosting. Thaw it completely in the fridge before adding the cream layer to ensure the best texture.
What Can I Substitute for Buttermilk?
If you don’t have buttermilk on hand, simply mix 1/2 cup of milk with 1 teaspoon of lemon juice or white vinegar. Let it sit for 5 minutes before using. This will give the same tang and moisture to your cake.
How Do I Store Leftover Valentines Cakes?
Store the cakes in an airtight container in the refrigerator for up to 3 days. Let them come to room temperature for a few minutes before eating for a softer, more cake-like texture.
Can I Use Different Flavors for the Cream Filling?
Absolutely! You can swap strawberry or raspberry extract for vanilla, almond, or even a hint of coconut extract to customize your frosting flavor. Just keep the whipped cream base the same for that light, fluffy texture.