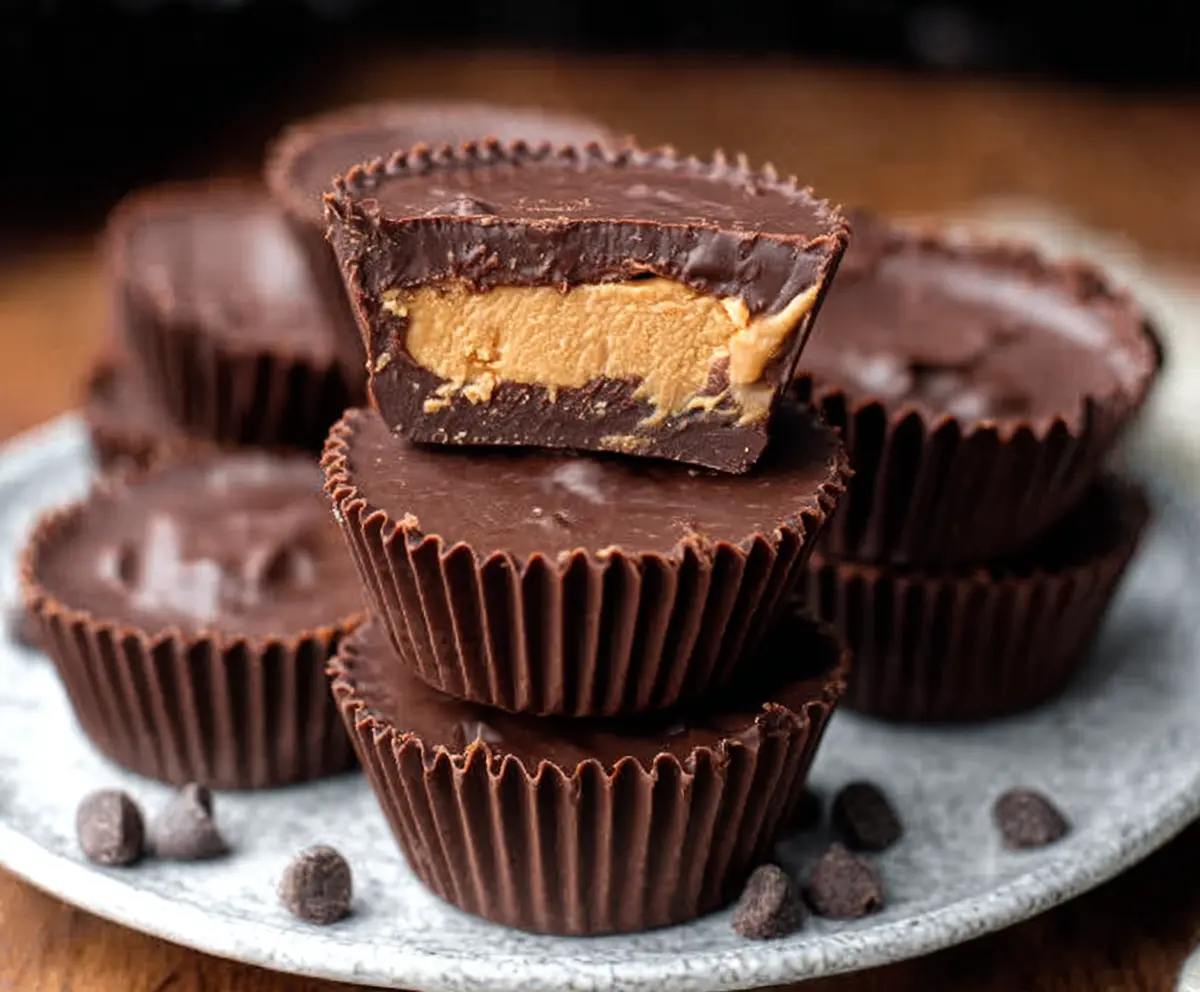
Classic Homemade Reese’s Peanut Butter Cups bring together creamy peanut butter and rich chocolate in a perfect little treat. These cups have that smooth, sweet peanut butter filling surrounded by a thick, glossy chocolate shell that you probably remember loving since you were a kid.
I love making these at home because you can control exactly how much peanut butter and chocolate you want, and it feels so satisfying to unwrap something you made yourself. Plus, they’re way better than store-bought since they don’t have any weird fillers—just the good stuff. I sometimes sprinkle a tiny pinch of sea salt on top to boost the flavor, and it’s amazing!
These are perfect as a sweet snack or a small dessert after dinner. I like to keep some in the fridge so they’re cool and firm when I eat them, but you can also have them at room temperature if you prefer softer chocolate. Sharing these with friends or family always brings smiles because they remind us of simple, happy times.
Key Ingredients & Substitutions
Peanut Butter: I recommend creamy and natural peanut butter for that smooth, fresh taste. If you prefer a fluffier texture, try whipped peanut butter or add a bit more powdered sugar for firmness.
Powdered Sugar: This sweetens and thickens the filling nicely. If you want a less sweet version, reduce the amount slightly or try a sugar substitute like erythritol powder.
Butter: Unsalted and softened butter helps bind the filling and adds richness. You can substitute with coconut oil for a dairy-free option, but the flavor will be a bit different.
Chocolate: Semi-sweet chocolate chips work best here, giving a good balance to the peanut butter’s sweetness. For a darker taste, try bittersweet or dark chocolate. Milk chocolate is also fine but sweeter.
Vegetable or Coconut Oil: Adding a bit of oil thins the chocolate, making it easier to spread and helping it harden smooth. Use coconut oil for a subtle coconut note or vegetable oil for a neutral taste.
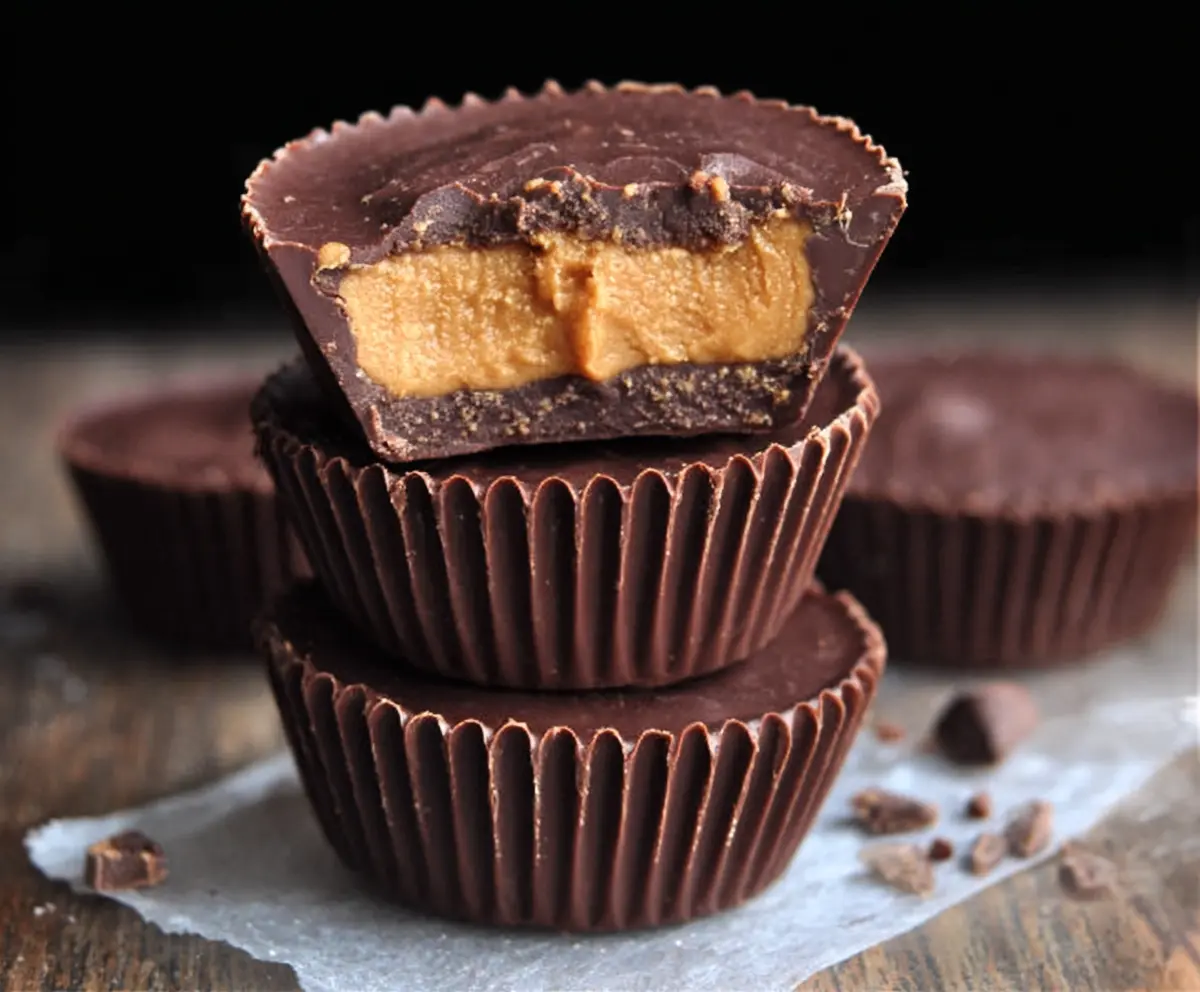
How Do You Get Smooth, Even Layers of Chocolate & Peanut Butter?
The secret is layering and chilling between each step. It keeps the chocolate firm and prevents salty gooey peanut butter from mixing with the chocolate.
- Start by spreading a thin layer of chocolate on the bottom and chill it until firm (5-10 minutes).
- Then add the peanut butter filling—press it down gently to avoid air pockets but don’t push it to the edges.
- Top with another chocolate layer carefully, spreading evenly to seal the filling inside.
- Chill for at least 30 minutes to let everything set fully before removing from the liners.
Patience here leads to neat, sturdy cups with perfect layering—worth the wait!
Equipment You’ll Need
- Standard muffin tin – I like using it because it holds the paper liners and keeps each cup neat and uniform.
- Paper cupcake liners – these make peeling off the cups easy and give a clean look.
- Microwave-safe bowl – perfect for melting the chocolate quickly and smoothly.
- Rubber spatula or spoon – helps spread the chocolate evenly in each cup.
- Measuring spoons and cups – for precise portions, ensuring uniform cups each time.
Flavor Variations & Add-Ins
- Dark or white chocolate: Swap the semi-sweet with dark or white chocolate for a different flavor profile.
- Salted peanut butter: Add a pinch of sea salt on top before chilling for a sweet-salty kick.
- Mix-ins: Stir crushed pretzels, toffee bits, or chopped nuts into the peanut butter filling for added texture.
- Peanut butter variations: Use honey or maple-flavored peanut butter for a different sweetness or add a hint of vanilla extract for extra flavor.
Classic Homemade Reese’s Peanut Butter Cups
Ingredients You’ll Need:
For the Peanut Butter Filling:
- 1 cup creamy peanut butter (smooth and natural preferred)
- 1 cup powdered sugar (sifted)
- 1/4 cup unsalted butter, softened
- Pinch of salt (optional, enhances peanut butter flavor)
For the Chocolate Shell:
- 2 cups semi-sweet chocolate chips or chopped chocolate
- 1 tablespoon vegetable oil or coconut oil (for smoother chocolate)
- Paper cupcake liners
How Much Time Will You Need?
This recipe takes about 15 minutes to prepare, plus 30 minutes for chilling and setting the peanut butter cups. Overall, you’ll spend around 45 minutes from start to finish, making these delicious treats quick and easy!
Step-by-Step Instructions:
1. Make the Peanut Butter Filling:
In a medium bowl, mix the creamy peanut butter, powdered sugar, softened butter, and a pinch of salt until smooth and thick but spreadable. This filling is the sweet center that makes these cups special.
2. Prepare Your Muffin Tin:
Place paper cupcake liners into a muffin tin to help the peanut butter cups hold their shape while setting.
3. Melt the Chocolate:
Put the chocolate chips and vegetable oil in a microwave-safe bowl. Heat in 30-second bursts, stirring well in between, until completely melted and smooth.
4. Add the First Chocolate Layer:
Drop about 1 tablespoon of melted chocolate into each cupcake liner. Spread it evenly over the bottom using the back of a spoon. Chill in the refrigerator for 5-10 minutes to harden.
5. Add the Peanut Butter Filling:
Once the chocolate is firm, spoon about 1 tablespoon of the peanut butter mixture on top of each chocolate layer. Gently press down to flatten slightly but avoid spreading to the edges.
6. Cover with More Chocolate:
Pour another tablespoon of melted chocolate over the peanut butter filling, making sure it covers the filling completely. Smooth the tops with a spoon.
7. Chill Completely:
Place the muffin tin back in the refrigerator for at least 30 minutes or until the chocolate is fully set and firm.
8. Enjoy and Store:
Carefully remove the peanut butter cups from the liners. Store in an airtight container in the fridge for up to two weeks. You can enjoy them chilled or at room temperature, whichever you prefer!
Can I Use Natural Peanut Butter for This Recipe?
Yes, natural peanut butter works great, but it may make the filling a bit softer since it contains more oil. You might need to add a little extra powdered sugar to help the filling firm up.
Can I Make These Peanut Butter Cups Ahead of Time?
Absolutely! You can prepare them and store them in the refrigerator for up to two weeks. Just keep them in an airtight container to maintain freshness.
Can I Substitute the Chocolate?
Yes, feel free to use milk chocolate or dark chocolate instead of semi-sweet, depending on your taste preferences. Just adjust the sweetness in the filling if needed.
How Should I Store Leftover Peanut Butter Cups?
Store leftover cups in an airtight container in the refrigerator to keep the chocolate firm. They also taste great at room temperature if you prefer a softer texture.