Chocolate Brownie Protein Balls are a simple and delicious treat that combines rich chocolate flavor with a boost of protein. These little bites are packed with chewy texture, cocoa goodness, and a touch of sweetness that makes them perfect for a quick snack or a healthy dessert.
I love making these protein balls when I need something sweet but also want to keep things on the healthier side. They come together quickly, require no baking, and I always keep a batch in the fridge for those moments when I want a little chocolate fix without feeling guilty. Plus, they’re great for sharing with friends or packing in lunchboxes.
My favorite way to enjoy these is chilled right out of the fridge—they’re firm, satisfying, and just soft enough to bite into easily. If you’re looking for a quick energy boost before a workout or a simple treat to enjoy anytime, these Chocolate Brownie Protein Balls hit the spot every time!
Key Ingredients & Substitutions
Medjool Dates: They add natural sweetness and help bind the balls. If you can’t find Medjool dates, regular dried dates or even dried figs can work well. Just soak them a bit if they feel too dry.
Almonds or Walnuts: These nuts give good texture and healthy fats. You can swap with cashews or pecans if you prefer a milder or different flavor. For nut-free, try pumpkin seeds or sunflower seeds.
Cocoa Powder: Unsweetened cocoa is key to the rich chocolate flavor. Dutch-processed cocoa will offer a smoother taste, but natural cocoa powder works just fine. Avoid sweetened versions to keep control on sugar.
Chocolate Protein Powder: This boosts the protein content and adds chocolate flavor. If you don’t have chocolate protein powder, vanilla or plain protein powder can work, just add a bit more cocoa powder for the chocolatey taste.
Mini Dark Chocolate Chips: These add extra chocolate bites and make the balls look great. You can use regular chocolate chips, chopped chocolate, or even white chocolate if you want to mix it up.
How Do I Get the Right Texture for Protein Balls?
The texture is important: you want the mixture sticky enough to roll but not too wet. Here’s how to nail it:
- Start by pulsing dates and nuts until finely chopped and sticky. This forms the base.
- Add dry ingredients, then pulse. If it feels crumbly, add 1 teaspoon of water at a time. The dough should clump together when pressed.
- Don’t add too much water or the balls will be soggy and hard to roll.
- Once mixed, chill the dough for 10 minutes if it’s too soft. This helps with rolling.
- Rolling between palms keeps the balls smooth. If it sticks too much, lightly wet your hands or dust with a little cocoa powder.
Following these tips will give you protein balls that hold together well but remain soft and chewy, just like a brownie bite!
Equipment You’ll Need
- Food processor – I love it because it quickly purees dates and nuts into a sticky mixture.
- Mixing bowl – perfect for folding in the chocolate chips and chilling the dough.
- Measuring cups and spoons – keep everything accurate and easy to follow.
- Rubber spatula – helps scrape the mixture out of the food processor and mix thoroughly.
- Baking sheet or plate – to arrange the rolled balls before chilling.
- Tray or container for storage – keeps the balls fresh in the fridge.
Flavor Variations & Add-Ins
- Swap dark chocolate chips for white or milk chocolate chips for a different sweetness profile.
- Add a spoonful of peanut butter or almond butter for extra creaminess and a nutty flavor.
- Mix in shredded coconut or chopped dried fruit for added texture and natural sweetness.
- Use flavored protein powders like vanilla or caramel for a different twist on the flavor.
Chocolate Brownie Protein Balls Recipe
Ingredients You’ll Need:
- 1 cup pitted Medjool dates (about 8-10 dates)
- 1/2 cup raw almonds or walnuts
- 1/4 cup unsweetened cocoa powder, plus extra for rolling
- 1/4 cup chocolate protein powder (chocolate flavor preferred)
- 1/4 teaspoon salt
- 1 teaspoon vanilla extract
- 2 tablespoons water (if needed)
- 1/3 cup mini dark chocolate chips or finely chopped dark chocolate
How Much Time Will You Need?
This recipe takes about 10 minutes of prep time and at least 30 minutes of chilling to help the protein balls firm up. So, plan for about 40 minutes from start to finish.
Step-by-Step Instructions:
1. Blend Dates and Nuts
Put the pitted dates and raw almonds or walnuts into a food processor. Pulse them until they are finely chopped and start to stick together. This will create the base for your protein balls.
2. Add Cocoa, Protein Powder and Flavorings
Add the unsweetened cocoa powder, chocolate protein powder, salt, and vanilla extract into the food processor with the dates and nuts. Pulse again until everything combines into a sticky dough. If the mixture feels too dry or crumbly, add water a little at a time until it holds together nicely.
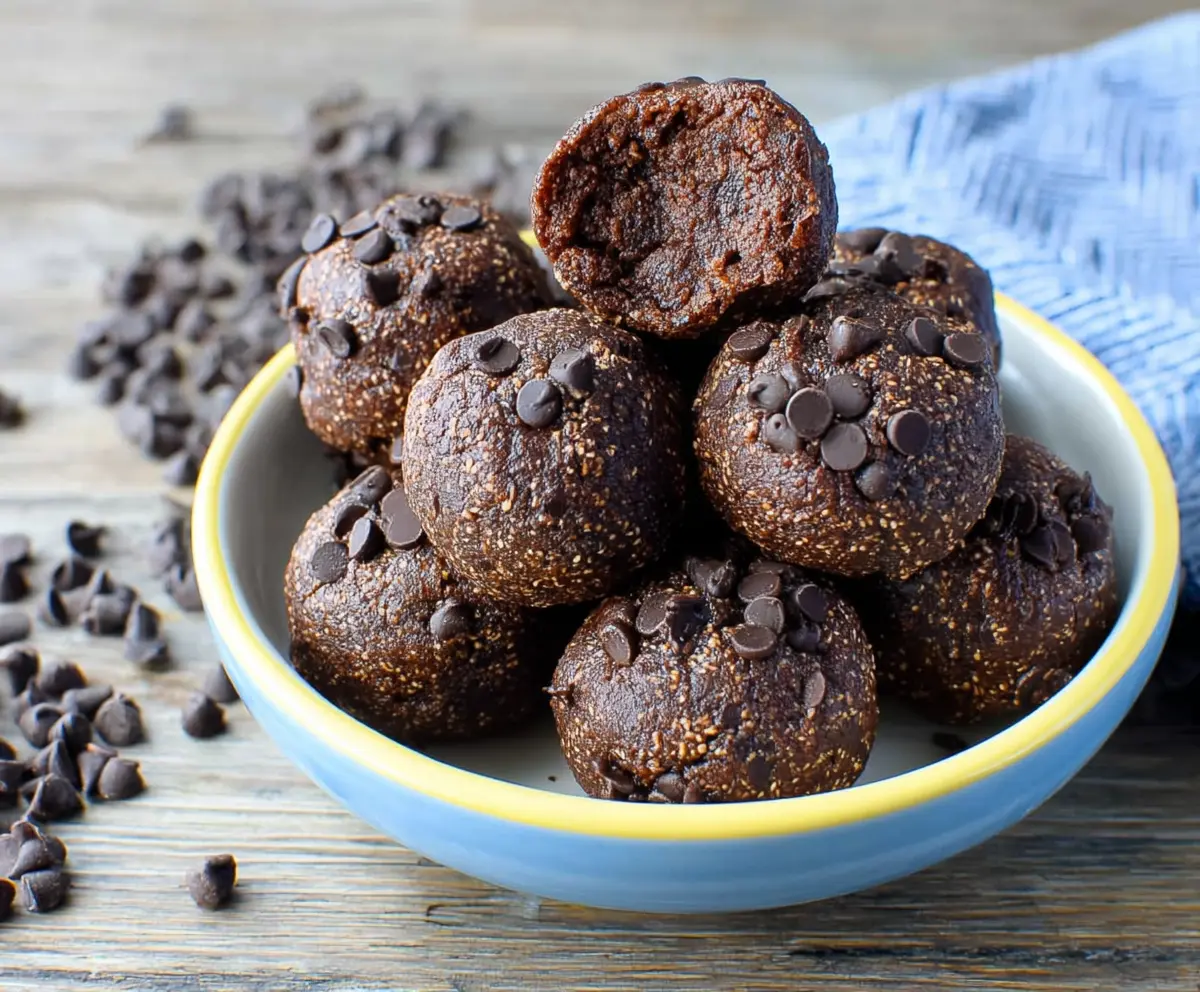
3. Mix in Chocolate Chips
Transfer the sticky dough into a mixing bowl. Gently fold in most of the mini dark chocolate chips, keeping a few aside for rolling the balls later.
4. Form the Balls
Take about a tablespoon of the mixture and roll it between your palms to make a smooth ball. Repeat until all the mixture is used.
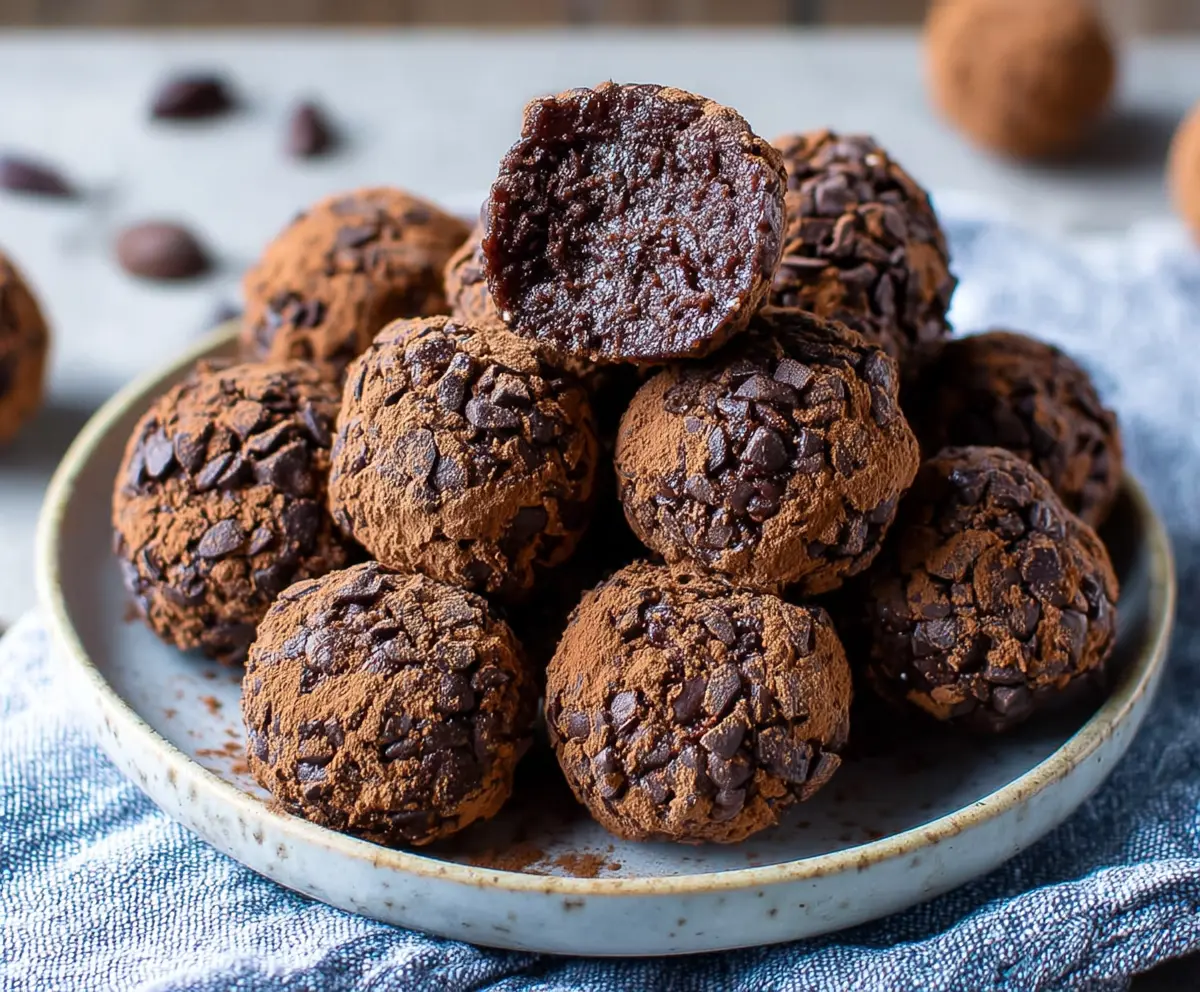
5. Coat the Protein Balls
Pour some extra unsweetened cocoa powder into a shallow dish. Roll each ball in the cocoa powder, then gently press them into the leftover mini chocolate chips to coat the outside evenly. This adds a nice chocolatey finish.
6. Chill and Serve
Place the protein balls on a plate or tray and refrigerate for at least 30 minutes. This helps them firm up and makes them perfect for snacking.
7. Store for Later
Keep any leftover protein balls in an airtight container in the refrigerator. They stay fresh for up to one week and make a quick, tasty treat whenever you want.
Enjoy these rich, fudgy, chocolate-packed protein balls as a healthy snack anytime!
Can I Use Frozen Dates for This Recipe?
Yes, you can use frozen dates, but be sure to thaw them completely before blending. Softening them in warm water for 10 minutes helps achieve the right sticky texture.
Can I Substitute the Nuts?
Absolutely! Feel free to swap almonds or walnuts with cashews, pecans, or even seeds like pumpkin or sunflower to make it nut-free. Just keep the quantity the same for best results.
How Should I Store Leftover Protein Balls?
Store them in an airtight container in the fridge for up to one week. For longer storage, you can freeze them for up to 2 months—just thaw in the fridge before eating.
Can I Make These Ahead of Time?
Definitely! Prepare the balls a day or two in advance and keep them chilled. The flavors actually deepen overnight, making them even better the next day.